- This topic has 9 replies, 5 voices, and was last updated 4 years, 6 months ago by
 Jemima Fawr.
-
AuthorPosts
-
15/09/2019 at 16:59 #122326
 Jemima FawrParticipant
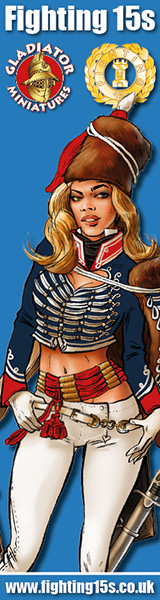
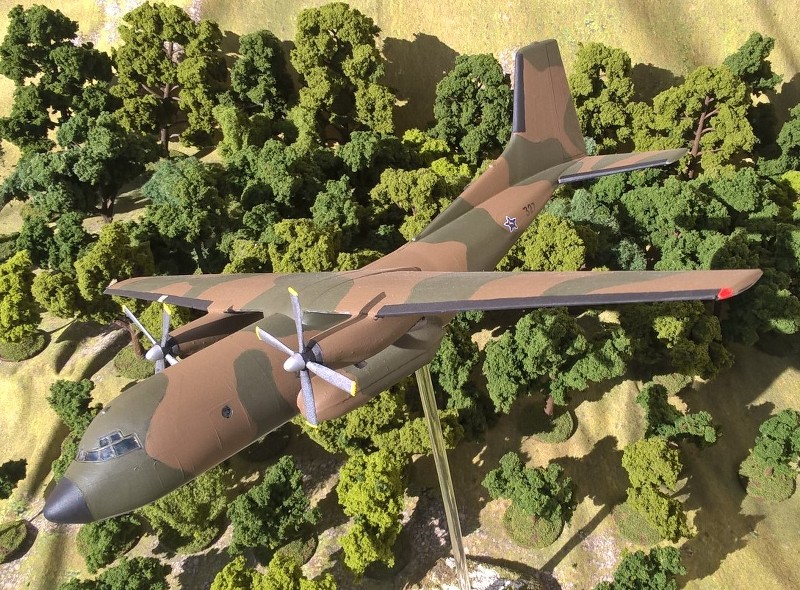
I’ve been painting some aeroplanes for the Angolan Border War, as well as photographing some of my old stuff:

My wargames blog: http://www.jemimafawr.co.uk/
15/09/2019 at 20:30 #122348 kyoteblueParticipant
Those look great!!!
15/09/2019 at 22:44 #122363 Jim JackamanParticipant
Excellent work and quite a fly by. Makes me want to dust off my old AK47 air assets for a game or two…haven’t played in ages.
15/09/2019 at 23:13 #122367Jemima FawrParticipantCheers chaps! Yes, that was my thought as well (albeit with different rules). I built up a large collection about 12 years ago and did a colossal Angola game at Bovington in 2008 and it sorta killed the period for me for ten years.
My wargames blog: http://www.jemimafawr.co.uk/
16/09/2019 at 08:09 #122392Deleted User
MemberI’m really impressed by the conversions. I knew the F1 has some conversion but was surprised at the extent. I didn’t eben know they made 1/100 Pumas.
16/09/2019 at 11:51 #122417Jemima FawrParticipantYes, he’s a talented bloke! 🙂 I live in eternal hope that a gigantic cache of Roskpopf models might be found and come on to the market… 🙁
My wargames blog: http://www.jemimafawr.co.uk/
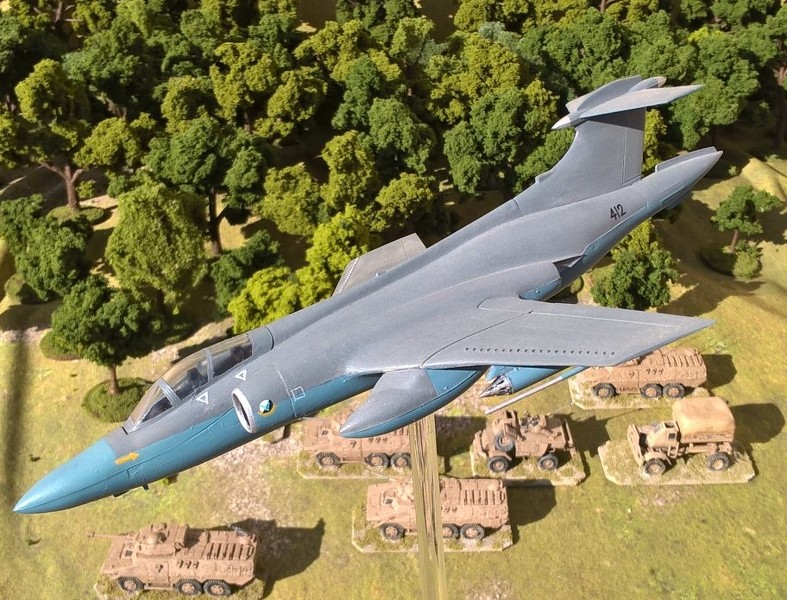
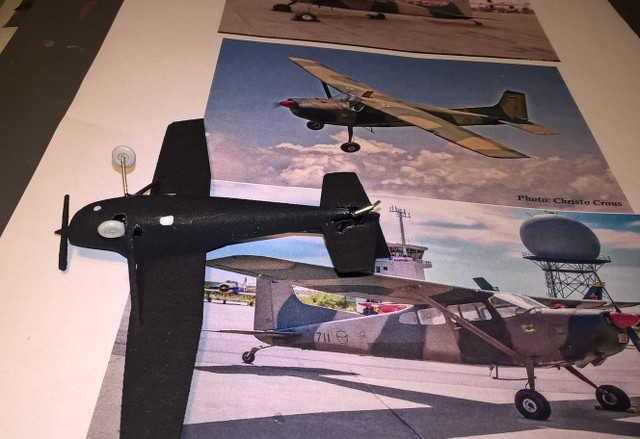
14/10/2019 at 13:29 #124417Jemima FawrParticipantLast night I started turning a Cessna 172 into a Cessna 185A Air Observation Post:
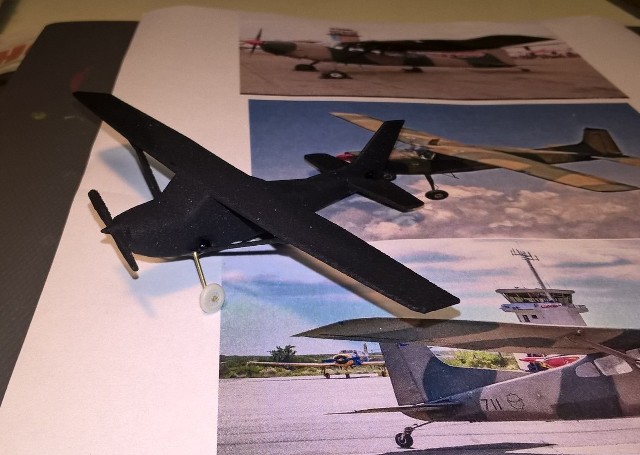
Here’s how it looks when it arrives from Shapeways – it’s a single-piece 3D-printed model. I need to turn it from a tricycle-undercarriage configuration into a tail-dragger:

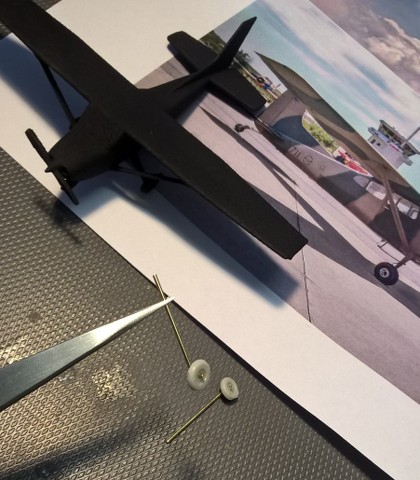
First job: Cut some bits of brass wire to make the landing-gear struts and steal some spare wheels from another kit:

Then bend the ends of the wire at a 45-degree angle and superglue on the wheels:
Snip off the existing undercarriage, sand smooth and then drill holes for the new undercarriage just forward of the wing-strut roots. Also drill a hole under the tail for the tail-wheel:
Cut the brass wire struts to length and superglue ’em in the ‘oles. Also add a small piece of bent brass wire to form the tail-wheel strut:
Job jobbed!

Now to paint it!
My wargames blog: http://www.jemimafawr.co.uk/
14/10/2019 at 16:25 #124433 zippyfusenetParticipant
I love wargamer conversions! Great work.
You'll shoot your eye out, kid!
14/10/2019 at 16:27 #124435Jemima FawrParticipantTa! Oh bugger, it re-sized the photos to thumbnails… I’ll edit to make them bigger.
My wargames blog: http://www.jemimafawr.co.uk/
14/10/2019 at 16:30 #124437Jemima FawrParticipantEdited. That’s better! 🙂
My wargames blog: http://www.jemimafawr.co.uk/
-
AuthorPosts
- You must be logged in to reply to this topic.