Home › Forums › Terrain and Scenery › 1/72 Normandy chapel and barn – Completed
- This topic has 25 replies, 9 voices, and was last updated 6 years, 4 months ago by
 6mmwargaming.
-
AuthorPosts
-
26/10/2017 at 11:22 #74833
 6mmwargamingParticipant
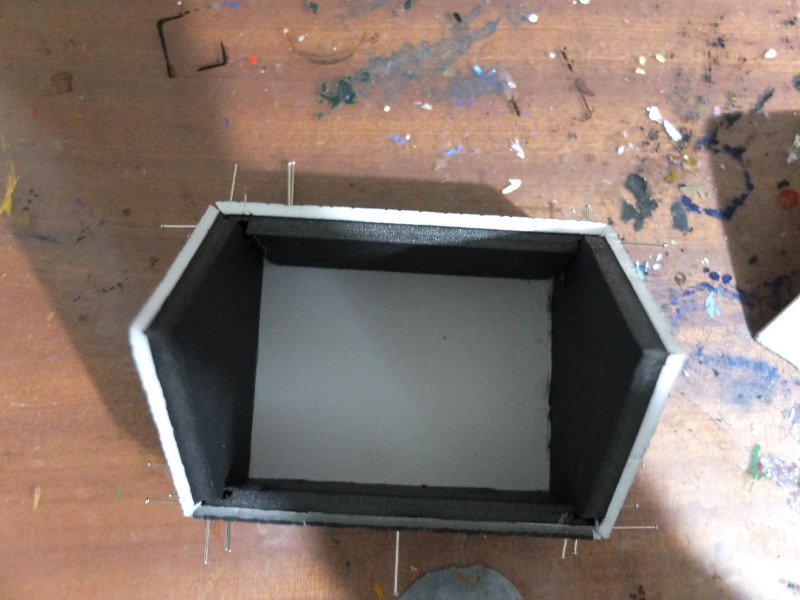
I’ve started making a couple of 20mm scale buildings for Chain of Command. I wanted buildings with a smaller footprint than my 1/72 italeri buildings which have a big footprint on the table.
The first building is a chapel and my inspriation was the Chapel of St Ceneri. I’m not sure if its actually in Normandy but its a nice simple design 😀

So I started with some 5mm foamboard and model railway textured stonework sheet. I cut the baseic shape out and laminated them together. The widows are from a set of model railway buildings and although they dont look quite like chapel windows the overall shape is good. The resindoor is from Gamecraft.
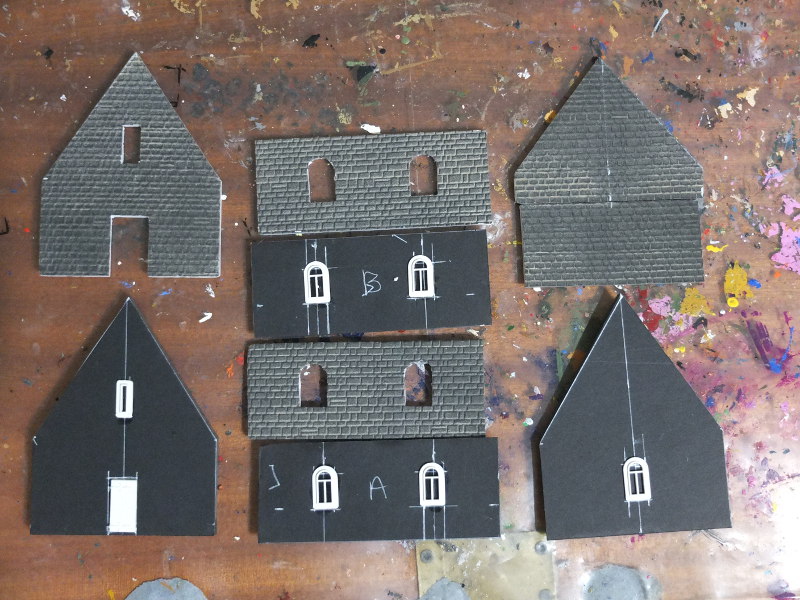
Next I cut thin beveled strips out of a foam (similar to blue foam but from a modelshop) to go around the windows and door frames. it pretty hard to see that in the picture.
Then I assembled it and added a roof and floor from 3mm card. I cut pieces out of the ends of the walls to make it stronger and also for the floor to make it stronger.
Onto the barn
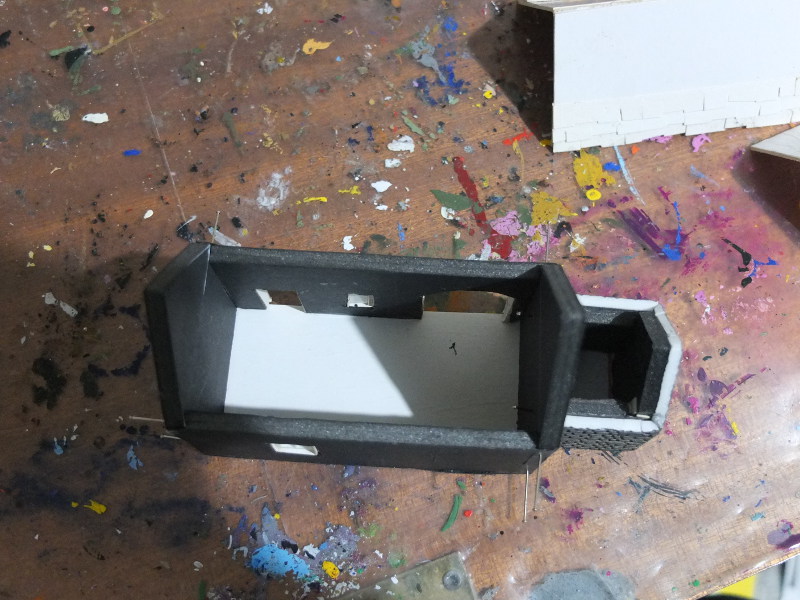
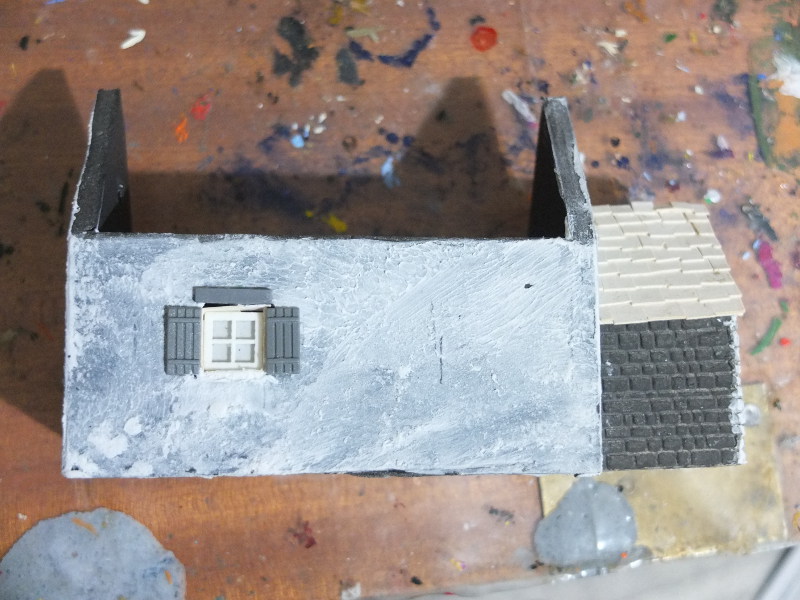
The idea was to have a smaller barn with a stone extension, and make the barn look a bit run down. With the barn I followed a similar construction technique, but I plan to texture the walls on the main piece. I cut the windows and doors out and used thin card to edge the frames. The doors are from Gamecraft.
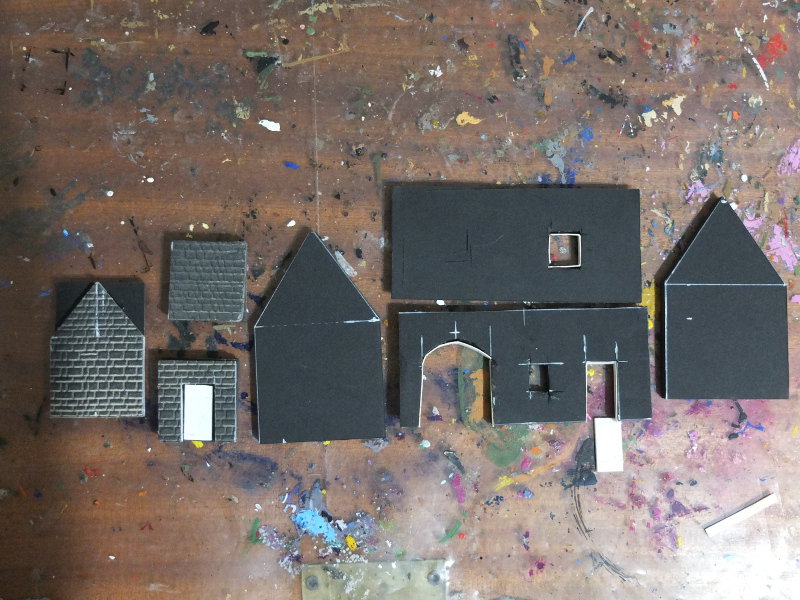
The barn door was made from balsa wood and card. I stuck to card foamboard and balsa for the buildings as it all glues together well with PVA.
Also with this building I made a floor from card and the roof. And I have started on the roof which is made from thin card cut into strips.
More soon.
My 6mm Wargaming site https://6mm.wargaming.info
26/10/2017 at 11:25 #74836 MikeKeymaster
True to form sir, true to form!
What scale / brand is the stone sheet?
 26/10/2017 at 19:50 #74879
 Darkest Star GamesParticipant
That is a fantastic start! Both buildings are looking really good.
"I saw this in a cartoon once, but I'm pretty sure I can do it..."
26/10/2017 at 19:55 #748806mmwargamingParticipantThanks guys. I’ve made more progress, I just need to sort out the photos.
My 6mm Wargaming site https://6mm.wargaming.info
27/10/2017 at 22:23 #750186mmwargamingParticipantNo idea about the stone sheet sorry, I got it in a model railway shop and it was one of the Gemran brands.
A small confession, I started these a couple of weeks ago so I am catching up on the progress.
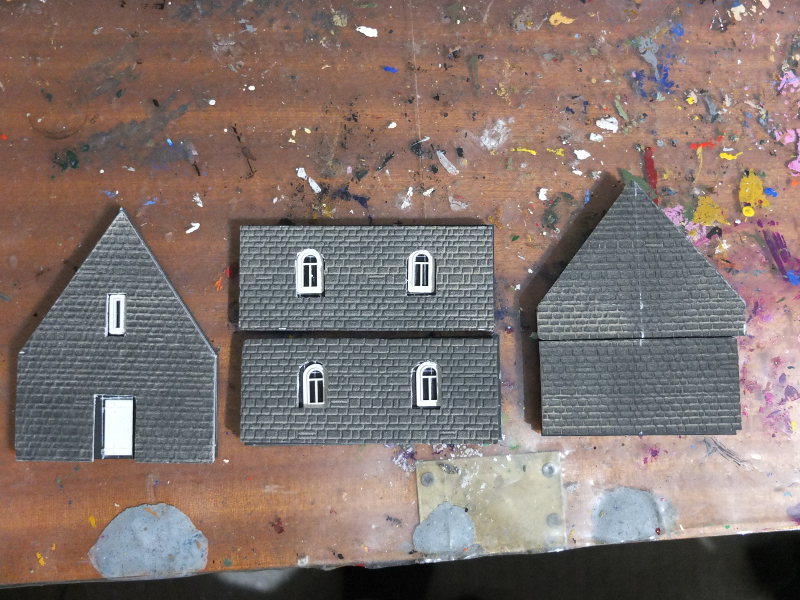
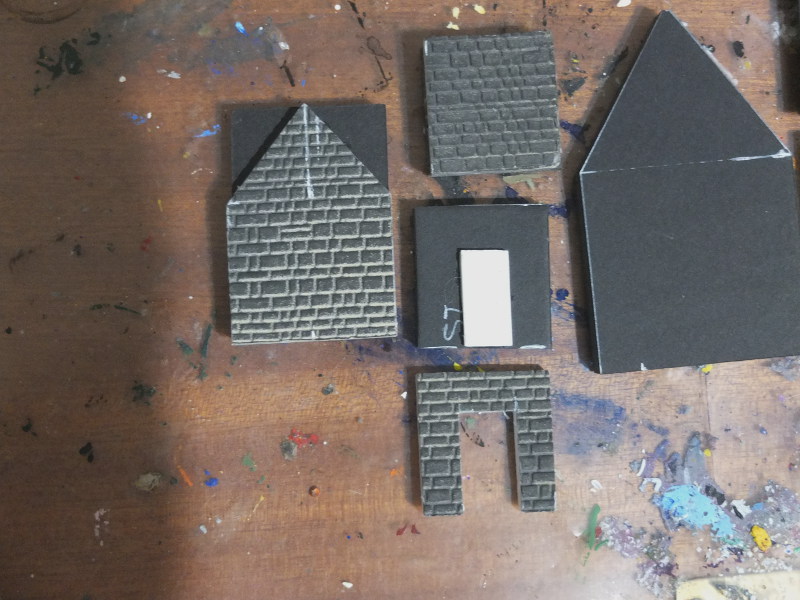
Chapel
I added some buttresses(?) to the chapel as I noticed them in the photos and it breaks up the walls. These were carved from blue foam using a pen and knife. Later on I reduced the size of these as they looked too large.
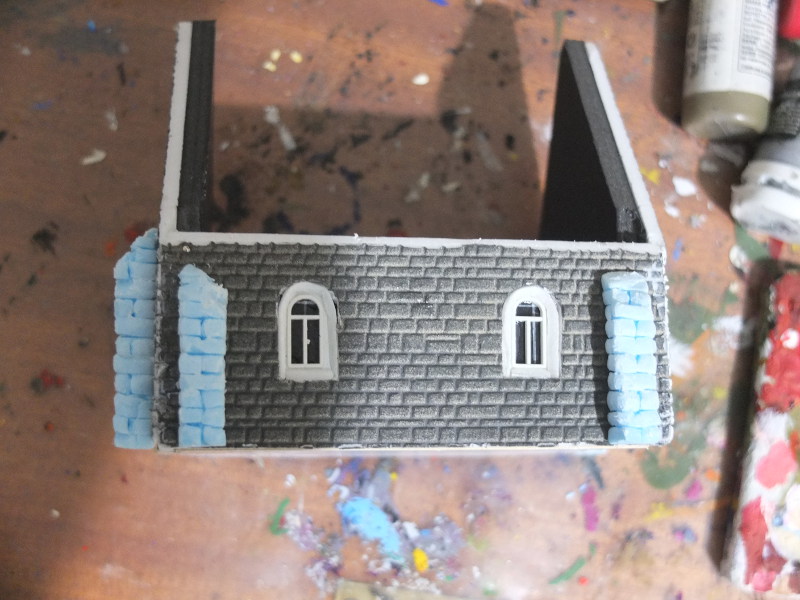
Also after many nights gluing cardboard on I finished the roof. The tiles were made from a mix of strips and individual tiles (with a few to glue down again!)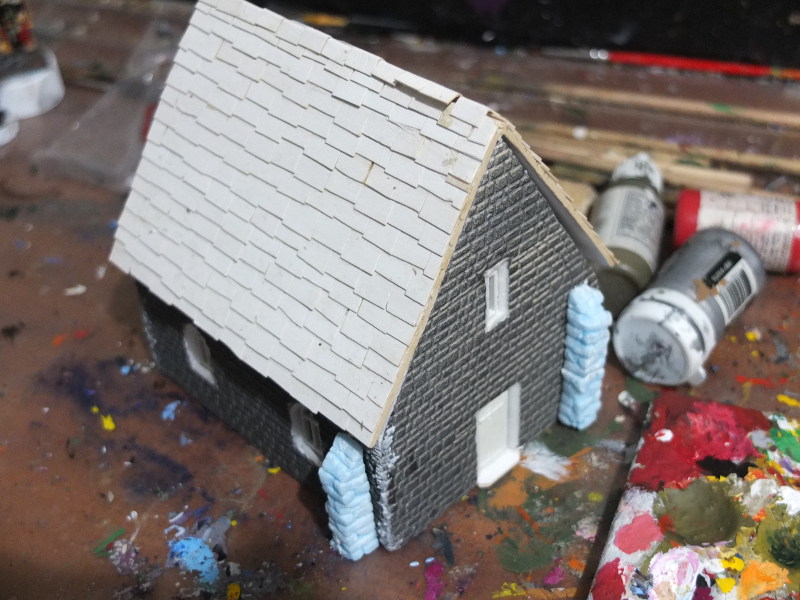
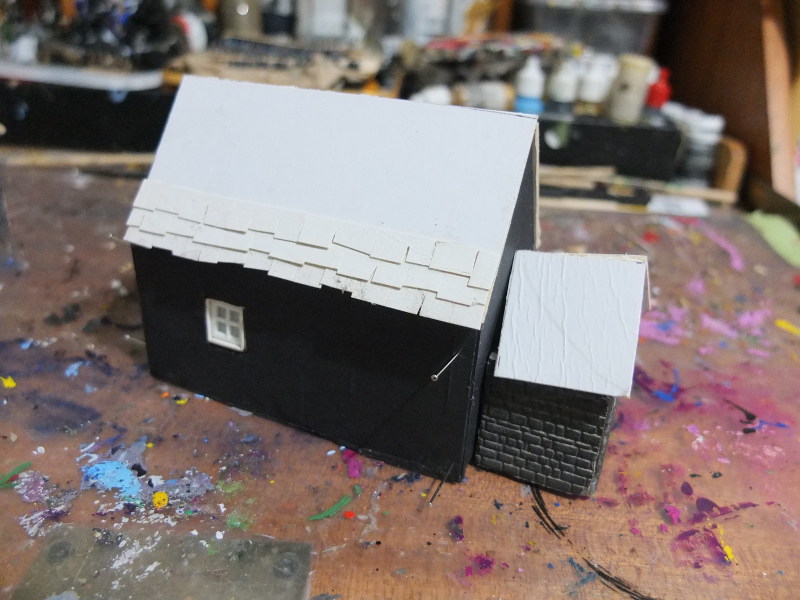
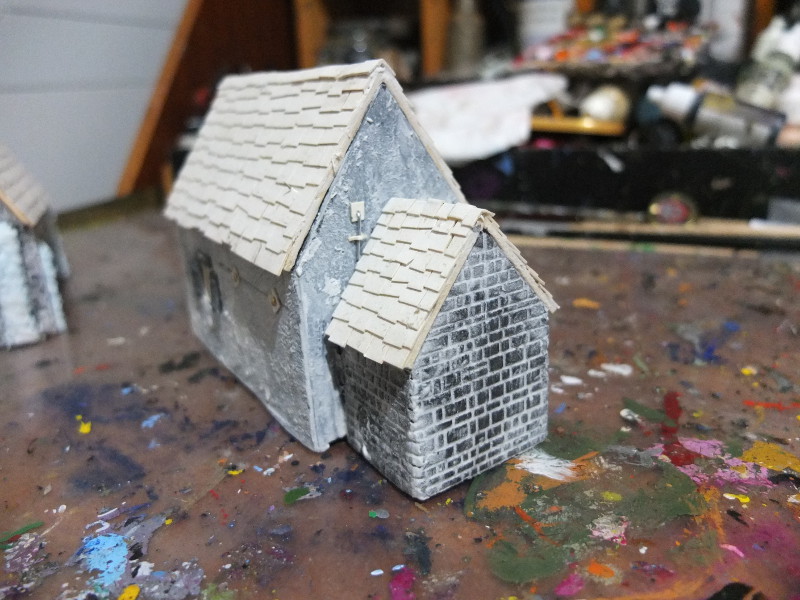
More progress on the Barn. I textured the walls using acrylic caulk (sealant) and I added some details. I cut some card strips up in 5mm wide strips and folded and glued them to make the window frames and added windows from Gamecraft. The shutters and bits above the windows are spares from Italeri’s 1/72 Mediterranean style buildings. And some details on and around the barn doors.
Also I finished the roof but it looks a little too fantasy IMHO
More soon
CheersMy 6mm Wargaming site https://6mm.wargaming.info
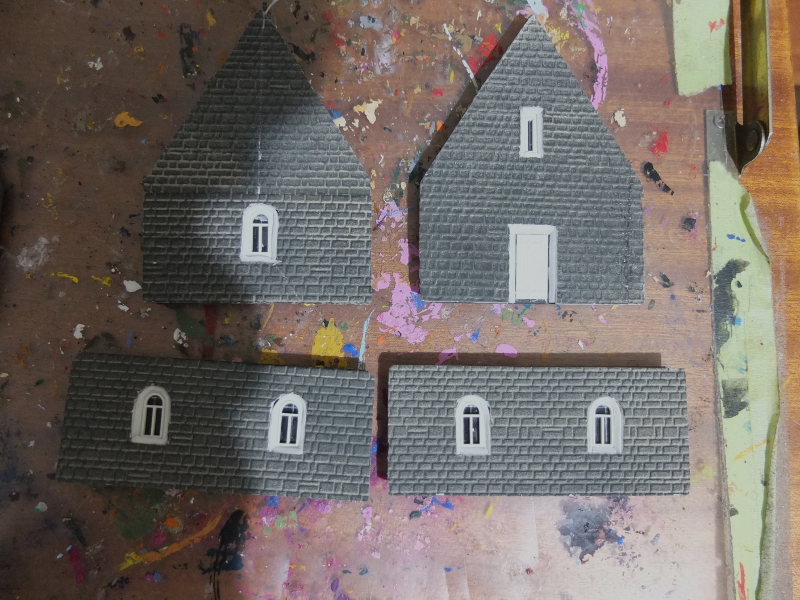
02/11/2017 at 06:56 #754246mmwargamingParticipantI’m onto the final details for these now. I could have started painting the buildings, but I wanted to add something more to them and I was inspired by the amazing modelling work of this guy http://www.militarymodelling.com/news/article/make-it-real-part-1/4083
Chapel
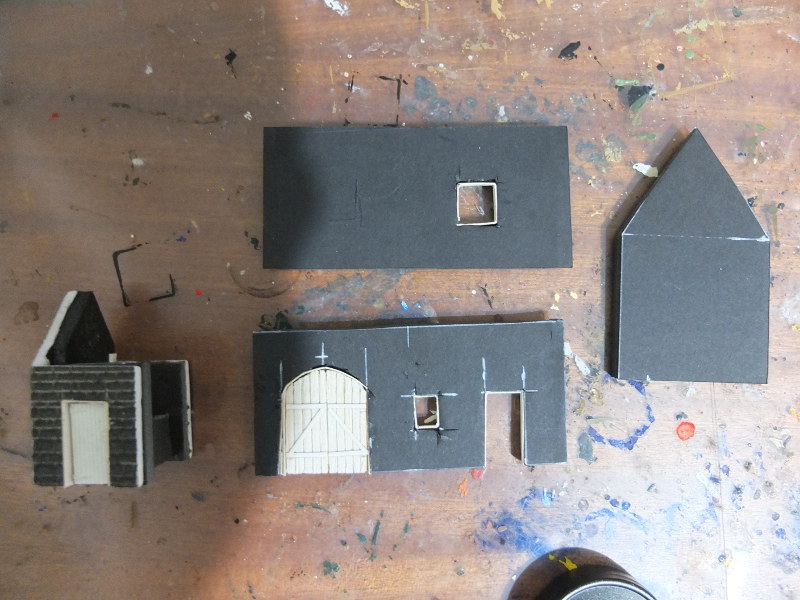
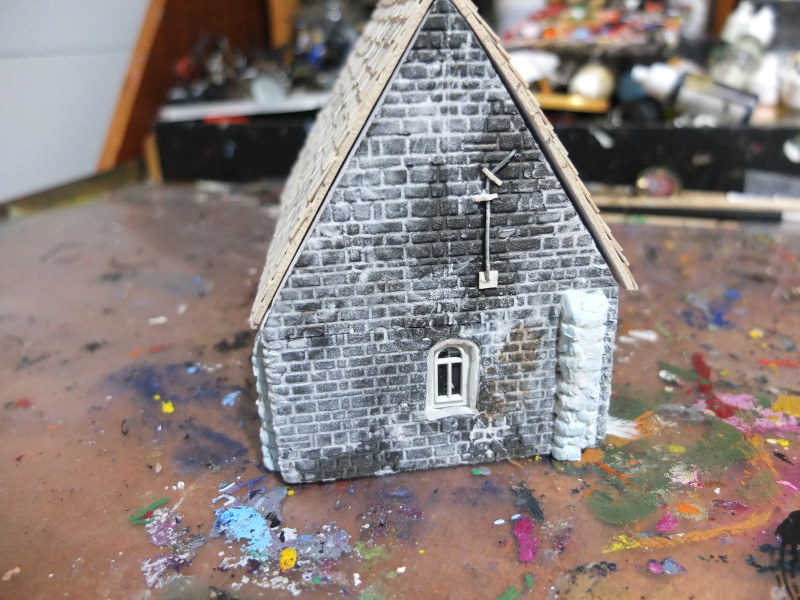
First I pushed a stone into the stone work to rough it up and create some unevenness to it. Then I added some random pieces of wire and card to the building, which I saw a lot of in the link above. I reduced the sizes of the stones supports and they look much better now. Also I’ve seen pictures of stone buildings which have metal plate and bolts which is maybe some sort of bracing. Finally I gave the building a thin watered down wash of polyfilla mixed with caulk over the stone work and wiped off any excess. it also help fill the gaps.

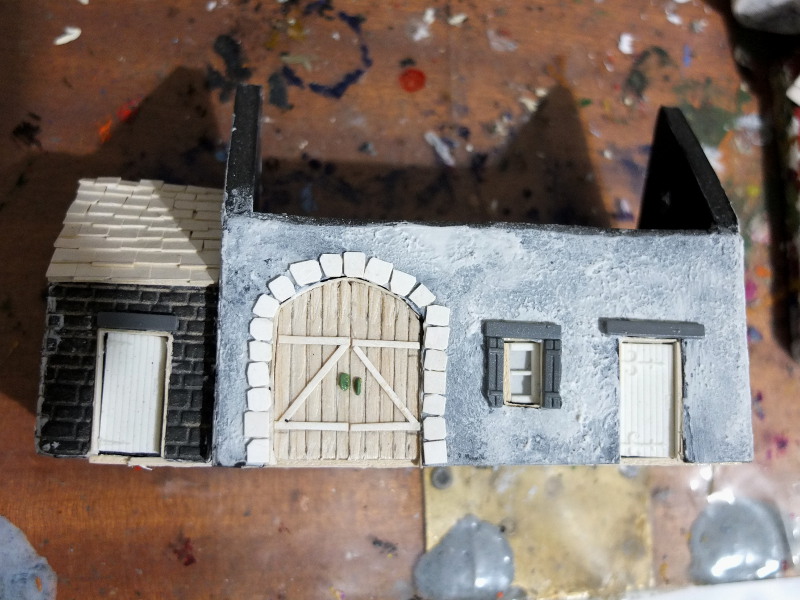
Barn
I followed a similar process to the chapel and glued some random pieces onto the building. Included was a sign from an Italeri set and a ladder I think from a Hasegawa watchtower. The metal plates were card and I used some cut off brass pins for the bolts (which I forgot on the chapel). And a couple of pieces if plasticard I add above the main barn doors.

Next up, basing and painting
My 6mm Wargaming site https://6mm.wargaming.info
02/11/2017 at 12:37 #75445 willzParticipant
An excellent model, thanks for sharing.
02/11/2017 at 13:34 #75451 NoelParticipant
That’s inspiring.
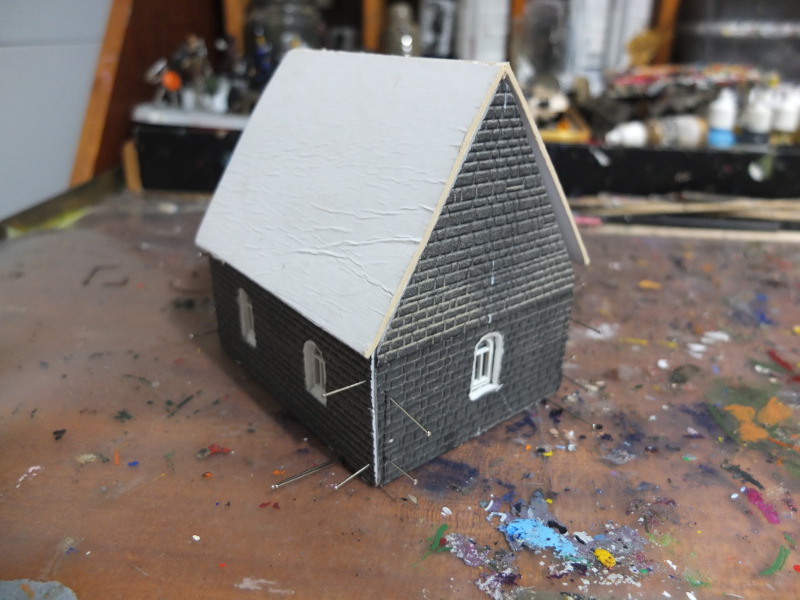
13/11/2017 at 07:06 #761126mmwargamingParticipantLots of progress in this update as i forgot to take photos during the painting stages!
For the brick walls I wanted to try a new and hopefully more realistic technique. I painted the buildings with a slate colour and then once that was dry I went over the wall with a white paint. While the white paint was still wet, I wiped it off the highlights with a tissue,leaving the white in the cracks (to look like mortar). Some pieces I had to go over a couple of times and on some places the tissue removed some of the slate base colour. This actually helped with the effect, giving the bricks some shading and variation.
Next I washed parts of the wall with brown and green washes and then followed up with some green and brown weathering powders. Rust powders were used on the metal parts on the buildings.
Originally I wasn’t going to base the buildings but I decided to go with a simple and small basing scheme. For the church I kept it basic with a small base and a ruined piece of wall. Later on I will add some gates and a couple of gravestones. For the barn I added a wall made from foamboard, cardboard and a some Busch gate posts. Parts of the Barn base is blended into the building at the back so that the base is not to intrusive.
Thanks for looking
My 6mm Wargaming site https://6mm.wargaming.info
13/11/2017 at 08:09 #76114 Guy FarrishParticipant
Thanks for posting!
They turned out beautifully – lovely bit of work.
13/11/2017 at 09:20 #761196mmwargamingParticipantThanks
Still not quite finished but close!
My 6mm Wargaming site https://6mm.wargaming.info
13/11/2017 at 10:33 #76123MikeKeymasterVery cool, just went and had a reminisce over the 6mm Greek build.
So nice.
14/11/2017 at 06:08 #761816mmwargamingParticipantVery cool, just went and had a reminisce over the 6mm Greek build.
So nice.yeah some of my best work. Back to 6mm soon….
My 6mm Wargaming site https://6mm.wargaming.info
14/11/2017 at 18:38 #76239 Autodidact-O-SaurusParticipant
These look really great! Thanks for sharing your techniques.
Self taught, persistently behind the times, never up to date. AKA ~ jeff
More verbosity: http://petiteguerre.blogspot.com/25/11/2017 at 21:55 #769716mmwargamingParticipantThanks
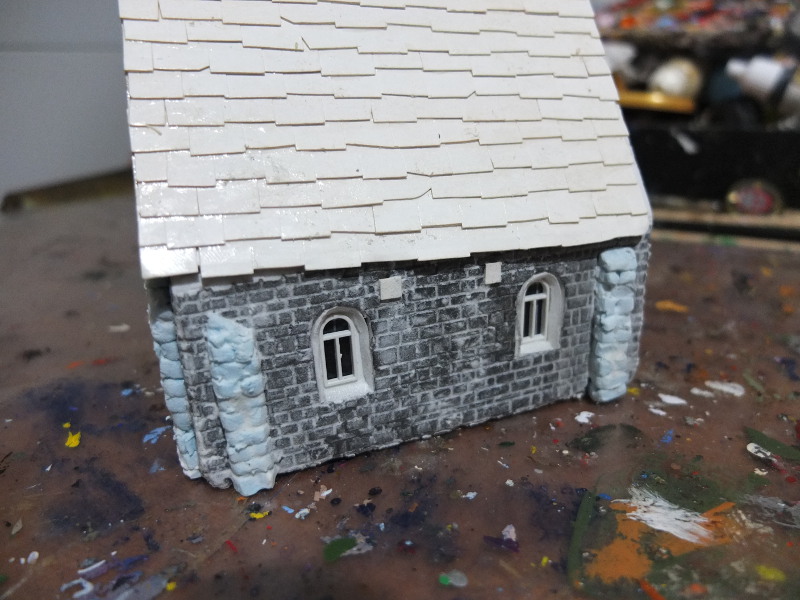
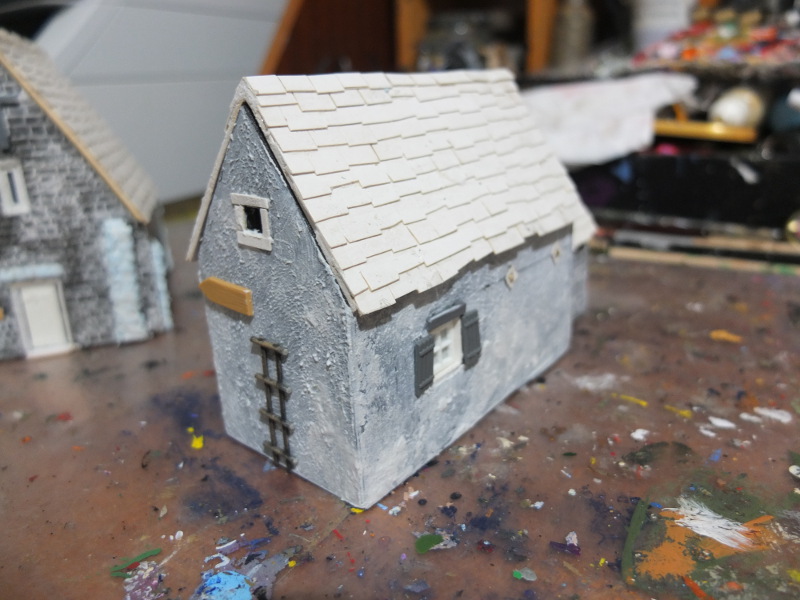
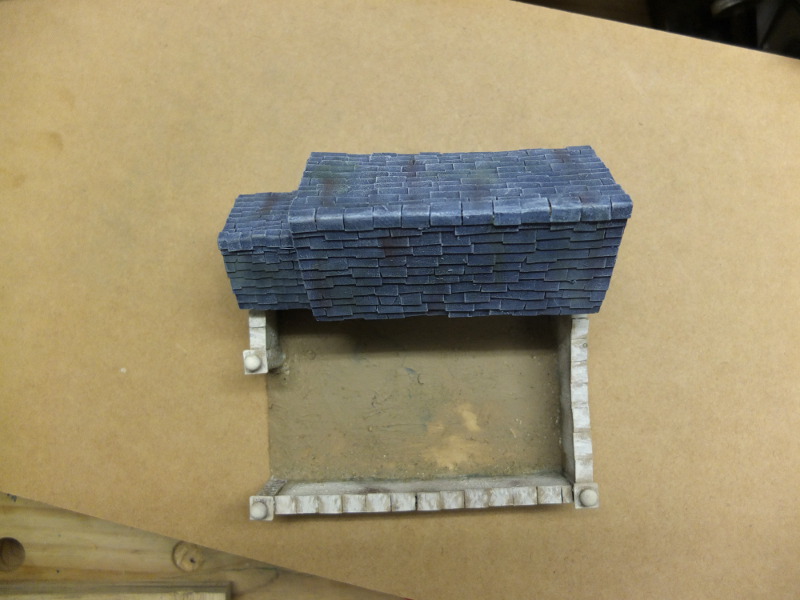
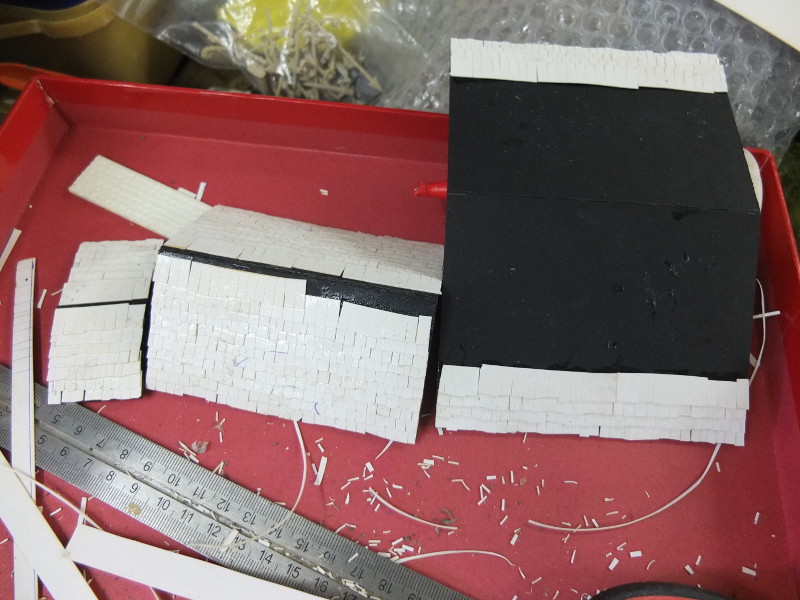
Progress has taken a turn on this with the start of some new roofs!
I’m using smaller tiles and trying to make the more regular. I plan to paint the roofs brown (like in the photo at the top of this thread). This is very time consuming cutting and gluing the tiles but hopefully they will be finished in a day or so

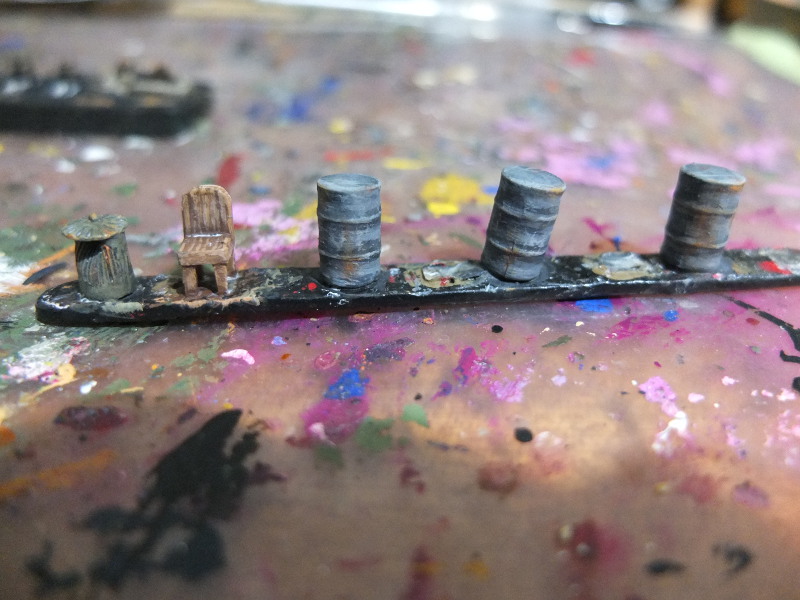
Also I painted up some accessories for the buildings
My 6mm Wargaming site https://6mm.wargaming.info
05/12/2017 at 09:32 #778726mmwargamingParticipantI’ve slowed down a bit on this as it is summer here in NZ and actually nice and hot!
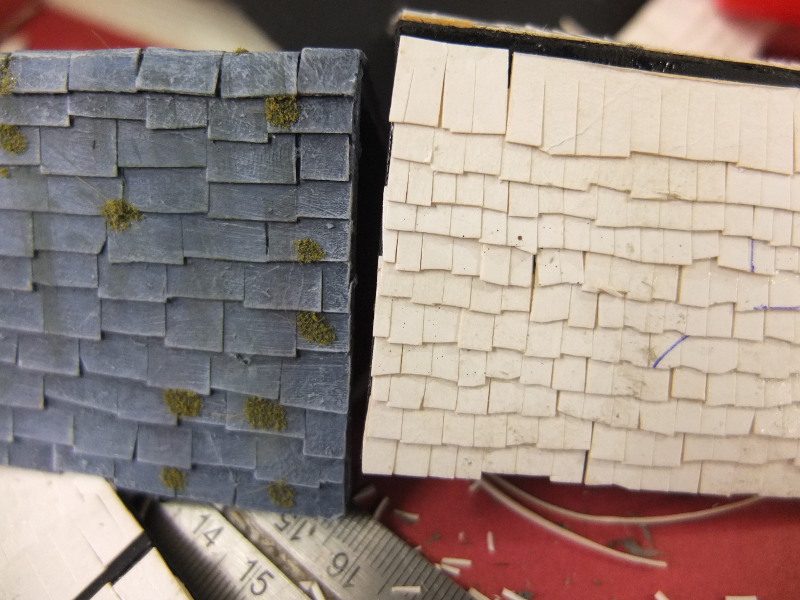
The roofs are finished and it took longer than hoped to cut up all the tiles!
You can also see the basing is done but more on that later.
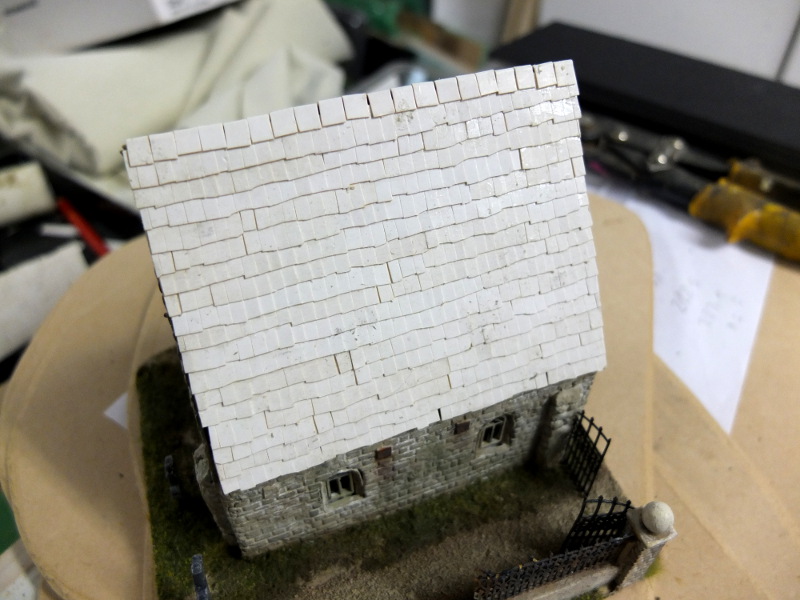
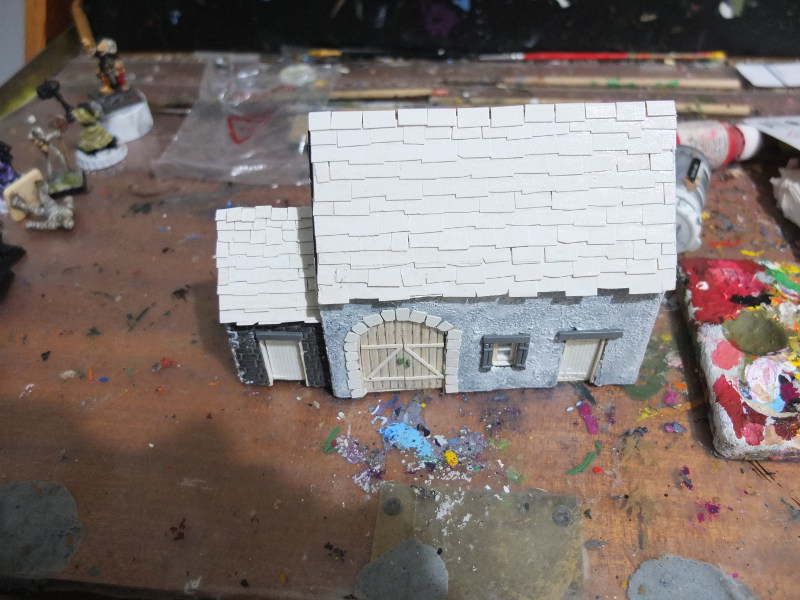
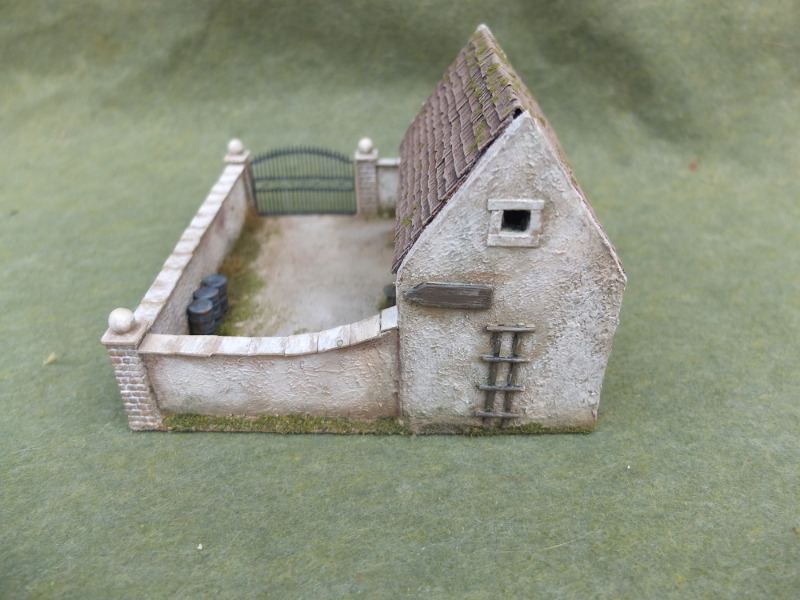
I changed the style of the barn roof so it fits inside the stone walls now. There is still some work to do, to make it fit well
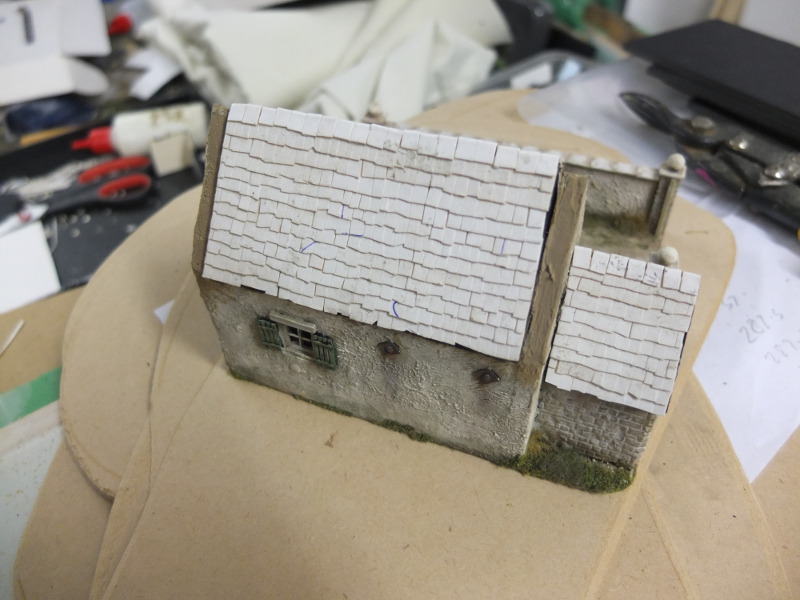
Onto the final steps of painting the roof and fixing up the barn a little.
My 6mm Wargaming site https://6mm.wargaming.info
05/12/2017 at 09:45 #77873MikeKeymasterDuuuuuuuuude.
05/12/2017 at 09:47 #77874 Prince RhysParticipant
You have immense skills – thanks for sharing and showing us how its done!
06/12/2017 at 07:38 #779906mmwargamingParticipantThanks, I like to post my own progress as I find it helps me. As you can see I tend to wing it which means I alter the design as I go.
My 6mm Wargaming site https://6mm.wargaming.info
06/12/2017 at 10:27 #77999 PatriceParticipant
Very interesting! Thank you.
http://www.argad-bzh.fr/argad/en.html
https://www.anargader.net/08/12/2017 at 21:38 #782766mmwargamingParticipantHi all
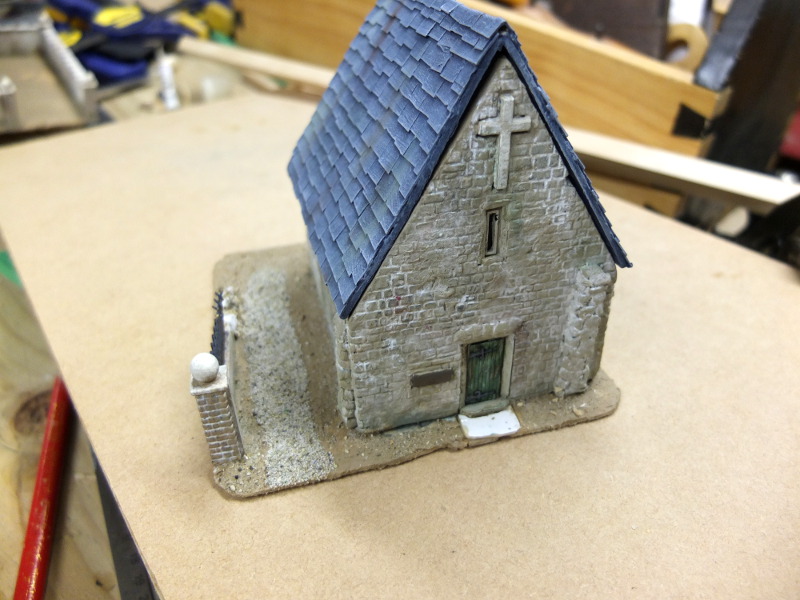
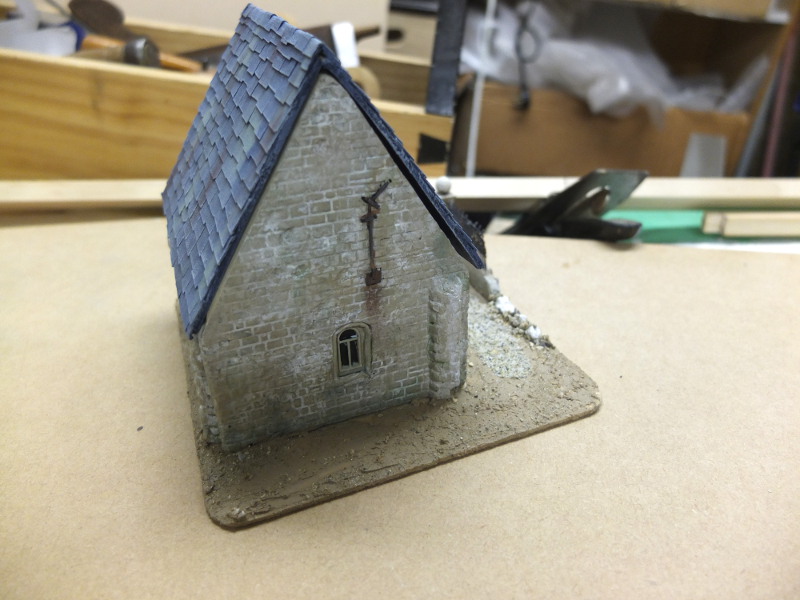
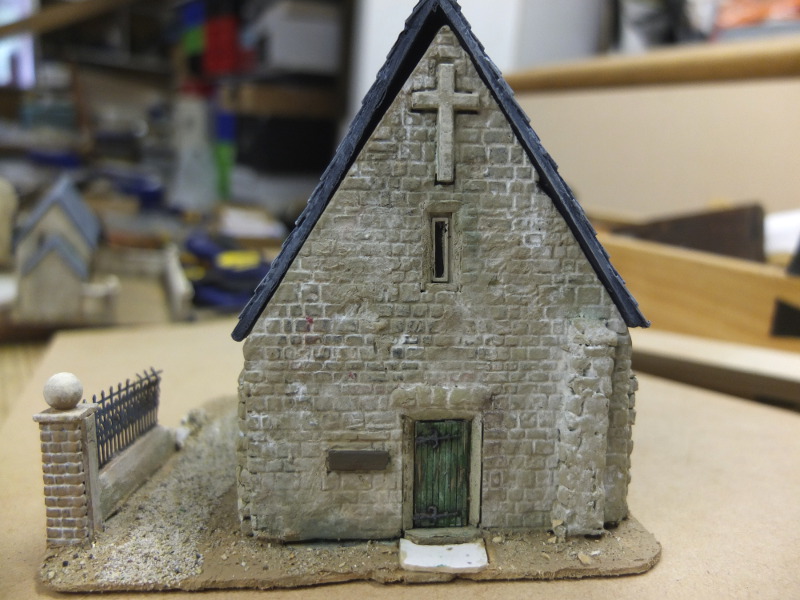
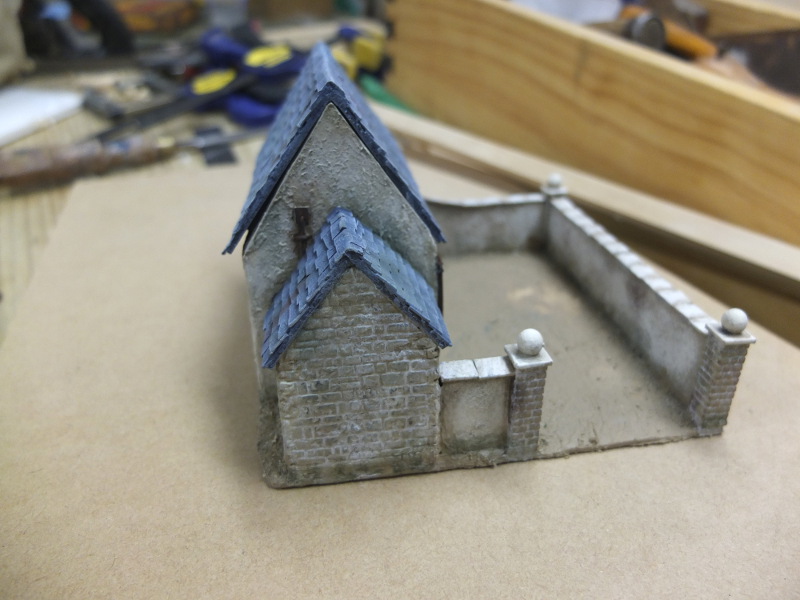
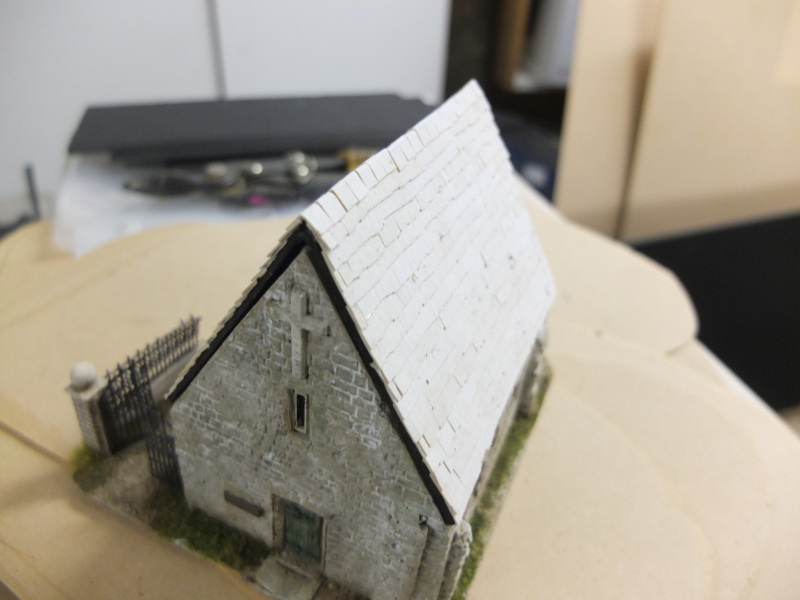
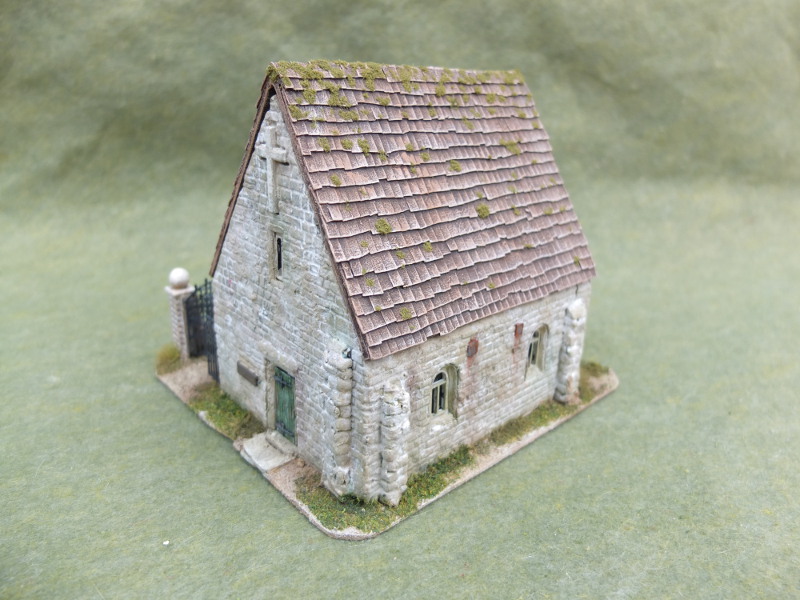
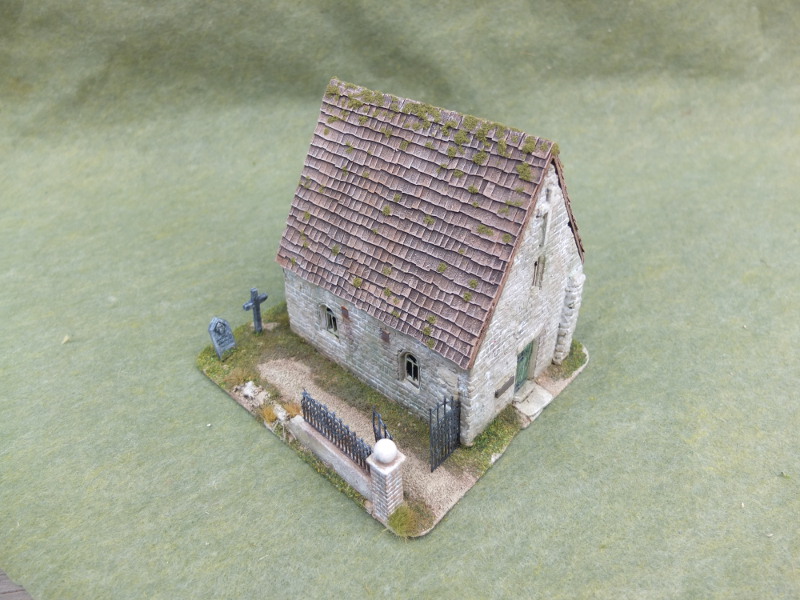
The chapel is completed with a new roof and the basing done. I’m very pleased with the new roof and it looks much more like the photo of the actual chapel I based it on.
I painted the roof various craft paint browns and gave it repeated drybrushes (perhaps too heavy but it stands out), and then glued some Woodlands Scenics burnt grass onto the roof to represent moss
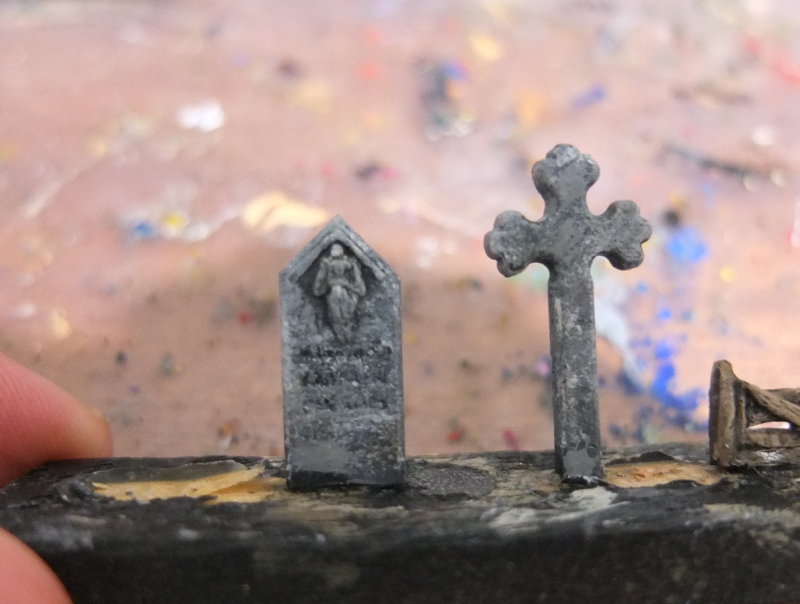
The base was 3mm mdf and I added a couple of Renedra cross and one made from sprue. The broken wall is made from foamboard with the gate and railings from Gamecraft, and the post from a model railway shop.


More soon on the barn
My 6mm Wargaming site https://6mm.wargaming.info
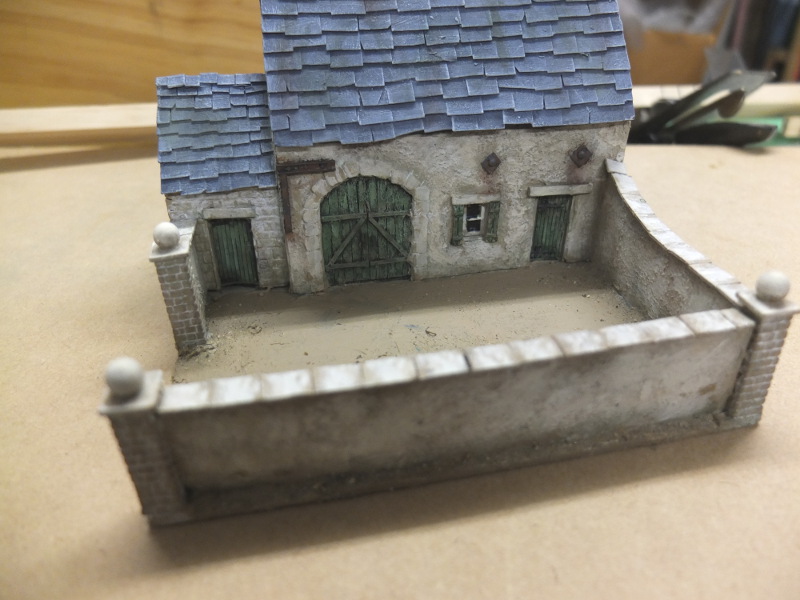
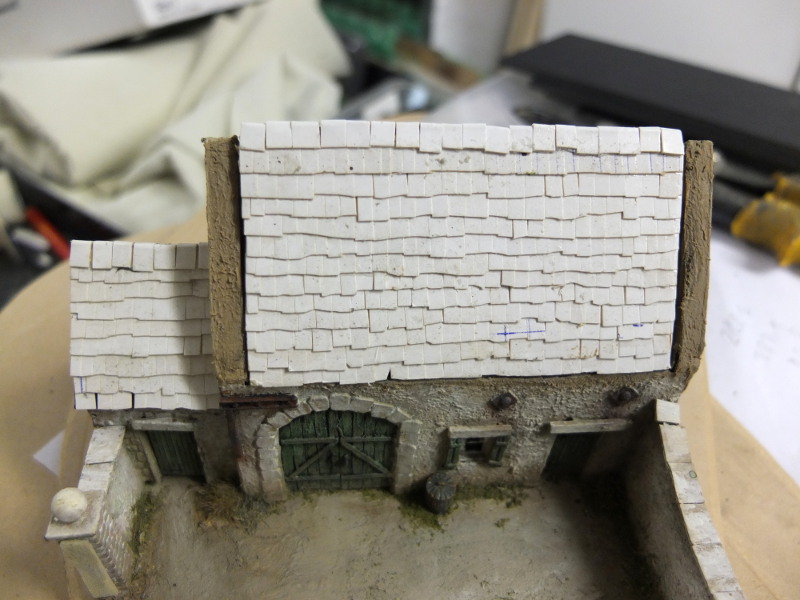
11/12/2017 at 06:03 #785386mmwargamingParticipantAnd here’s the finished Barn. With a gate from one of the model railway wall sets (it is actually a iron wall section).
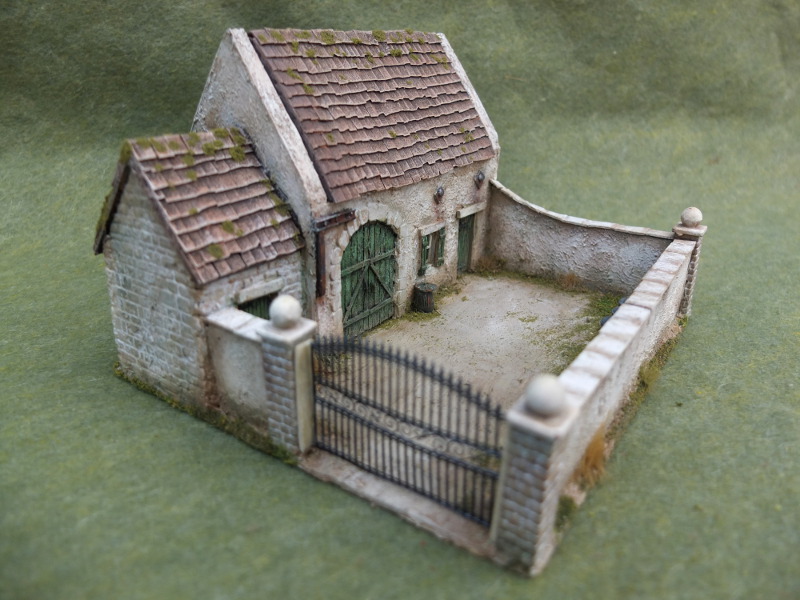
With a finger for scale!
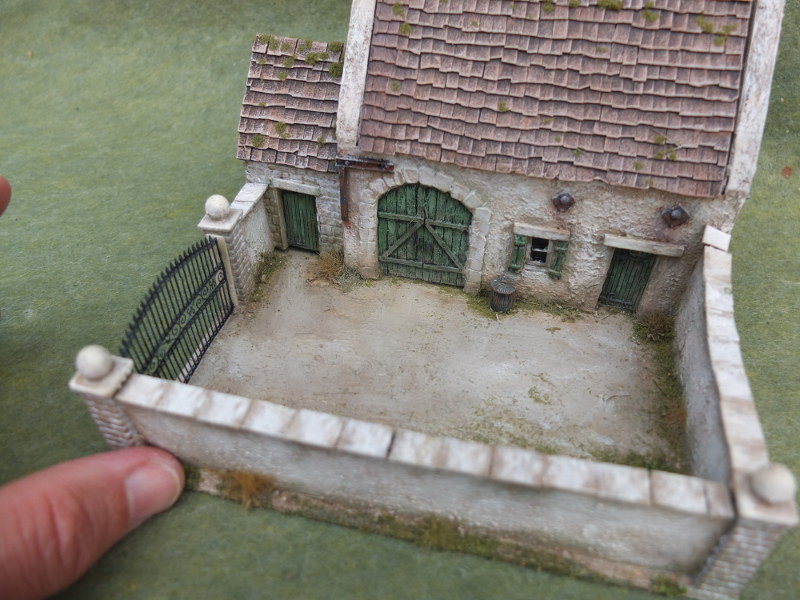

And it looks like I forgot to add something like a decal to the sign
I hope you enjoyed the thread. I have some old Airfix buildings to pimp next
My 6mm Wargaming site https://6mm.wargaming.info
11/12/2017 at 08:26 #78544MikeKeymasterSo much win.
The attention to detail not only in the making but the painting too.kudos.
11/12/2017 at 09:43 #78546Prince RhysParticipantAwesome work!
11/12/2017 at 14:57 #78554Darkest Star GamesParticipantThose are some great pieces! I really like the weathering, realistic yet not over done. And, as a guy that does architecture and sees a lot of models, I’d just like to say that your attention to the innocuous little details, such as the surface mounted electrical conduits, is both awesome and appreciated!
"I saw this in a cartoon once, but I'm pretty sure I can do it..."
11/12/2017 at 18:15 #785726mmwargamingParticipantThanks guys.
I really wanted to improve my work and I noticed a lot of wargames building don’t have the extra little details. The link I posted earlier really made me think about those.
My 6mm Wargaming site https://6mm.wargaming.info
-
AuthorPosts
- You must be logged in to reply to this topic.