- This topic has 17 replies, 7 voices, and was last updated 4 years, 3 months ago by
Just Jack.
-
AuthorPosts
-
01/04/2020 at 14:55 #134142
Just Jack
ParticipantAll,
Morning, 11 April 1941
Here we are, continuing Kampfgruppe Klink’s campaign in Greece. The first battle saw Captain Freitag’s 1st Schutzen Battlegroup take a key mountain crossroads manned by members of the British Royal Engineers supported by Armored Cavalry from New Zealand. The fight saw the Germans infantry nearly eliminate the Commonwealth battlegroup, which fell back in disarray. Captain Freitag pressed his advantage, immediately pursuing south down, where it ran into defensive positions manned by the remnants of the New Zealand 21st Infantry Battalion.
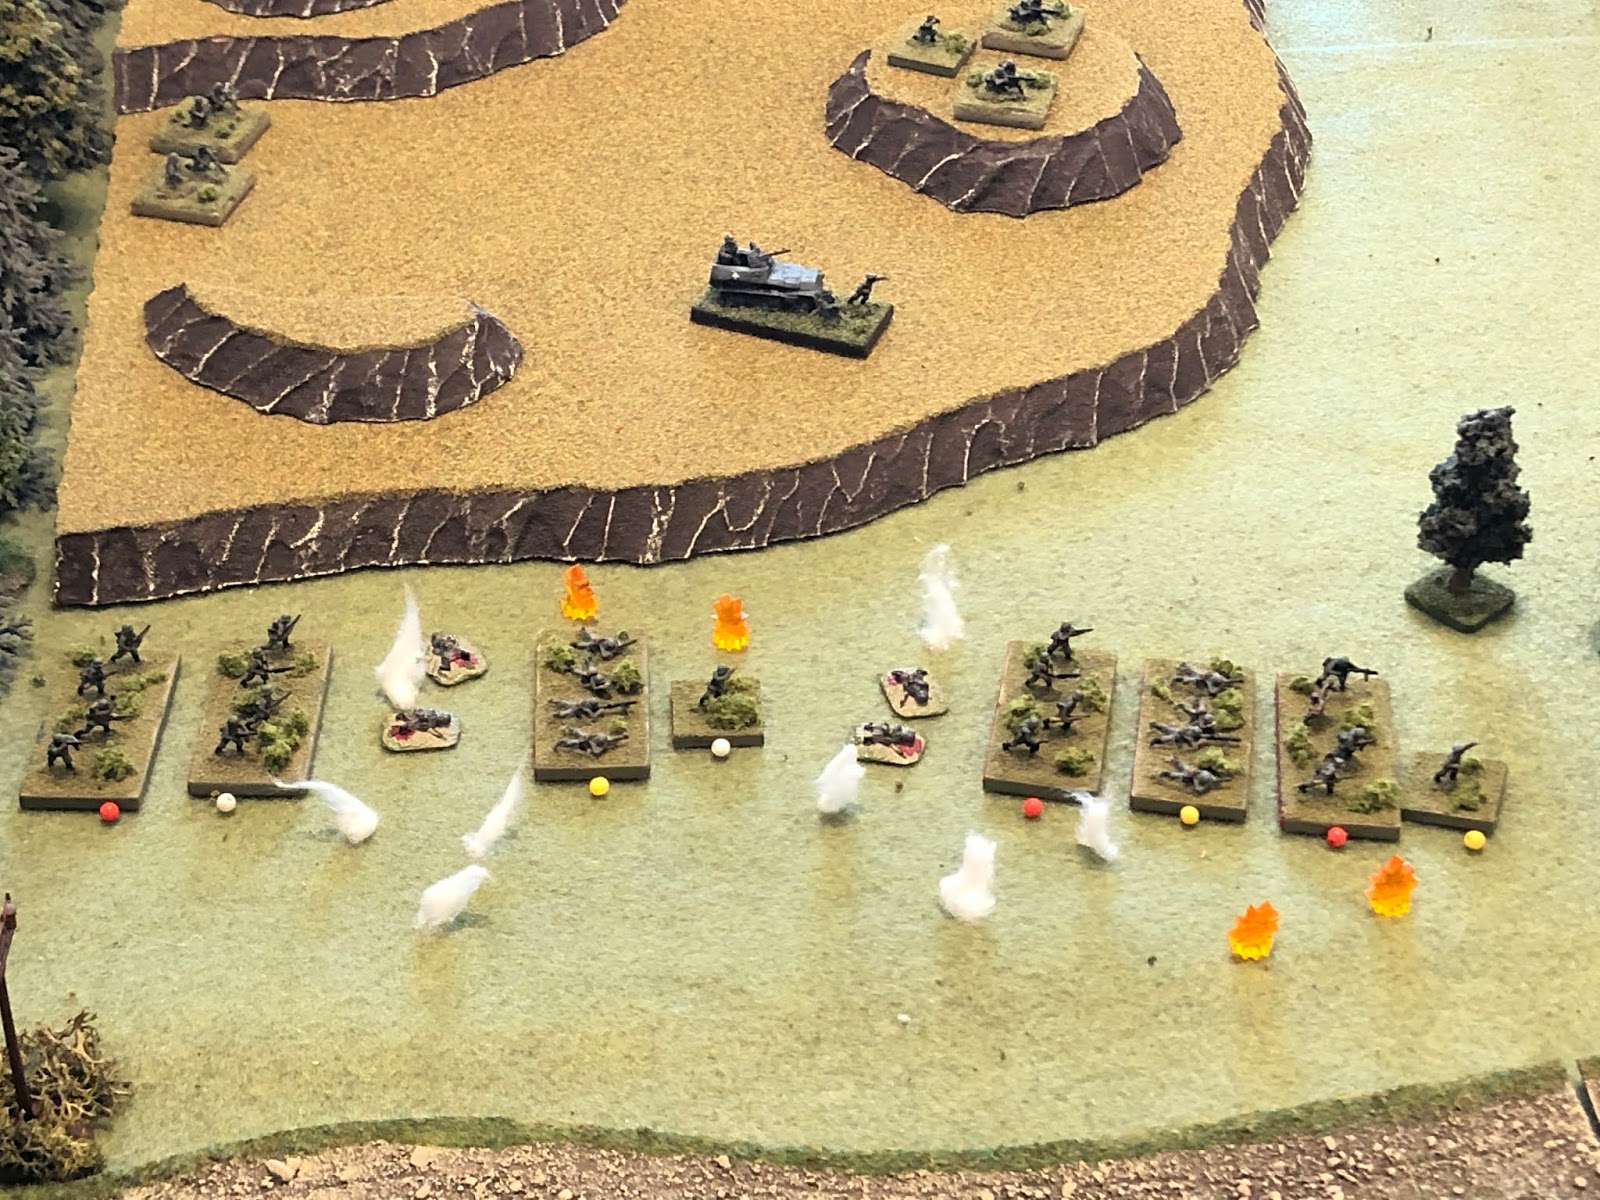
Captain Freitag (center top) looks on as his advancing rifle platoons get caught in the open and pounded by Kiwi machine guns and mortars!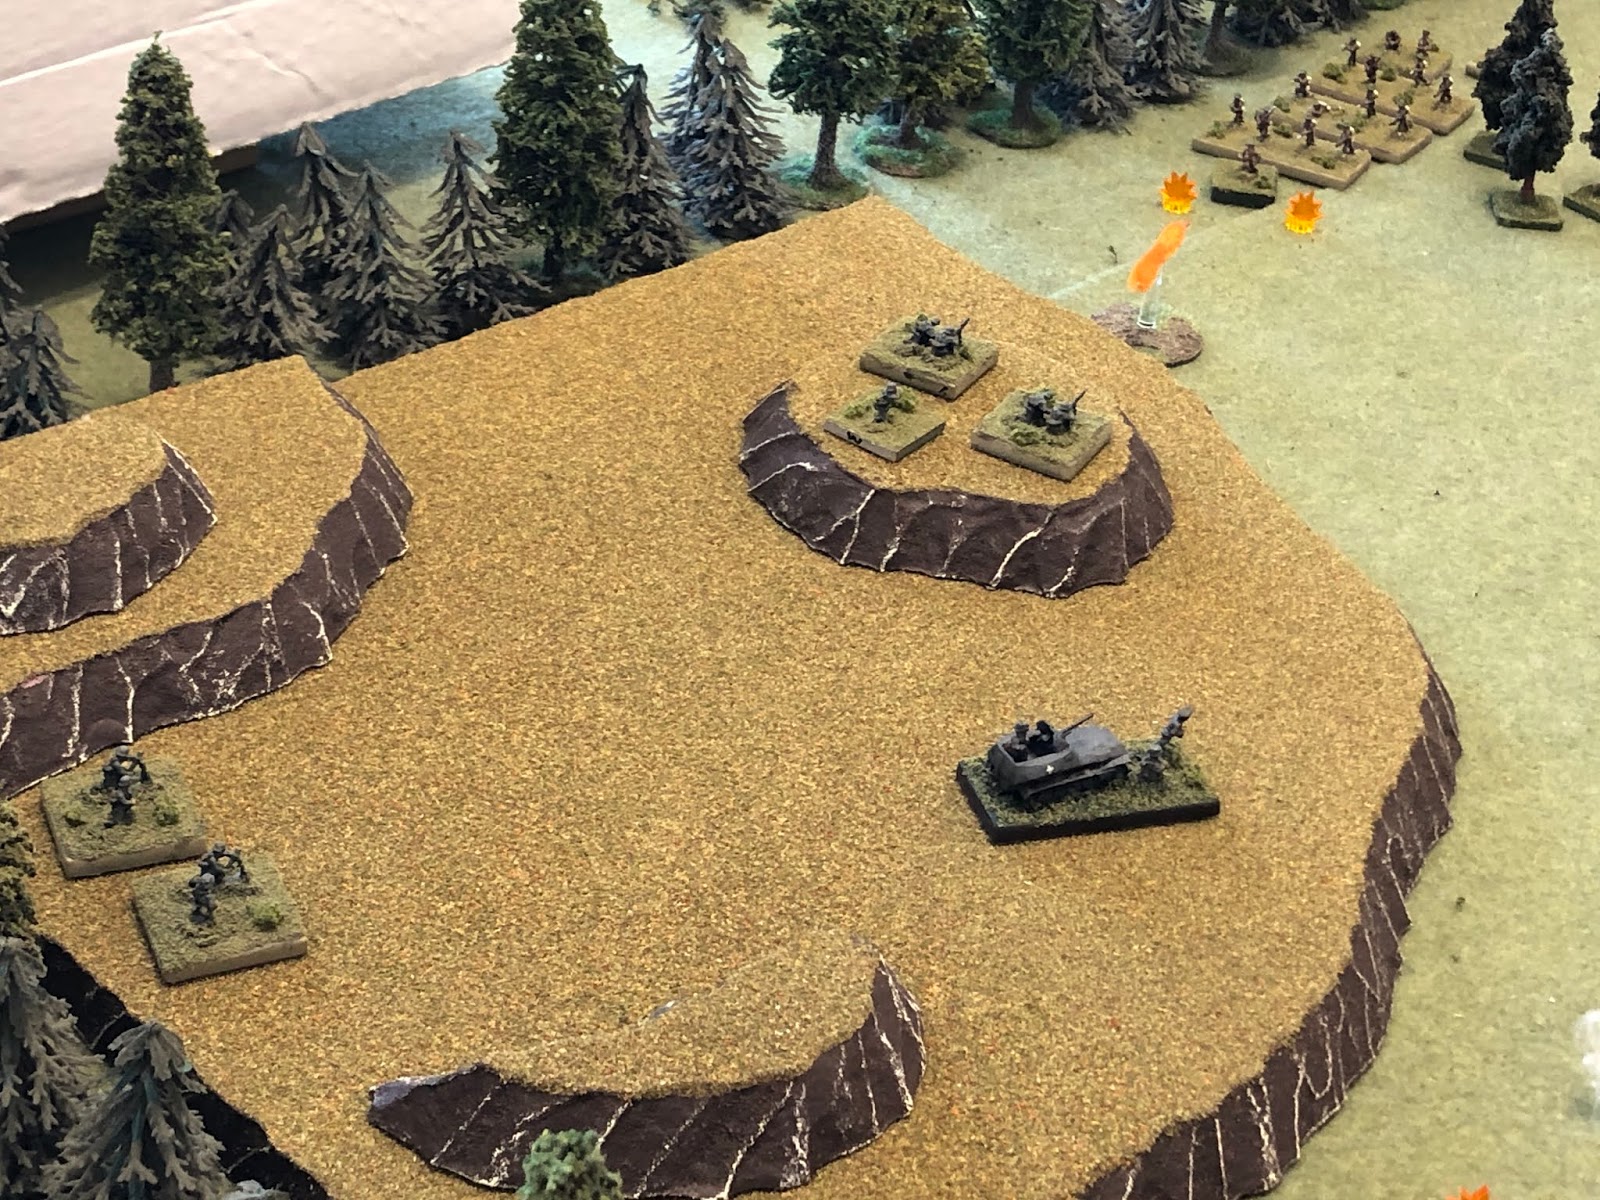
The New Zealanders become overconfident, pushing a rifle platoon forward (top right) to finish off the German infantry, but they run straight into the German machine guns (center) and mortars (far left).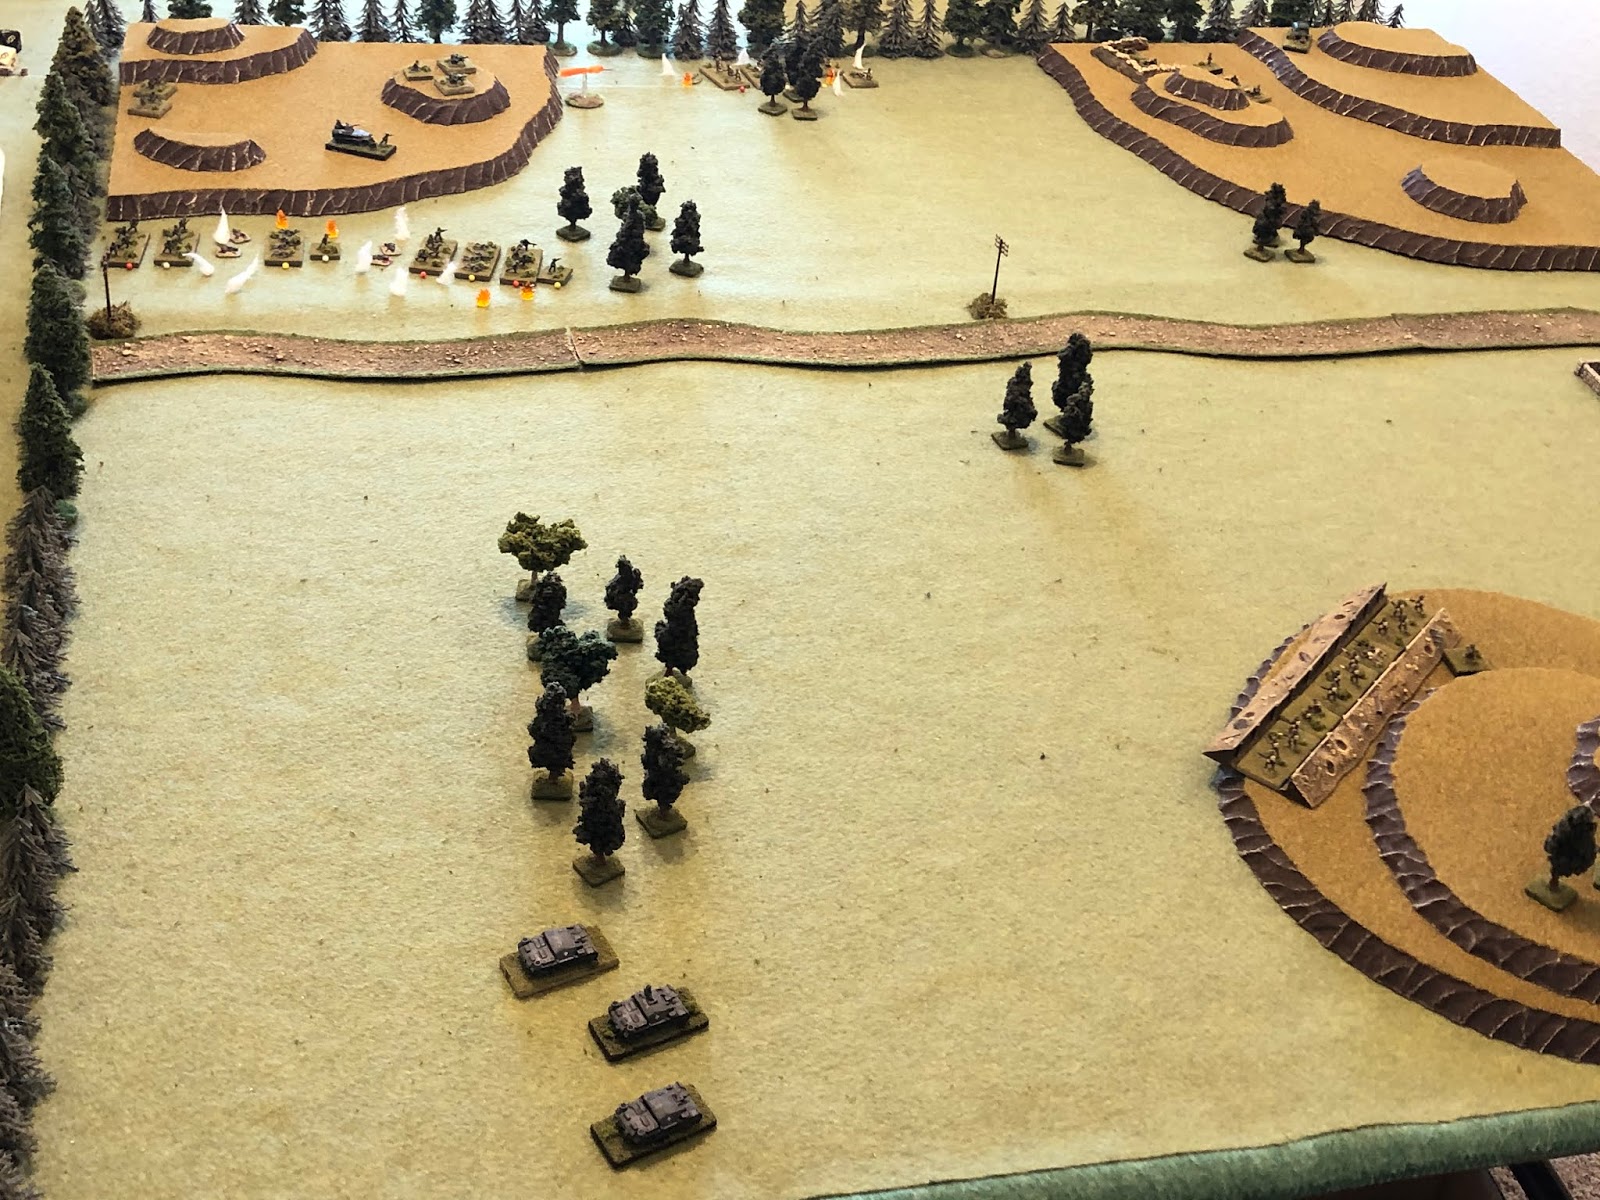
In a desperate move to alleviate pressure on his infantry (top left), Captain Freitag calls his Stugs in on the far right flank (bottom left).
But the Kiwi commander, Major Hunt, responds by bringing his 2-pdr ATGs in on Hill 316 (bottom right), and they immediately engage the German armored vehicles (top left).To see how the fight went, please check the blog at:
https://blackhawkhet.blogspot.com/2020/04/kg-klink-in-greece-fight-2.html?m=1Here is the next set of map turn moves, which resulted in only one fight:
https://blackhawkhet.blogspot.com/2020/04/kg-klink-mini-campaign-in-greece-map.html?m=1
More fighting, coming right up!
V/R,
Jack01/04/2020 at 19:25 #134147 kyoteblueParticipant
Good fight, Jack.
01/04/2020 at 22:08 #134149 ThuseldParticipant
I thought it was going to be a quick fight with the Germans getting cut up in the open.
Experiments here: http://inexperiencedmodelmaker.blogspot.co.uk/
Tranquil Stars updates: https://tranquilstars.wordpress.com
01/04/2020 at 22:42 #134150ParticipantThanks, John, and yeah, me too, Thuseld! It turned out to be quite a fight, and the deployment rules I’m using for the hidden defenders seem to be working pretty well in terms of throwing a lot of unknowns into the game.
V/R,
Jack02/04/2020 at 11:46 #134166ParticipantThese are very good….I’m hooked now and eagerly awaiting episode 3!
The German attrition rates in their non-coms is grim………..gives credence to a mythical survivor like Steiner.
"Even dry tree bark is not bitter to the hungry squirrel"
02/04/2020 at 13:56 #134180ParticipantThanks, Gaz, I’m happy to hear that. Fight #3 will go up Sunday evening, trying to keep myself to a steady release of two batreps per week.
“The German attrition rates in their non-coms is grim………..gives credence to a mythical survivor like Steiner.”
Indeed! I was just chatting about that with another gamer. When I list the casualties and their experience/accomplishments (“…veteran of Poland, France, and Greece, awarded the Iron Cross 2nd Class…”), it’s not out of sentimentality, it’s simply illustrating what the Germans are actually losing, how the dude made it through all of that other stuff and still wound up… kaput.The whole “Kampfgruppe Klink” thing of following this unit through the entire war was 1) because if you wanted to go all the way from September ’39 to May ’45 you had to do Germans, and following a group of characters, I really wanted to see if anyone could actually make it through the entire thing. It’s not looking good 😉
V/R,
Jack02/04/2020 at 17:36 #134191 Victoria DicksonParticipant
Great report
 02/04/2020 at 19:03 #134194kyoteblueParticipant
Good to see you posting Victoria.
02/04/2020 at 21:15 #134199Victoria DicksonParticipantGood to see you posting Victoria.
Yeah, I need to do it more often
 02/04/2020 at 21:51 #134200kyoteblueParticipant
You do.
03/04/2020 at 00:46 #134204ParticipantOh my goodness! Can it be true? A Victoria sighting??? Next thing you know we’ll have Shaun, Ivan, and Rod posting here again!
I’m very happy to ‘see’ you again, I hope all is well.
V/R,
Jack03/04/2020 at 01:18 #134206 Shaun TraversParticipant
Unlikely.
🙂
Actually am quite busy during the week (remote working but work is busier than ever) so have not read the Klink reports yet. But I have got some gaming reports coming as my weekends are more free now. My spare time in the last few months has been spent playing PBEM One Hour Wargame scenarios with Dale e.g.
http://daleswargames.blogspot.com/2020/03/one-hour-wargames-scenarios-filling-in.html
More non-solo gaming in the last two months than the last five years!
03/04/2020 at 03:51 #134208kyoteblueParticipantIt would be good to see Ivan and Rod. Hi Shaun!!
03/04/2020 at 04:32 #134209ParticipantWell I’ll be damned, just call out their names and they appear!
Good to ‘see’ you, Shaun, I hope all is well for you and your family. And I had no idea you and Dale were doing PBEM, I’ll have to check it out.
Oh, and since it’s working, I should mention War Panda!
V/R,
Jack
03/04/2020 at 10:20 #134218Whirlwind
ParticipantReally interesting that one. I was thinking “bad, bad mistake” as soon as I started reading about the New Zealanders preparing a counter-attack…
One thing that did occur to me was that the Germans by deploying their mortars and machine guns early looked as if they were expecting contact but the rifle platoons didn’t. I wonder if the NZ weapons platoon might have opened up a little too early (although I suppose that at least they got some good firing in before the German armour turned up!). Combined with a NZ defence of the other strongpoints, the Germans might have been in for a very thin time…
All that said, it seems like the Stukas are always going to be a bit of a trump card in this campaign.
04/04/2020 at 16:00 #134257ParticipantHello John,
“Really interesting that one. I was thinking “bad, bad mistake” as soon as I started reading about the New Zealanders preparing a counter-attack…”
Certainly high-risk, high-reward. Which, as you know from all my previous battle reports, I am highly disposed towards 😉 In the overall scheme of things, the Commonwealth troops are over-matched: they are lightly armed, immobile, most of their battlegroups don’t have much in the way of offensive striking power, and they are quantitatively worse than their German counterparts on account being a mish-mash of units, having a poor supply situation, missing quite a bit of their gear, and missing some leaders (after deploying to Greece they occupied their initial defensive line, were ejected from it, and are no attempting man a second defensive line against KG Klink). What this means in the campaign is that the Commonwealth is set up to lose these battles, so when they get a chance at winning one they’re going to take it, rather than sit back and lose slowly. Indeed, in order to assist the Commonwealth a bit, I’m rather aggressive with the Germans, too, so that the fights don’t simply degenerate into the Germans stacking their firepower, pushing ahead scouts to identify Commonwealth positions, then reduce it with overwhelming firepower. I want drama, so I push the Germans ahead, and I’m going to take my shots with the Commonwealth forces when I can, and I think Chain of Command’s deployment scheme suits this.“One thing that did occur to me was that the Germans by deploying their mortars and machine guns early looked as if they were expecting contact but the rifle platoons didn’t.”
I suppose. To me it was just standard overwatch, even for an administrative (vice tactical) movement. In the campaign narrative, the Germans are pulling their normal ‘blitzkrieg,’ pushing ahead as quick as possible, hoping to unhinge the defense and then, once that’s occurred, to keep up the pace of operations so that the defenders cannot recover. In that manner, it’s common for supporting fires elements to leapfrog from supporting position to supporting position, even while the maneuver elements keep slogging forward. And if it hasn’t been clear, the Weapons Platoons for the various German battlegroups are motorized (as is the Engineer Platoon assigned to the Panzer battlegroup).“I wonder if the NZ weapons platoon might have opened up a little too early (although I suppose that at least they got some good firing in before the German armour turned up!).”
I dunno. Coming after the first fight, where the Commonwealth Weapons Platoon waited and let German infantry get almost on top of them before getting into the fight, I probably was a little keen to get the British Wpns Plt into the fight a bit earlier. But it’s always going to be a matter of feel, and the problem, or course, is the earlier you deploy, the longer you are subject to enemy fire, because with the German advantage in orders dice they are never going to be in a position where they can’t get their forces on the table to engage.“Combined with a NZ defence of the other strongpoints, the Germans might have been in for a very thin time…”
Like I said, my purview is that the Commonwealth forces are going to have a hard time winning any of these fights (minus maybe the few fights where Commonwealth armor is present, but even then they’re not overly powerful), so I want to avoid, as much as possible, the Allies just sitting back and getting reduced, one position at a time. And we can certainly discuss mutually-supporting positions, but the Allies simply don’t have the firepower the Germans do.“All that said, it seems like the Stukas are always going to be a bit of a trump card in this campaign.”
They are going to be fairly present throughout the campaign; the Commonwealth troops have 25-pdr artillery on their side, it’s just not going to show up as much as German supporting fires as it happens when you get a “Chain of Command dice,” and the Allies don’t have as many ‘command dice’ so, in terms of dice odds, they’re not going to receive as many supporting fire missions as the Germans.*And just for anyone not aware, in Chain of Command you roll ‘orders dice’ at the beginning of each turn to determine what you’re able to do. The Germans start with six command dice, the Allies with five, and you lose command dice as you lose forces, until you’re not able to hardly do anything. Anyway, you roll your command dice and you read each one:
1: Activate one squad, vehicle, or weapons team
2: Activate one platoon (the entire platoon can act, but all elements do the same thing)
3: Activate one platoon leader and platoon (the entire platoon can act, but now they can do different things and their commander can rally units)
4: Activate the battlegroup commander (he can rally units and/or activate units, as individuals or platoons)
5: Get one ‘Chain of Command Dice.’ Once you get six of these you can all in off-table supporting fires.
6: One ‘6’ doesn’t do anything, but if you get 2+ you get back to back phases.For example, I’m the Germans and I roll my six orders dice. I get a 1, a 2, a 4, a 5, and two 6s.
I use the 4 to activate the Battlegroup Commander, who moves up, rallies two squads, and orders 1st Rifle Platoon to group move forward.
I use the 2 to activate 2nd Rifle Platoon to group move forward.
I use the 1 to activate one vehicle from the Stug Platoon and move it forward then fire.
The 5 means I add a Chain of Command Dice. I already had 4 Chain of Command Dice, so I now have 5. One more and I can call in the Stukas.
The two 6s mean I get next phase, so after I’ve done the above activations I gather up my six orders dice and I immediately roll again, while the Commonwealth troops can only sit back and watch.I hope that helps to explain how and why things are happening the way they are.
V/R,
Jack04/04/2020 at 16:44 #134259ParticipantCheers Jack, very interesting explanations, many thanks. Looking forward to the next one!
05/04/2020 at 04:45 #134273ParticipantAnytime buddy, take care!
V/R,
Jack
-
AuthorPosts
- You must be logged in to reply to this topic.