Home › Forums › Air and Sea › Naval › The Battle of Savo Island, 9th August 1942, in 1/3000
- This topic has 6 replies, 5 voices, and was last updated 1 year, 7 months ago by
 AdmiralHawke.
-
AuthorPosts
-
13/08/2022 at 22:19 #176896
 AdmiralHawkeParticipant
As this week marked the 80th anniversary of the Battle of Savo Island, I thought it high time I posted a report of my re-creation of the battle in 1/3000 scale.
History
Operation Watchtower was the first Allied offensive of the Pacific War. The 1st Marine Division landed on Tulagi and Guadalcanal in the southern Solomon Islands on 7th August, 1942.
Although there was limited opposition ashore, the American transports unloading off Lunga Point, Guadalcanal, were repeatedly attacked by Japanese aircraft flying from Rabaul. The destroyer Mugford was hit by a bomb, the destroyer Jarvis by a torpedo and the transport George F. Elliott set on fire by a Japanese aircraft deliberately crashing into it. The Allied crews were exhausted from days of continuous operations.
The three entrances to Savo Sound off Guadalcanal forced Rear-Admiral Crutchley aboard HMAS Australia to divide his covering force into three groups to cover the approaches during the night: Southern, Northern, and Eastern. He then took his own ship, Australia, to confer with the overall commander, Rear-Admiral Richmond Kelly Turner aboard the transport McCawley.
Meanwhile, Vice-Admiral Mikawa, the Commander-in-Chief of the Eighth Fleet at Rabaul, New Britain, had set out for Guadacanal with every available ship to attack the Allied forces. Although Mikawa’s ships were spotted by Allied aircraft, the Japanese force was mis-reported as containing a seaplane carrier and the significance of the sighting was missed.Game set up
– I used Grand Fleets rules from Majestic 12 Games (http://www.mj12games.com/grandfleets/) with a few amendments, primarily to the spotting and initiative rules so that ships that spot at longer range have the initiative.
– The miniatures are almost all from Tiny Thingamajigs on Shapeways (https://www.shapeways.com/designer/matt_atknsn).
– The mat is the dark sea mat from Tiny Wargames (https://www.tinywargames.co.uk).
– Those of you with excellent warship recognition skills will spot that I made a couple of substitutions for models that I don’t have: most obviously, I replaced the 8-inch cruiser Vincennes with the 6-inch cruiser Nashville; the Canberra is played by the British Norfolk; the Yunagi by a Fubuki class; and the Bagley class by the very similar Benham class.Radar pickets
USS Blue (Cdr. Harold N. Williams)
USS Ralph Talbot (Lt-Cdr. Joseph W. Callahan)
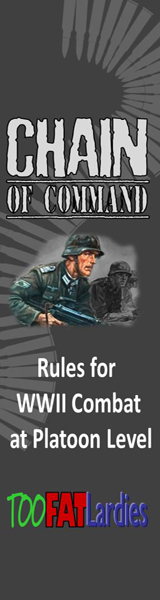
Southern Covering Force (Captain Bode)
USS Chicago (Capt. Howard D. Bode)
HMAS Canberra (Capt. Frank E. Getting)
USS Patterson (Cdr. Frank R. Walker)
USS Bagley (Lt-Cdr. George A. Sinclair)Northern Covering Force (Captain Craven)
USS Nashville (Capt. Francis S. Craven)
USS Quincy (Capt. Samuel N. Moore)
USS Astoria (Capt. William G. Greenman)
USS Helm (Lt-Cdr. Chester E. Carroll)
USS Wilson (Lt-Cdr. Walter H. Price)Eastern Covering Force (Rear-Admiral Norman Scott)
USS San Juan (Capt. James E. Maher)
HMAS Hobart (Capt. H.A. Showers)
USS Buchanan (Cdr. Ralph E. Wilson)
USS Monssen (Cdr. Roland N. Smoot)Eighth Fleet (Vice-Admiral Mikawa Gunichi)
Chōkai (Capt. Hayakawa Mikio)
Aoba (Capt. Hisamune Yonejiro)
Kinugasa (Capt. Tsutau Araki)
Furutaka (Capt. Takahashi Yuji)
Kako (Capt. Sawa Masao)
Tenryu (Capt. Shinpei Asano)
Yubari (Capt. Ban Masami)
Yunagi (Lt. Se Okada)
Battle: first phase
Imagine it is dark. 😉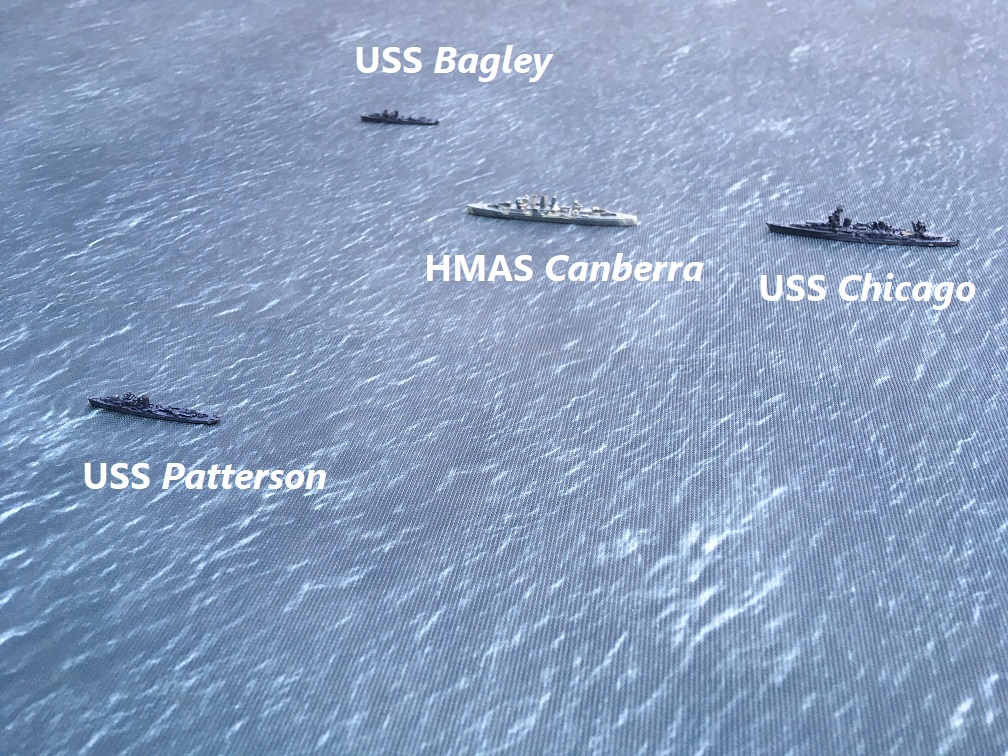
The Southern Covering Force patrols northwards at 12 knots, unaware of the approaching Japanese. The Australian cruiser Canberra leads the American Chicago, with the destroyers Patterson and Bagley ahead on either bow.
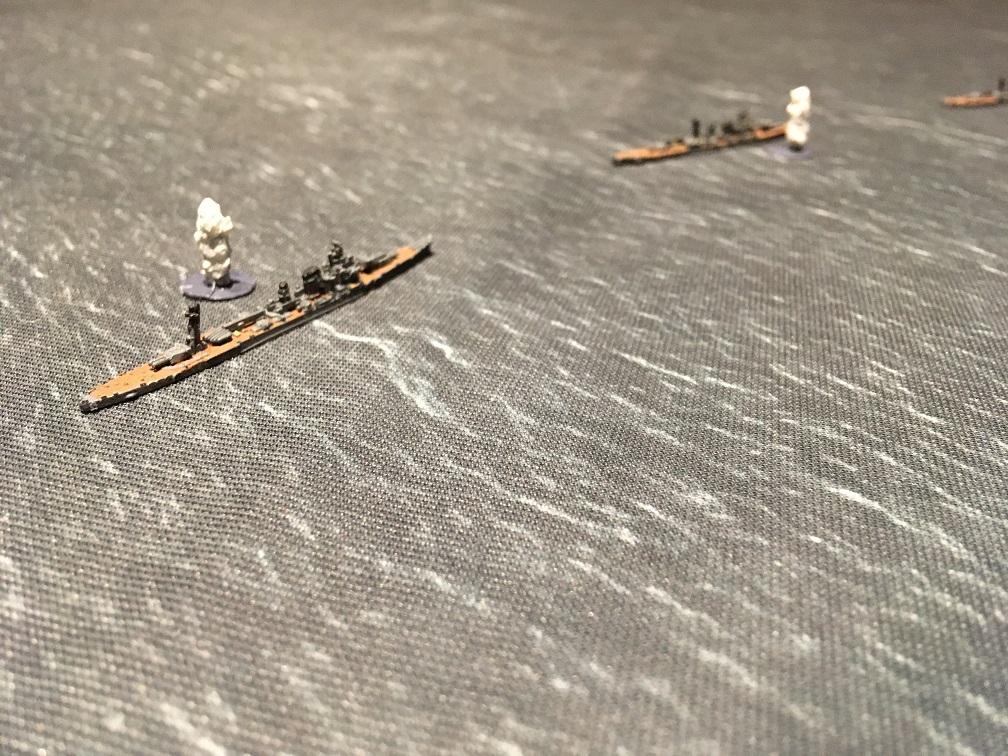
Having evaded the picket destroyers Ralph Talbot and Blue, Vice Admiral Mikawa’s flagship, the heavy cruiser Chōkai, leads the Eighth Fleet past Savo Island into the Savo Sound anchorage at 30 knots. The Chōkai leads the cruisers Aoba, Kinugasa, Furutaka, Kako and Tenryu.
Chōkai spots the US cruiser Chicago at 9,500 yards. The Allies have yet to spot the Japanese and remain unaware of the Japanese approach. None of the Allied crews, exhausted from days of continuous operations, are alert.Mikawa continues straight ahead to pass astern of the Allied cruisers. Eventually, the crews of the Australian cruiser Canberra and the US destroyer Patterson spot the Chōkai.

Chōkai opens fire at Chicago at short range with a full broadside from her 10 8-inch guns, scoring three hits. Aoba also opens fire at Chicago and scores another three 8-inch hits.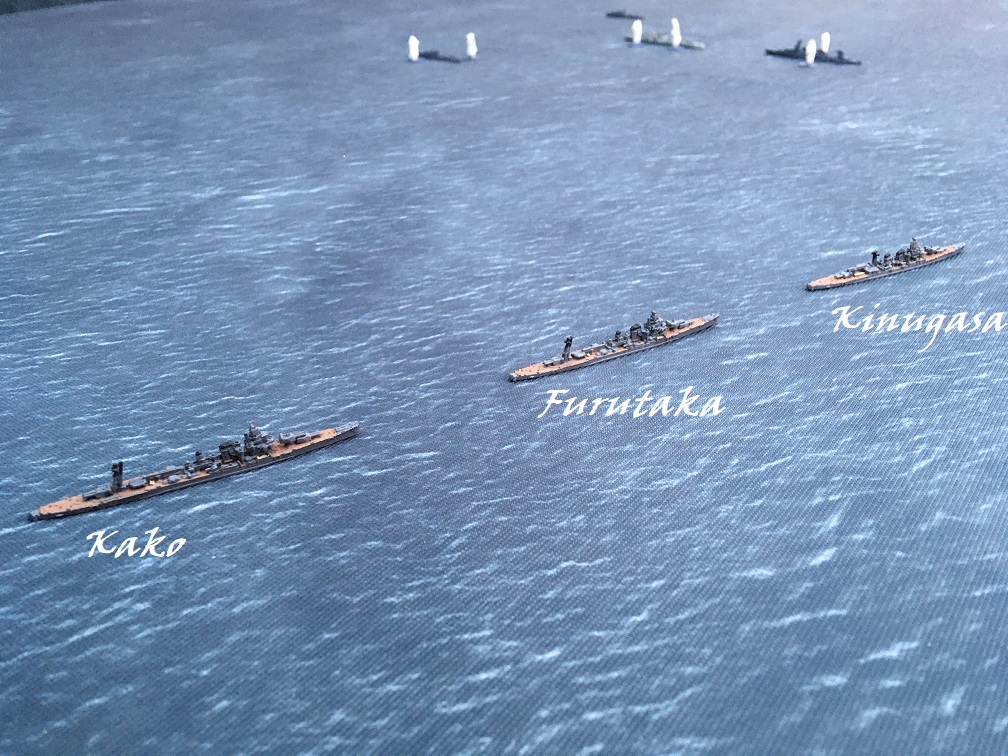
The Japanese heavy cruisers have all spotted the Allied cruisers now. Kinugasa opens fire at Canberra and, again, scores three 8-inch hits. Furutaka, fourth in line, opens fire at Canberra and scores two 8-inch hits. Kako, fifth in line, hits Canberra with another three 8-inch hits. The light cruisers Tenryu and Yubari open fire on Patterson at long range for their 5.5-inch guns. Even so, both hit the destroyer.
The three Allied ships are left reeling by the sudden onslaught: Canberra has been hit in her boiler rooms and had X turret knocked out; Chicago has also had a turret knocked out, though her speed has not been impaired; Patterson has had two of her guns knocked out and her engines damaged. Only Bagley, on the far side of the formation, remains unscathed.
The cruisers of Sentai 6 have all fired torpedoes: Aoba and Kinugasa at Chicago, Furutaka and Kako at Canberra.
Aboard Chicago, Captain Bode believes the strange ships are the Northern Covering Force and hesitates to open fire. Captain Getting of the Canberra has no such qualms and opens fire at the Furutaka.
Despite X turret having been knocked out, Canberra scores three 8-inch hits on Furutaka.
Canberra also fires her port-side torpedoes at the same target. Furutaka’s crew fight to control the damage aboard her. Astern, her sister ship Kako has fired her port-side torpedoes at the Canberra.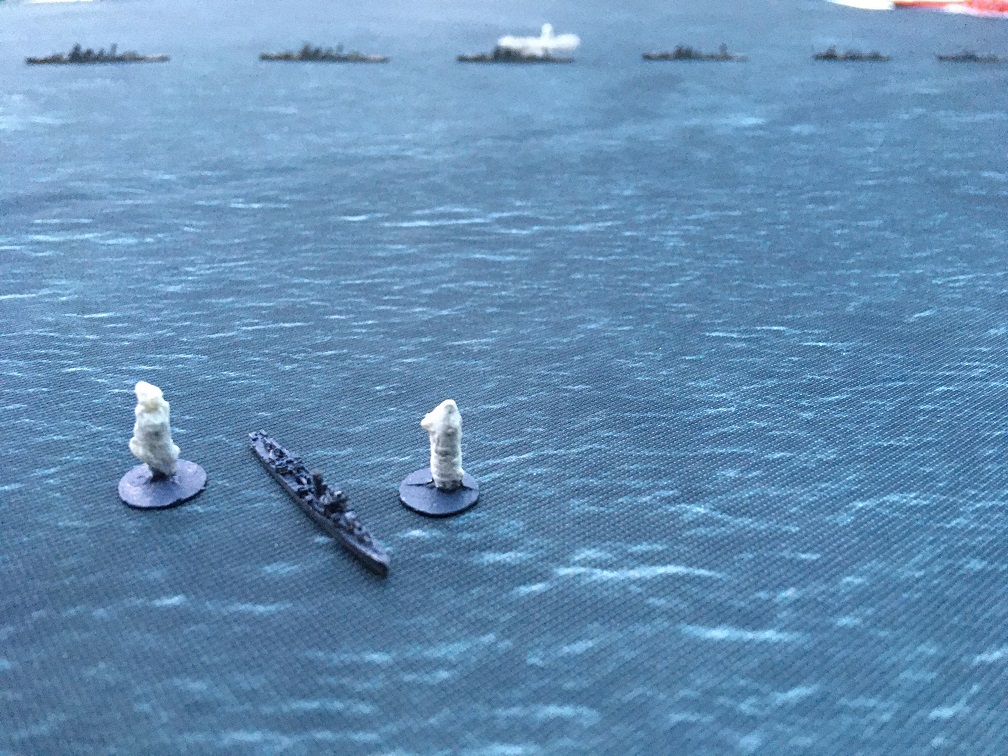
The Bagley-class destroyers carry the heaviest torpedo armament of any US destroyers. Commander Walker aboard Patterson orders his wounded ship’s eight port-side torpedoes fired at the fifth Japanese cruiser (Kako) as Japanese shells crash into the sea around her.While Aoba’s torpedoes miss the Chicago, one of Kinugasa’s hits the American cruiser, doing enough damage to doom the ship despite the efforts of her damage-control parties. Furutaka’s torpedoes all miss, but two of Kako’s torpedoes hit Canberra, sealing her fate. Canberra’s own torpedoes narrowly miss Furutaka.
The crew of the Kako are still celebrating the destruction of the Canberra when Patterson’s torpedoes arrive. Three torpedoes slam into the Kako in a series of devastating explosions that rip open her port side and cause her to heel over and sink within minutes, killing Captain Sawa and most of her crew.
Mikawa continues to the westward, passing behind the burning Allied cruisers. Chicago and Canberra have been brought to a halt by the torpedo hits and are out of action with their guns silenced. Unaware of the immediate fate of the cruisers, Lieutenant-Commander Sinclair swings the destroyer Bagley round to port to attack the enemy ships. Beyond the burning cruisers, Commander Walker aboard the Patterson steers his wounded ship slowly away from the enemy force. Patterson’s radio broadcasts an urgent warning: ‘Strange ships entering harbour’.Suddenly, the Bagley is caught in the glare of Japanese searchlights. Chōkai opens fire with a full broadside at Bagley, practically obliterating the destroyer with four 8-inch shells along her length, knocking out two of her guns, her boiler room and a torpedo mount. Aoba, second in the Japanese line, hits the already crippled destroyer with another four 8-inch shells.
The Chōkai and Aoba bracket the Bagley with further 8-inch salvoes before she sinks. Kinugasa fails to spot the Patterson as she makes off into the darkness, now the sole survivor of the Southern Force.
Battle: second phase
Remember, it is still dark. 😉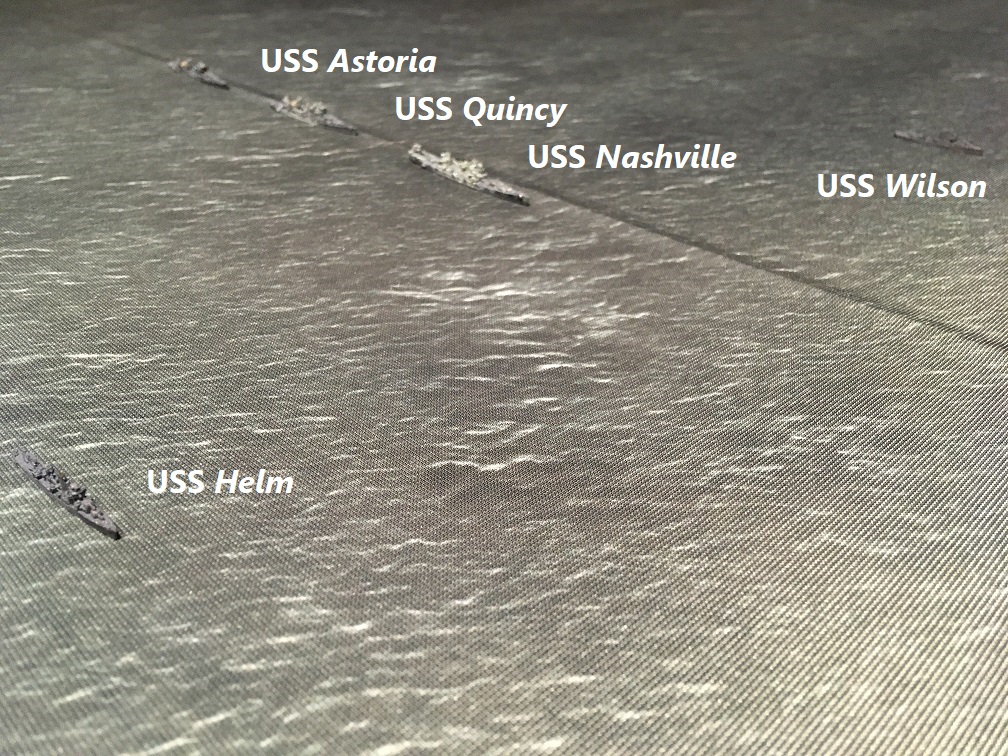
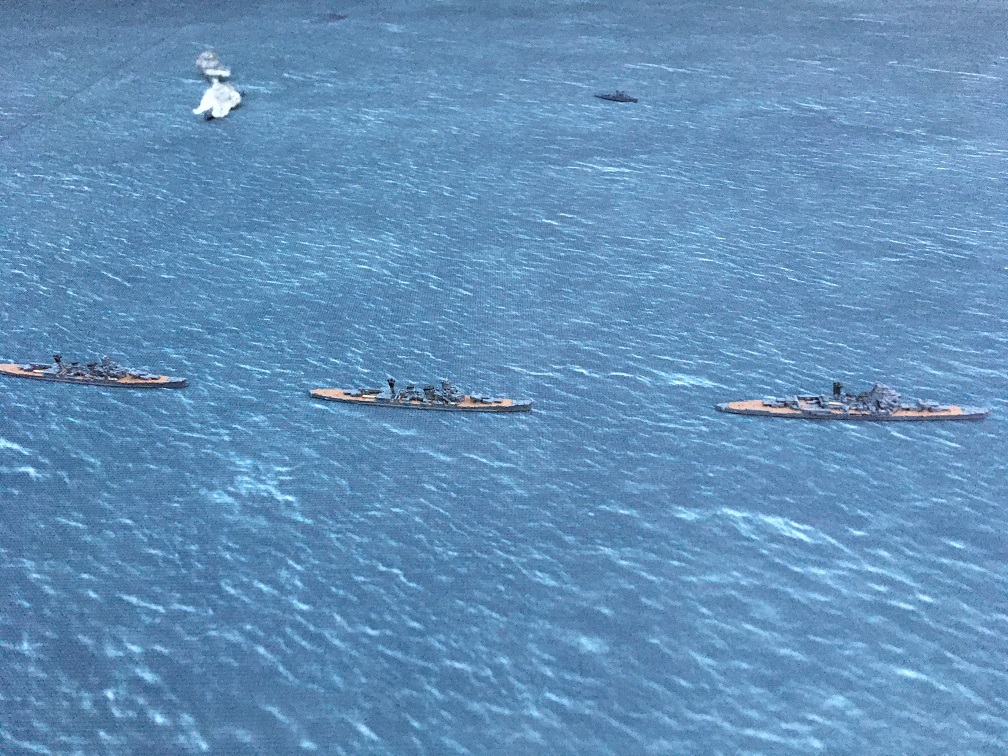
The Northern Covering Force patrols northwards through the darkness at 12 knots, unaware of the approaching Japanese. The 6-inch cruiser Nashville leads the 8-inch cruisers Quincy and Astoria. The destroyers Wilson and Helm are stationed on the port and starboard bows of the Nashville.
As Mikawa leads the Japanese fleet into Savo Sound, lookouts on the flagship Chōkai spot the American destroyer Helm crossing the Chōkai’s bows in the darkness, and then the cruiser Nashville beyond her. Admiral Mikawa orders an immediate alteration of course to port to bring the ship’s rear guns to bear and pass astern of the allied squadron. The Aoba turns in the
wake of the Chōkai. The crews of the Nashville and the Quincy, alerted by the Patterson’s radioed warning, spot the Chōkai. The crews of the Aoba and Kinugasa have not yet spotted the Nashville.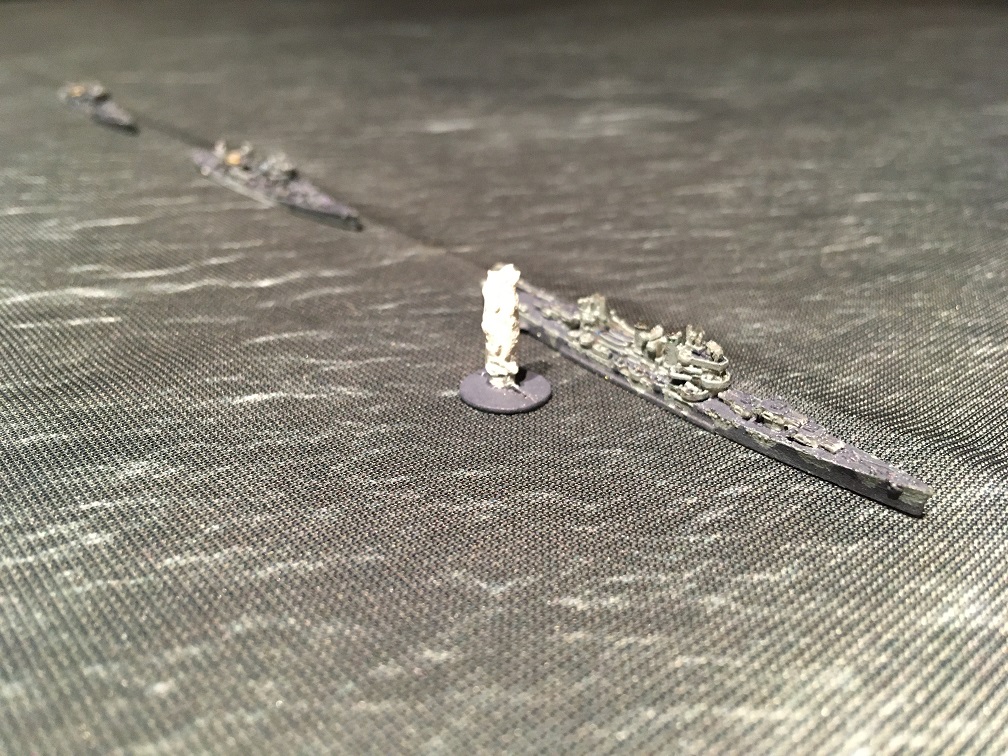
Chōkai opens fire at the Nashville, hitting the US light cruiser four times and inflicting serious damage topside. She also fires four torpedoes from her starboard tubes at the second American cruiser, the Quincy. However, Chōkai fails to use her searchlights to illuminate the American cruisers for the other Japanese cruisers, while the flash from Chōkai’s guns temporarily blind the lookouts on the other cruisers.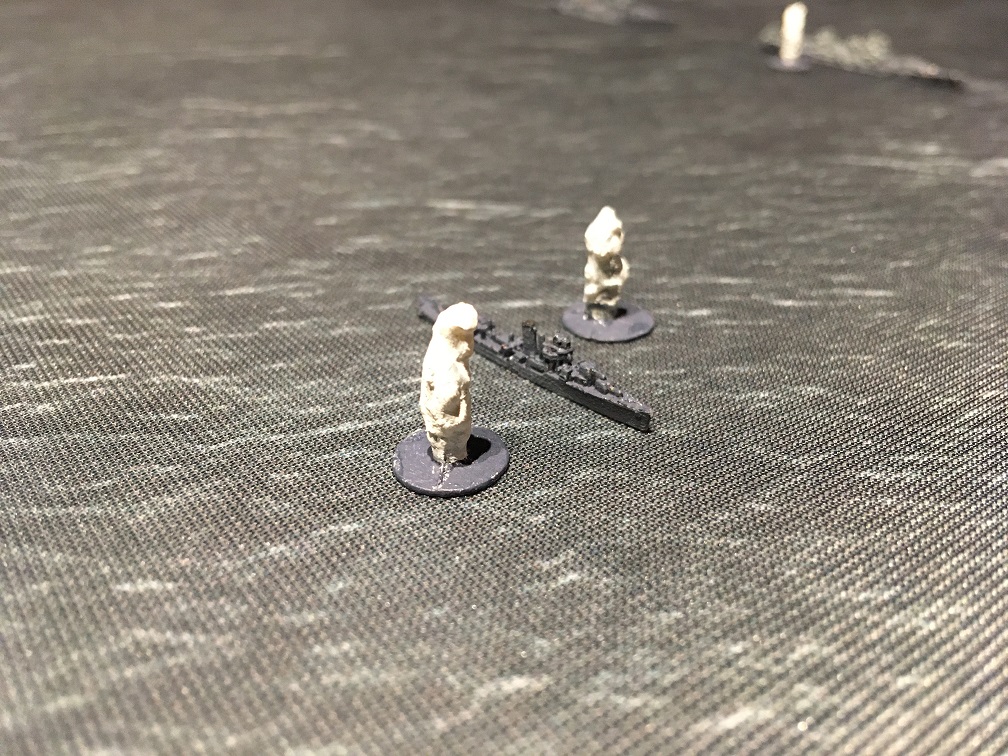
The Japanese cruiser Aoba, having failed to spot the US cruisers, opens fire at the destroyer Helm, but misses completely. Kinugasa’s gunfire is far more accurate: scoring three hits on the Helm. The three leading Japanese heavy cruisers all fire at the Helm with their secondary guns, though without effect. However, Kinugasa has severely wounded the destroyer.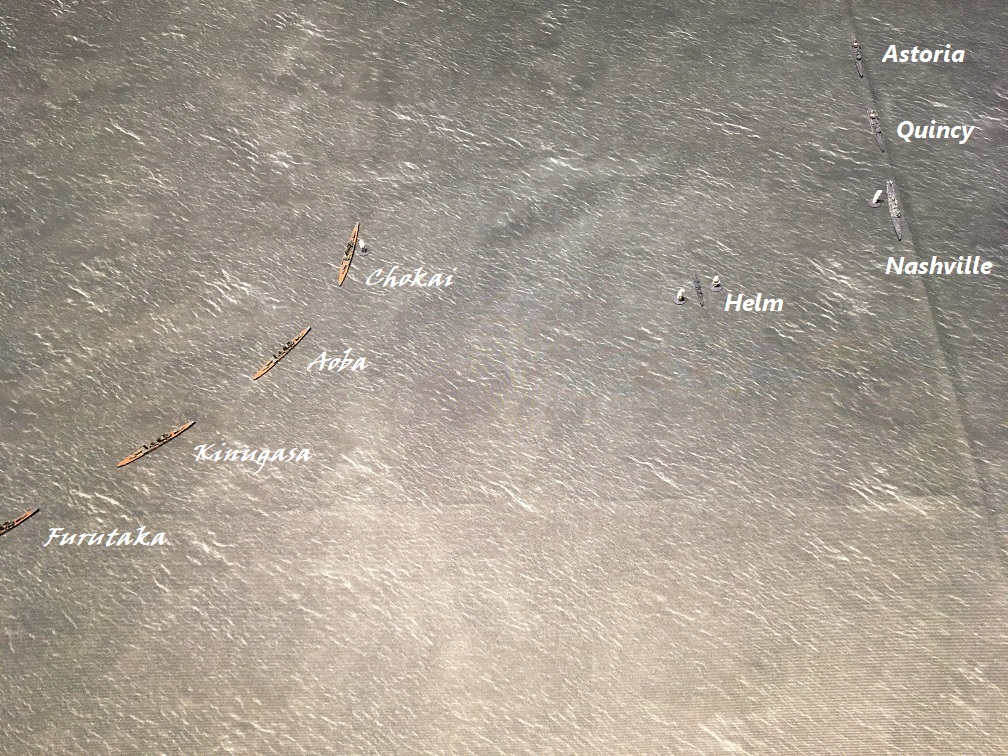
The American crews, stunned by the sudden attack, struggle to fight back. Lieutenant-Commander Carroll of Helm fails to give any orders to open fire, thinking the ships may be the Southern Force. Captain Craven aboard Nashville similarly believes the ships are the Southern Force.
Captain Moore aboard Quincy makes no such mistake: her 8-inch guns crash out a salvo at the Chōkai, inflicting two hits. Quincy’s five-inch guns hit Chōkai too.
Meanwhile, Chōkai’s torpedoes are streaking towards Quincy. Unfortunately for the American cruiser, Chōkai’s torpedoes are unerringly accurate [12, 12, 9 & 8: needing 10 or 12 to hit]. Two torpedo hits shatter Quincy, tearing huge holes in her hull, knocking out all power and dooming the American ship.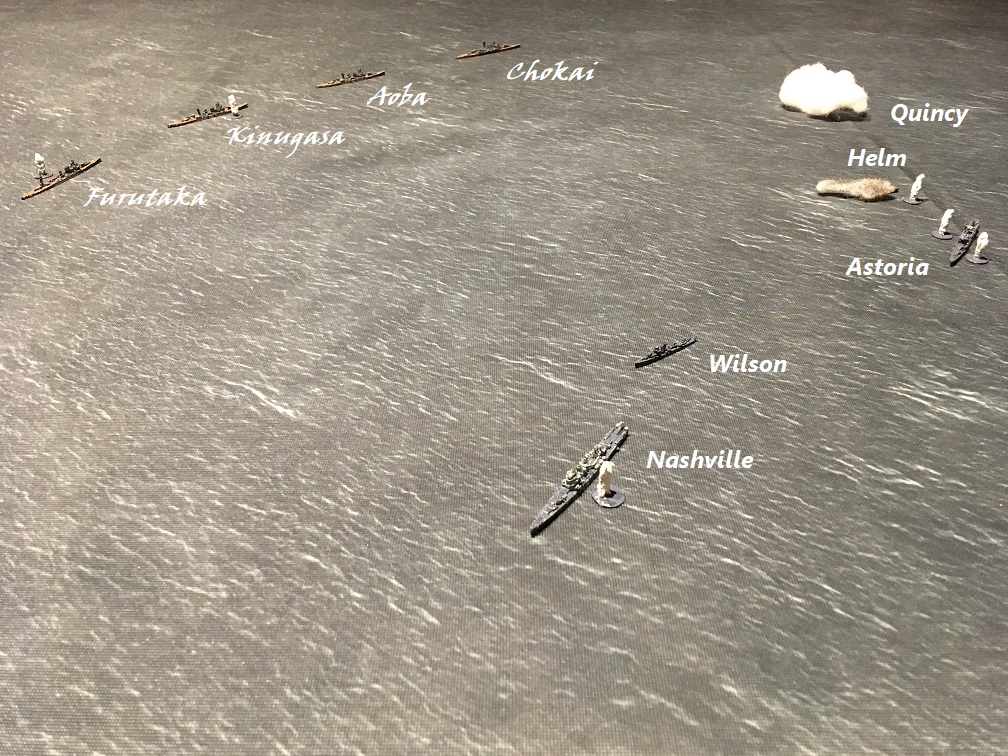
The American officers wake up to what is really happening. Nashville turns towards the Japanese at full speed, with the destroyer Wilson forming up behind her. Astoria swerves to avoid the wrecked Quincy, before looping round well behind Nashville.
Mikawa leads his cruisers northward at high speed. Chōkai has lost sight of the remaining American cruisers, with Astoria hidden behind smoke from the burning destroyer Helm, so Chōkai fires an 8-inch salvo at the Helm scoring another two hits on the doomed destroyer. Aoba, astern of Chōkai, spots the Astoria and opens fire on the American heavy cruiser. Her shooting continues to be poor, scoring just one hit. She also launches her four starboard
torpedoes at the Astoria. The Kinugasa also fires at the Astoria with a blistering salvo that scores four hits on the American cruiser. At the same time, she fires four torpedoes from her starboard tubes at the Nashville.
Finally, Furutaka opens fire at the Nashville, scoring three hits on the already wounded American light cruiser.Neither the Nashville nor the Astoria is out of the fight yet. The Japanese failure to overwhelm the Northern Force with their opening attack gives the American crews a chance to fight back.
Nashville opens fire at the Furutaka. Her 6-inch guns are at long range, but still succeed in scoring two hits on the Japanese cruiser, damaging one of Furutaka’s boiler rooms and knocking out one of her 8-inch turrets. Captain Greenman of the Astoria, meanwhile, has opened fire on the Kinugasa, scoring a punishing five hits on the previously undamaged heavy cruiser, damaging an engine room and knocking out an 8-inch turret.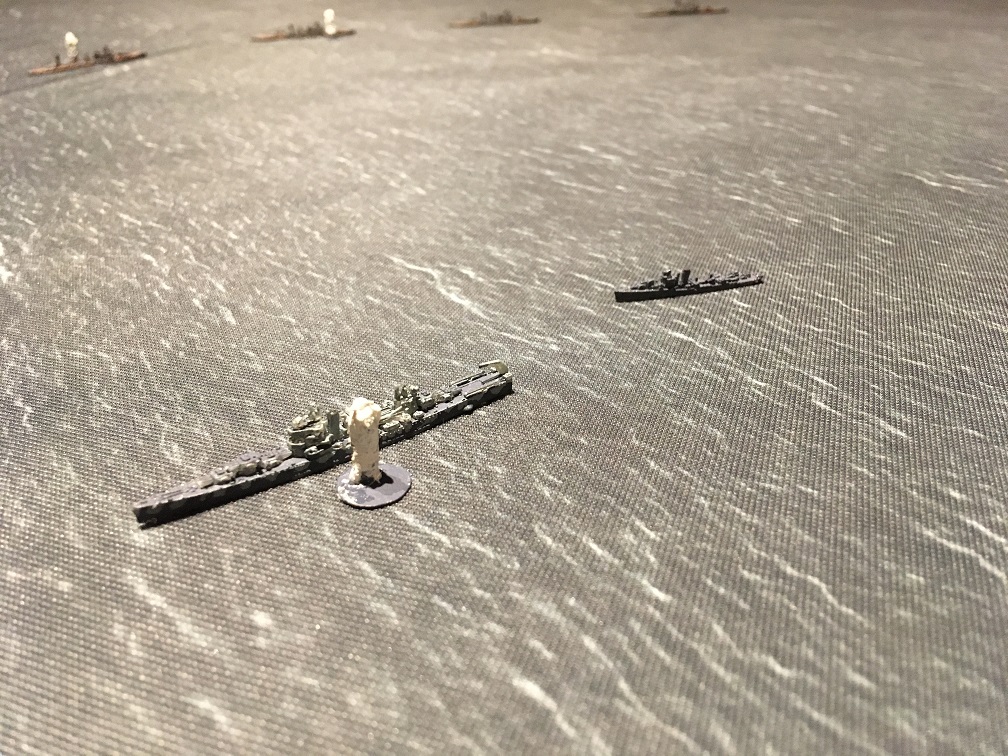
Aboard the destroyer Wilson, astern of the Nashville, Lieutenant-Commander Price orders his crew to fire four of her starboard torpedoes at the fourth Japanese cruiser (Furutaka).The Astoria’s luck now runs out as she is hit by torpedoes from both Aoba and Kinugasa, which cause enough damage to doom her to share the fate of her sister Quincy. Nashville escapes from Furutaka’s torpedoes without damage. The Japanese torpedoes are not the only ones in the water: Furutaka is hit by one of the torpedoes fired by the Wilson and seriously damaged.
Mikawa’s force is now in trouble. Of the five heavy cruisers, Kako has been sunk and only Aoba is undamaged. Worse, the ships are 100s of miles from safety in Rabaul and the damage to Furutaka and Kinugasa means the ships won’t get far from Guadalcanal before daylight. With American carriers known to be operating in the area, Mikawa orders an immediate
withdrawal. Attacking the transports can wait for another day. The Chōkai and Aoba turn away to the north-west, followed by the Furutaka and Kinugasa as their crews battle to control the damage aboard their ships.With his own ship damaged, the Quincy sunk, the Astoria sinking, and numerous Japanese ships still in action, Captain Craven of the Nashville decides to withdraw his damaged ship towards the transports and turns away to the south-east. The destroyer Wilson turns back to assist the burning Astoria.
Battle: third phase
Yep, still dark. 😉
The retiring Japanese cruisers approach in two columns. Chōkai and Aoba lead the damaged Kinugasa and Furutaka. Several thousand yards to the south, the Tenryu leads the Yubari.
As the Japanese cruisers retire, they cross the path of the picket destroyer Ralph Talbot, still patrolling to the west of Savo Island. The Ralph Talbot spots the Japanese cruisers coming straight at her before they spot her. Her captain, Lieutenant-Commander Callahan immediately turns the destroyer away from the path of the Japanese.
The Ralph Talbot circles round to starboard to the west to position herself for a torpedo attack. However the cruisers Chōkai and Aoba have now spotted Ralph Talbot. The American destroyer fires her torpedoes at the leading Japanese cruiser. Almost simultaneously, Chōkai has fired her torpedoes at Ralph Talbot. The Japanese flagship now opens fire. She pulverizes the destroyer with a devastatingly accurate salvo, scoring seven eight-inch hits. The Ralph Talbot’s torpedoes miss [2, 5, 8 and 11, needing a 10 or 12 to hit.]The Japanese escape back to Rabaul and Kavieng. An attack by the American submarine S44 on the Japanese cruisers as they withdraw is unsuccessful.
14/08/2022 at 00:34 #176900 kyoteblueParticipant
Thank you, this is what I wish I was running, but my players are vacationing in Canada.
14/08/2022 at 09:09 #176904 deephorseParticipant
Thanks for this. It’s reminded me that I played this scenario in a computer game maybe 30+ years ago. The name of the software escapes me, but what has stuck is the use of searchlights to spot and identify targets. Unlike a game with models on a table, you couldn’t see anything unless a searchlight hit upon a ship, or the ships got very close to each other. Made for a very tense experience.
Play is what makes life bearable - Michael Rosen
14/08/2022 at 12:01 #176905 Mike HeaddenParticipant
Nice write up Admiral Hawke! Your Allies seem to be doing marginally better than their historical counterparts.
@deephorse – I had that game, or at least one very similar, and remember well the agonising decision whether use searchlights, which gave away your own position but allowed you to hammer one of the enemy, or to fire star shell which only briefly revealed the enemy but kept your own ship better concealed.There are 100 types of people in the world, those who understand binary and those who can work from incomplete data
21/08/2022 at 17:42 #177184AdmiralHawkeParticipantThank you for all the comments. 🙂
Yes, searchlights cut both ways. In this game, the Japanese made the mistake of not using them enough.
It’s fascinating reading accounts of Jutland and how much more sophisticated the German searchlights were than the British.
@deephorse. That game sounds great. It is rather harder to recreate the effect of searchlights in a tabletop game than in a computer game. 😉
@ithoriel / Mike Headden. Yes, sinking Kako puts the Allies in this game slightly ahead, though offset by both Chicago and Bagley being sunk. (Kako was sunk, of course, but not until she was on her way back to Kavieng after the battle). I note that wargames rules often tend to inflict more damage than historical reality, probably in the interest of a more lively game.22/08/2022 at 15:14 #177196 Darkest Star GamesParticipant
I note that wargames rules often tend to inflict more damage than historical reality, probably in the interest of a more lively game.
Indeed, most table top rules tend to be extremely casualty high in order to get definite results. They also cater more towards “winning” that particular game rather than a long view of whatever conflict.
It’s hard to believe that after that fist game the Americans are ahead, but that is short view and not long view. I went down a bit of a rabbit hole reading historical accounts. I hope the Americans can get out of their surprise and fight on a more equal level.
"I saw this in a cartoon once, but I'm pretty sure I can do it..."
16/10/2022 at 21:11 #179154AdmiralHawkeParticipantApologies that it took me a while to complete the after-action report. I should, perhaps, have broken it into several posts.
The overall outcome was similar to history, but with both sides taking more damage than historically.
– The Allies lost four cruisers Astoria, Quincy, Canberra and Chicago, which matches history (though Vincennes rather than Chicago was sunk historically), but also three destroyers, Bagley, Helm and Ralph Talbot (compared with none historically).
– The Japanese lost one cruiser sunk, Kako (which, historically, was sunk while returning after the battle by the US submarine S44), but also suffered heavy damage to the cruisers Furutaka and Kinugasa (compared with only light damage to Chōkai historically).
So a tactical Japanese victory, but an Allied strategic victory because the Allied covering forces did enough to prevent Mikawa from attacking the vulnerable transports.It’s hard to fault Mikawa’s decision to turn away after engaging the northern covering force, rather than turning back towards the transport anchorage, given what he knew at the time (i.e. given that he didn’t know the US carriers had been withdrawn by Rear-Admiral Fletcher).
Crutchley’s cruisers of Task Force 62 had little chance once the Allies had missed the warnings of Mikawa’s approach.
-
AuthorPosts
- You must be logged in to reply to this topic.