Home › Forums › Terrain and Scenery › Jungle Scatter – How To
- This topic has 29 replies, 13 voices, and was last updated 2 years, 8 months ago by
 Angel Barracks.
-
AuthorPosts
-
14/07/2020 at 11:11 #140294
 Angel BarracksModerator
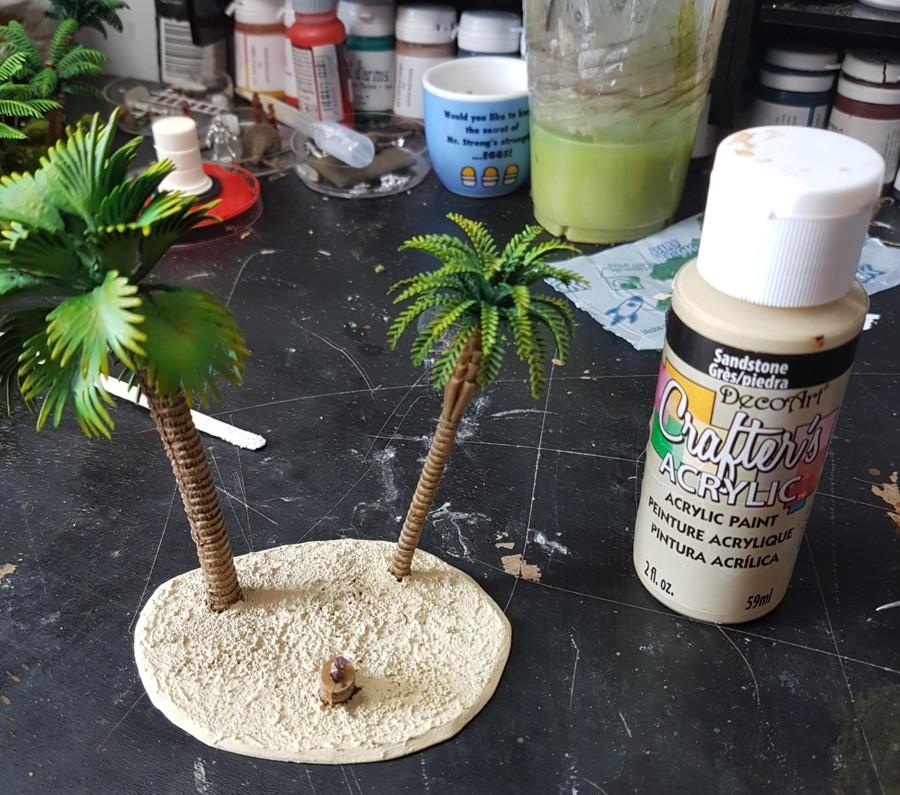
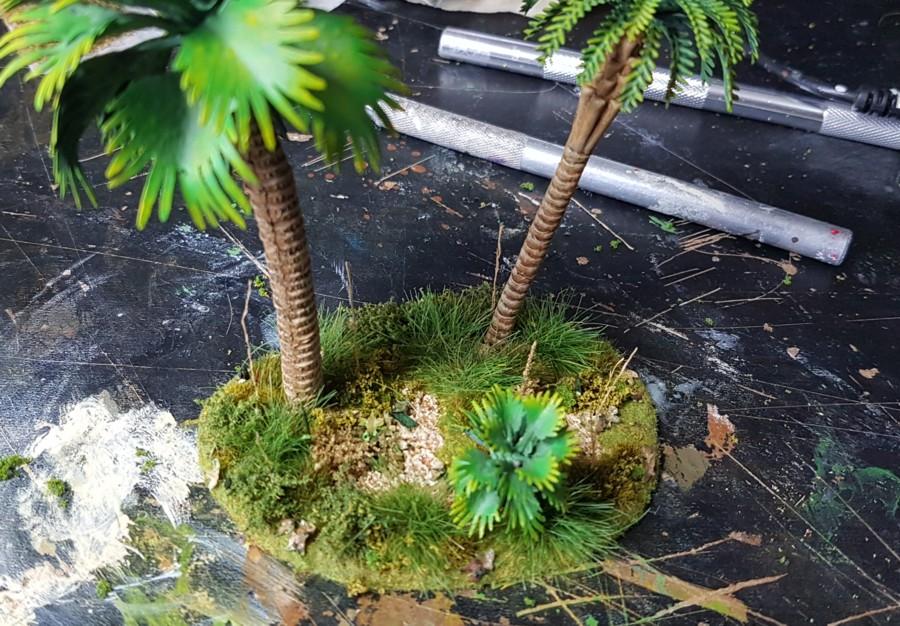
Over on FB someone asked for a how to on my jungle scatter.
So I will do a rough how to here.
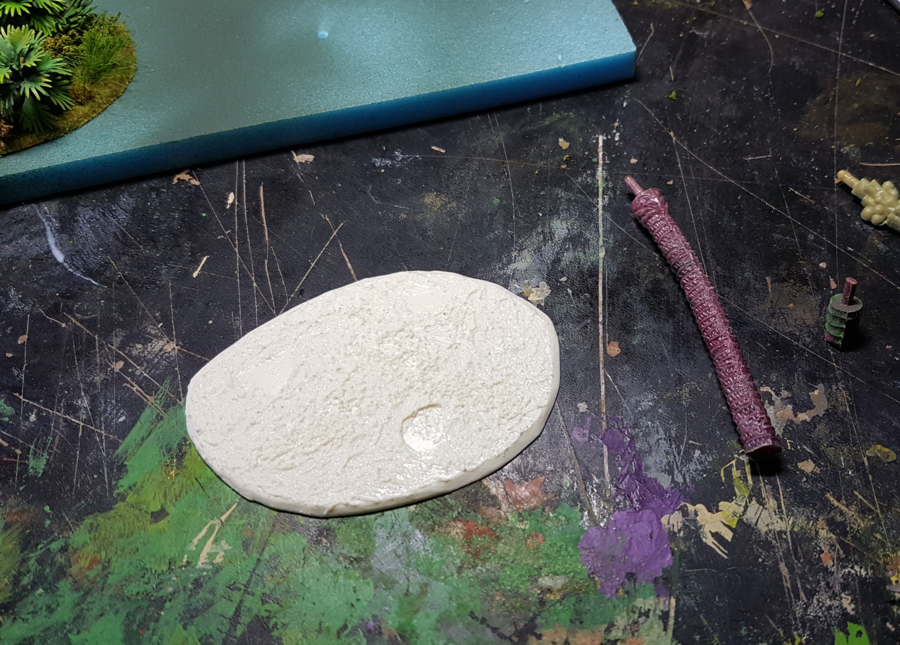
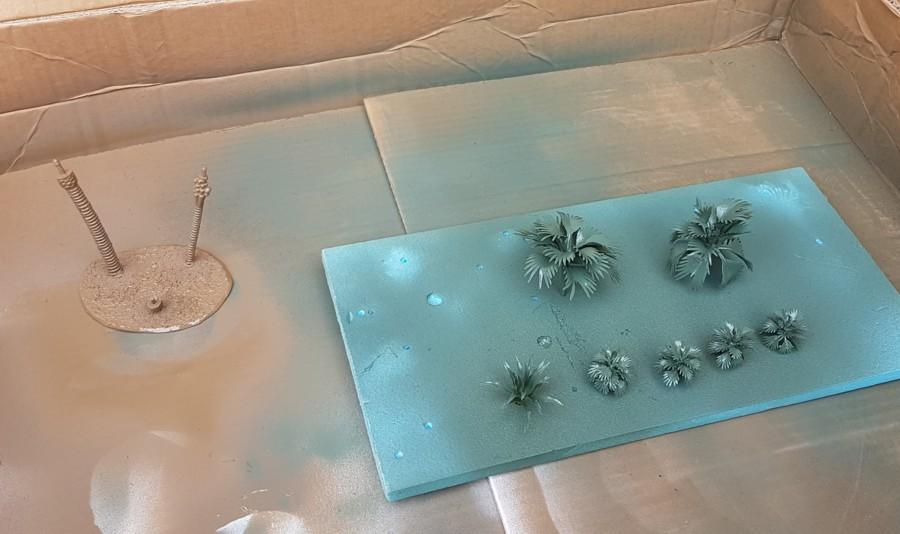
First off you need something to stick the stuff on.
I made a few shapes from plasticard and then smeared on some white pumice and went to the hassle of moulding them so I can cast ready textured bases.
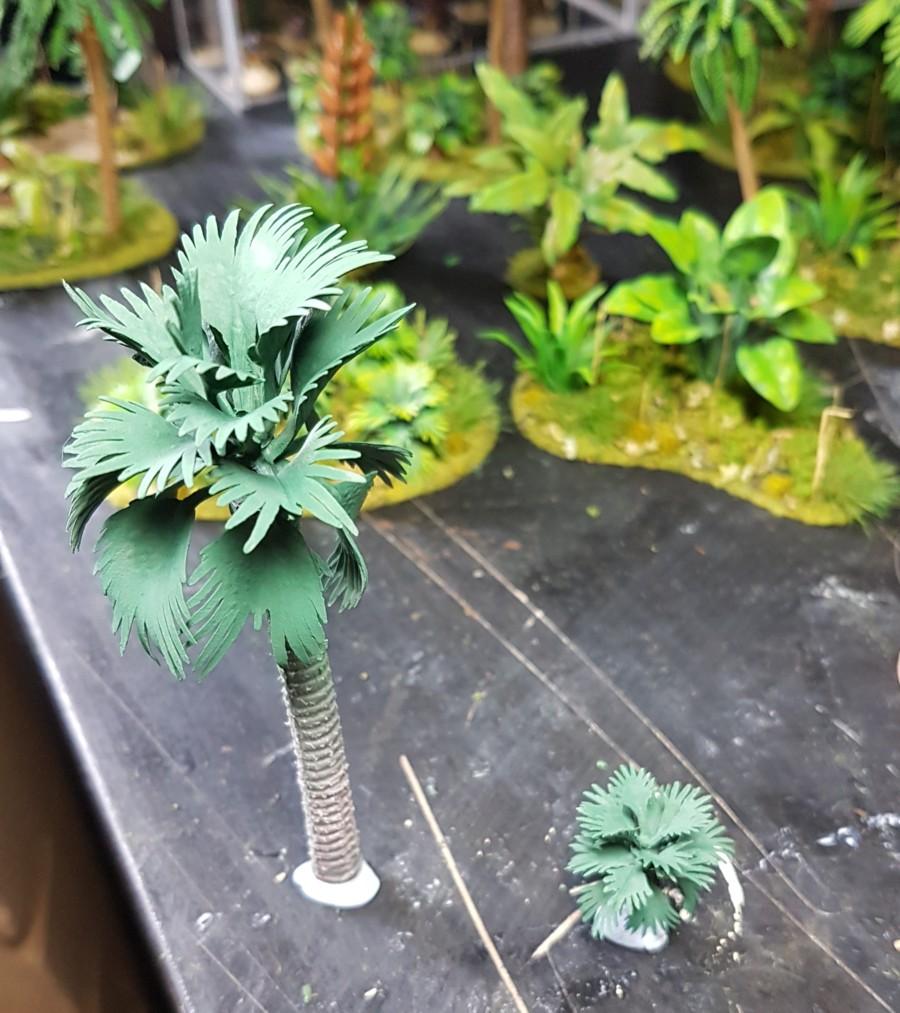
Though no reason why just plasticard originals will not work!I find that the cheap plastic trees I use have very obvious mould lines, so I rough them up a bit with a needle file.
The lines are still visible but they are less stark and straight.
For me this is enough.
When I made them, I left some untextured areas for the trunks to sit in.
Then I hot glue the trunks in place.
Hot glue is quick, easy and super sticky.
I have tried superglue and wood glue, hot glue is way better imo and a hot glue gun is cheap as chips.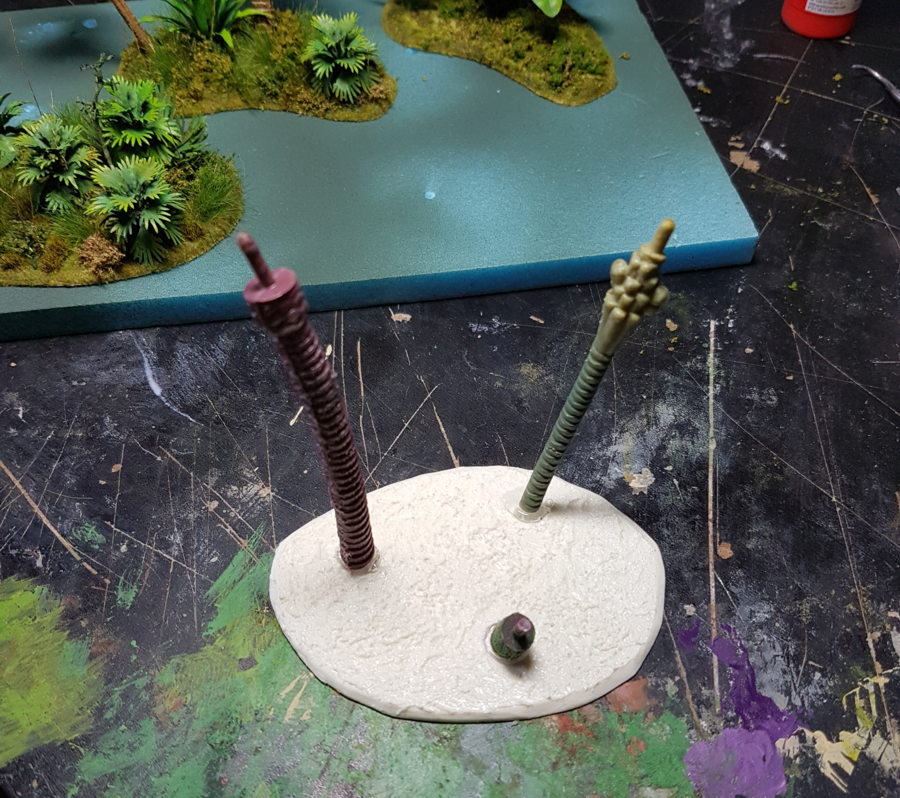
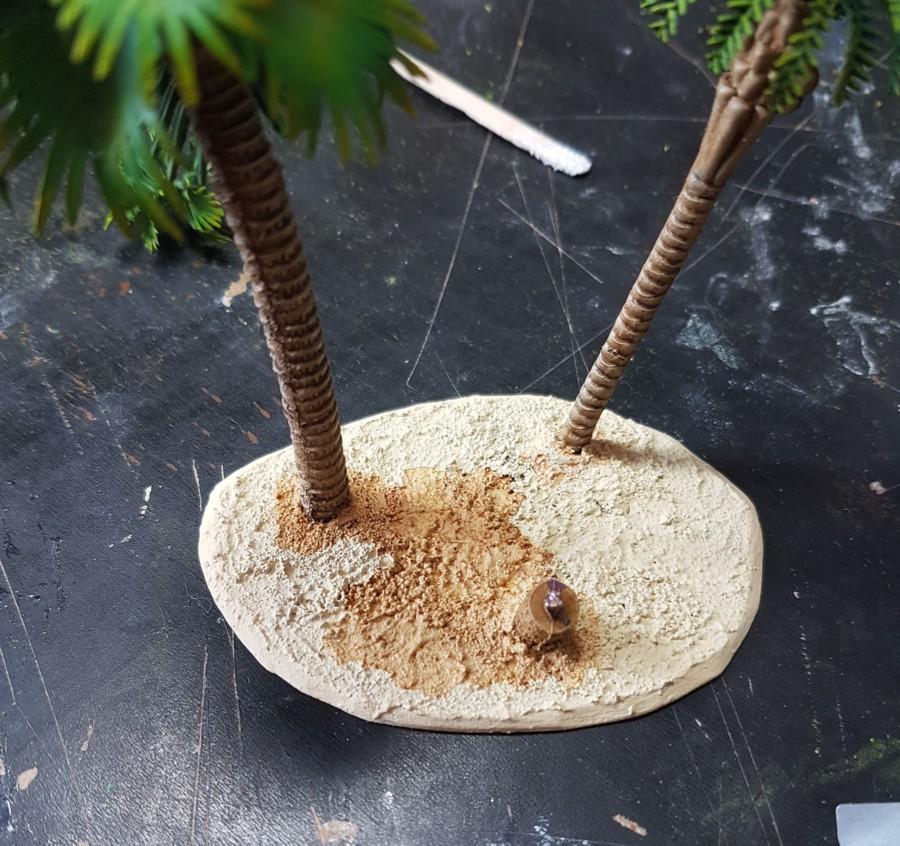
The hot glue can leave a ring of splodge:
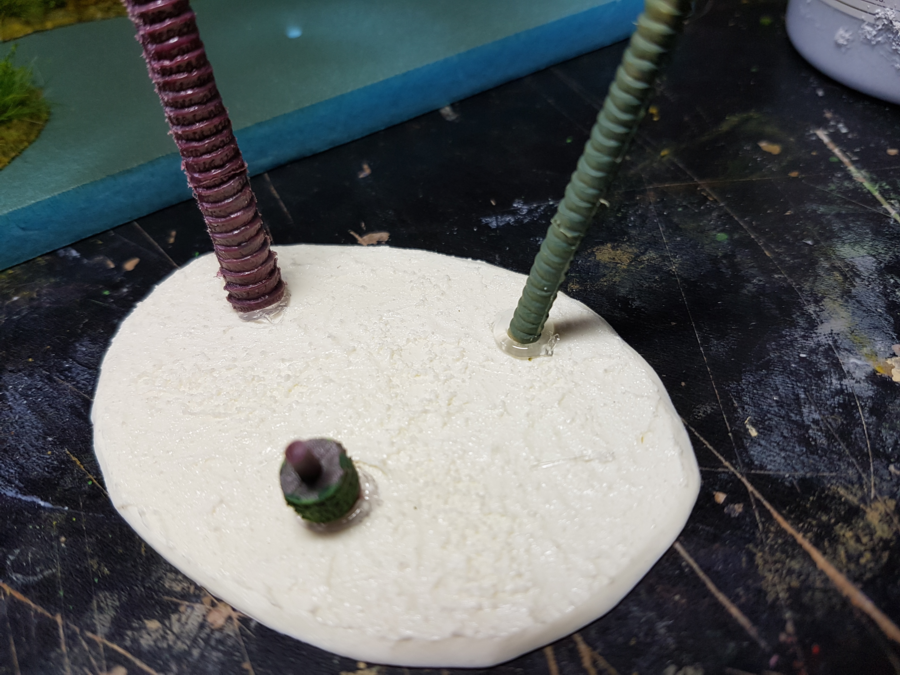
So once set, only a few seconds, I cover this up with white pumice (which is a sort of glue/very fine sand mix)
I apply this with a coffee stirrer stick.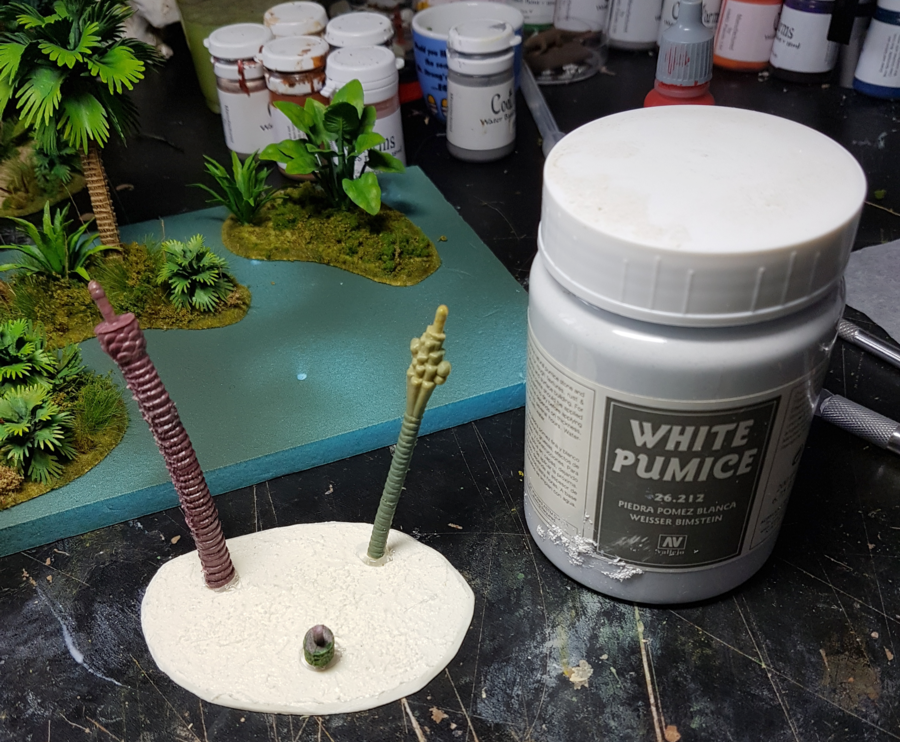
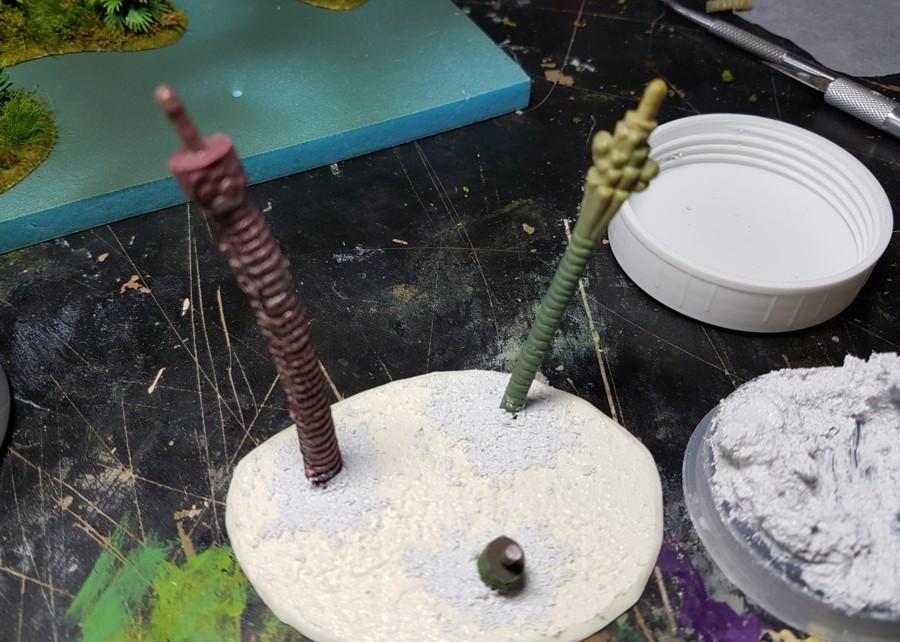
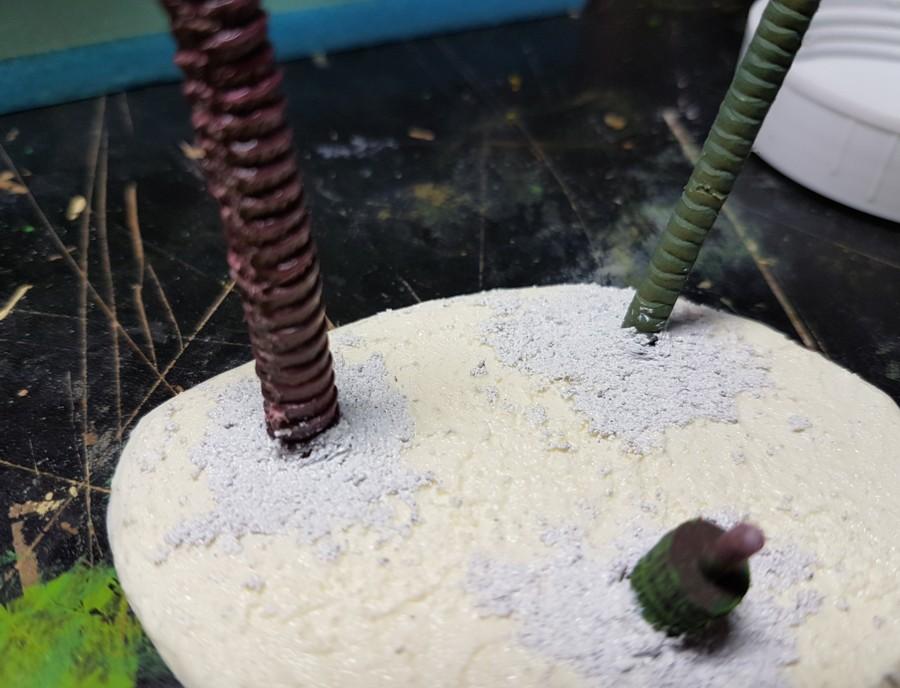
It does not need to be neat as there will be all manner of leafage and tuftage covering it.
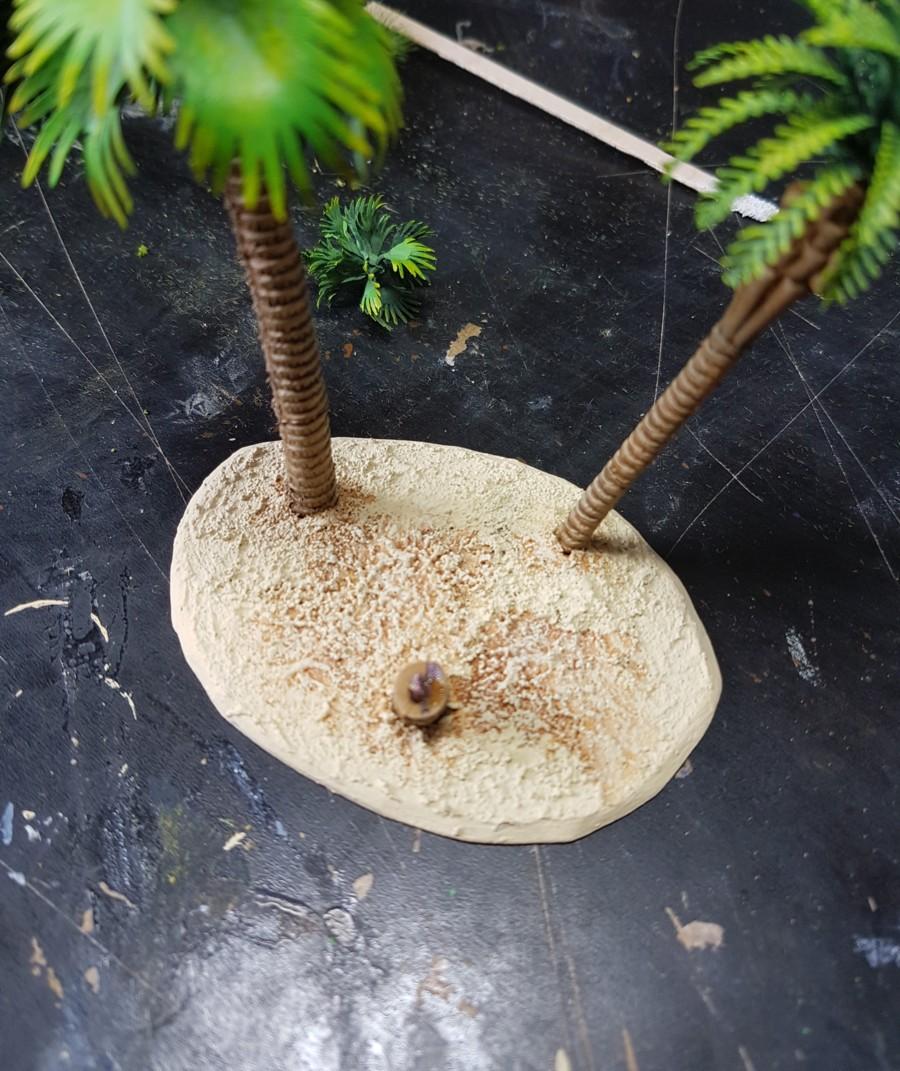
Once this is dry I will show you what I do next…
 14/07/2020 at 16:54 #140320
 PatriceParticipant
Superb!

Although I’m surprised that you glue the trees on. With such large bases it may be a problem for storage? When I use large bases I tend to let the trees loose, with a pin under the trunk.
http://www.argad-bzh.fr/argad/en.html
https://www.anargader.net/14/07/2020 at 20:55 #140336 ian pillayParticipant
Looking forward to part 2
Tally-Ho! Check out my blog at…..
http://steelcitywargaming.wordpress.com/14/07/2020 at 23:32 #140346 BravoSixParticipant
Oh that’s really nice work AB. I should link to this thread for some of the Vietnam wargamers who frequent my joint.
-Todd
Fields of Fire:Reloaded - The Online Community for Vietnam Wargaming
15/07/2020 at 00:29 #140349Nathaniel Weber
ParticipantNicely done. I enjoy those resin bases especially.
15/07/2020 at 03:32 #140355 OldBen1Participant
Ooo this looks good (pulls up a lawn chair).
15/07/2020 at 03:33 #140356OldBen1Participant6 feet away of course!
15/07/2020 at 08:10 #140365Angel BarracksModeratorAlthough I’m surprised that you glue the trees on. With such large bases it may be a problem for storage? When I use large bases I tend to let the trees loose, with a pin under the trunk.
1: Nah, they are only 15mm so don’t take up that much space, plus I only play 1 scale 1 genre so don’t have much stuff to store anyway.
2: Eeeeek what about the gaps/cracks between the trunk and ground, eeeek😀
Yikes, the pressure is on!
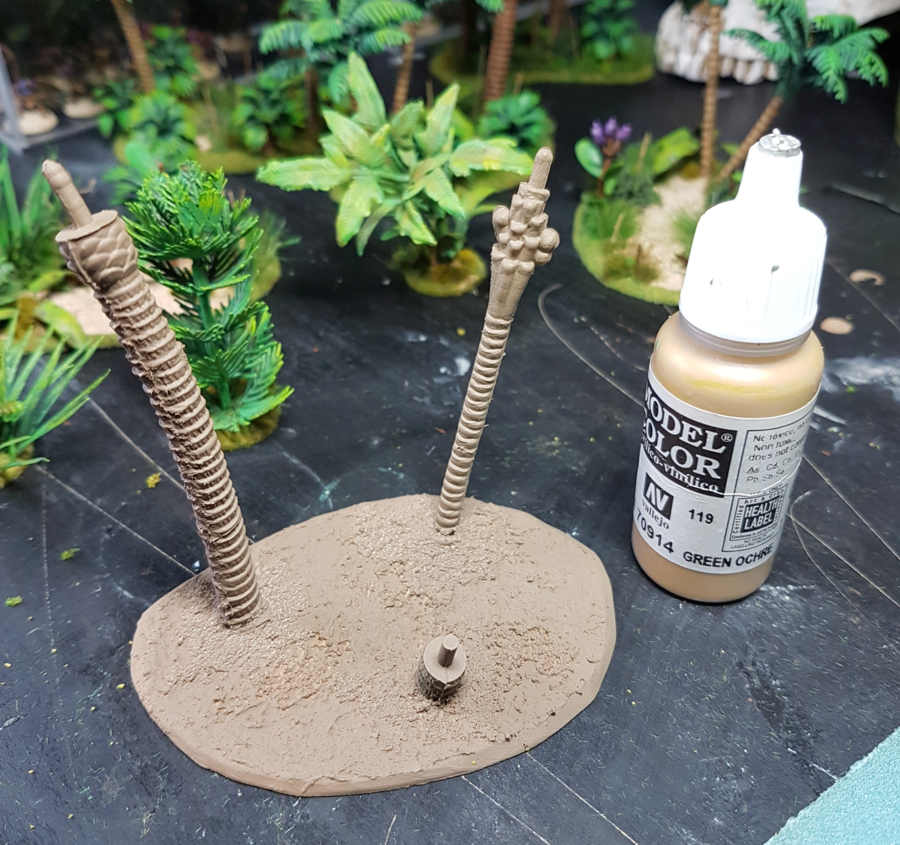
15/07/2020 at 09:21 #140371Angel BarracksModeratorQuick bit of priming.
Humbrol Dark Brown no29. My go to primer for figures and buildings and pretty much everything.
Humbrol Dark Green no30. My default green primer for leafy crud.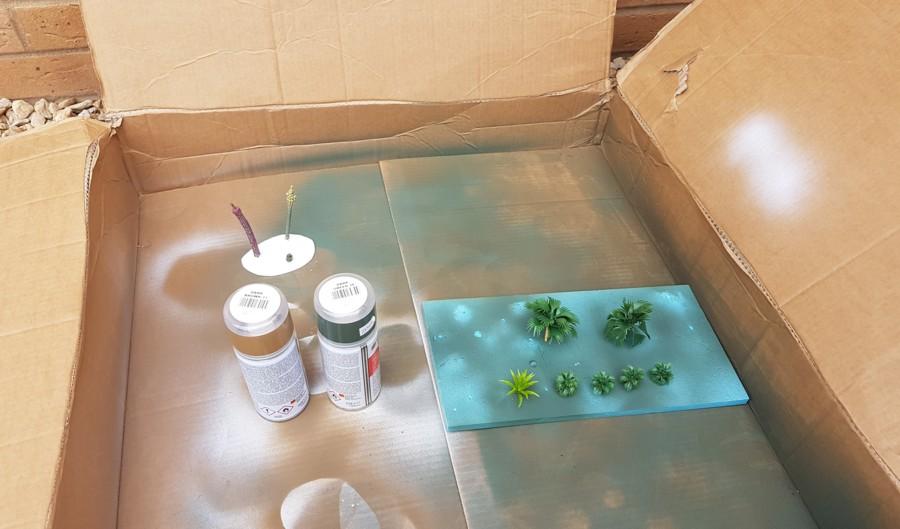
I tend not to worry about the underside of the smaller bushes as that cant be seen once on the tabletop.
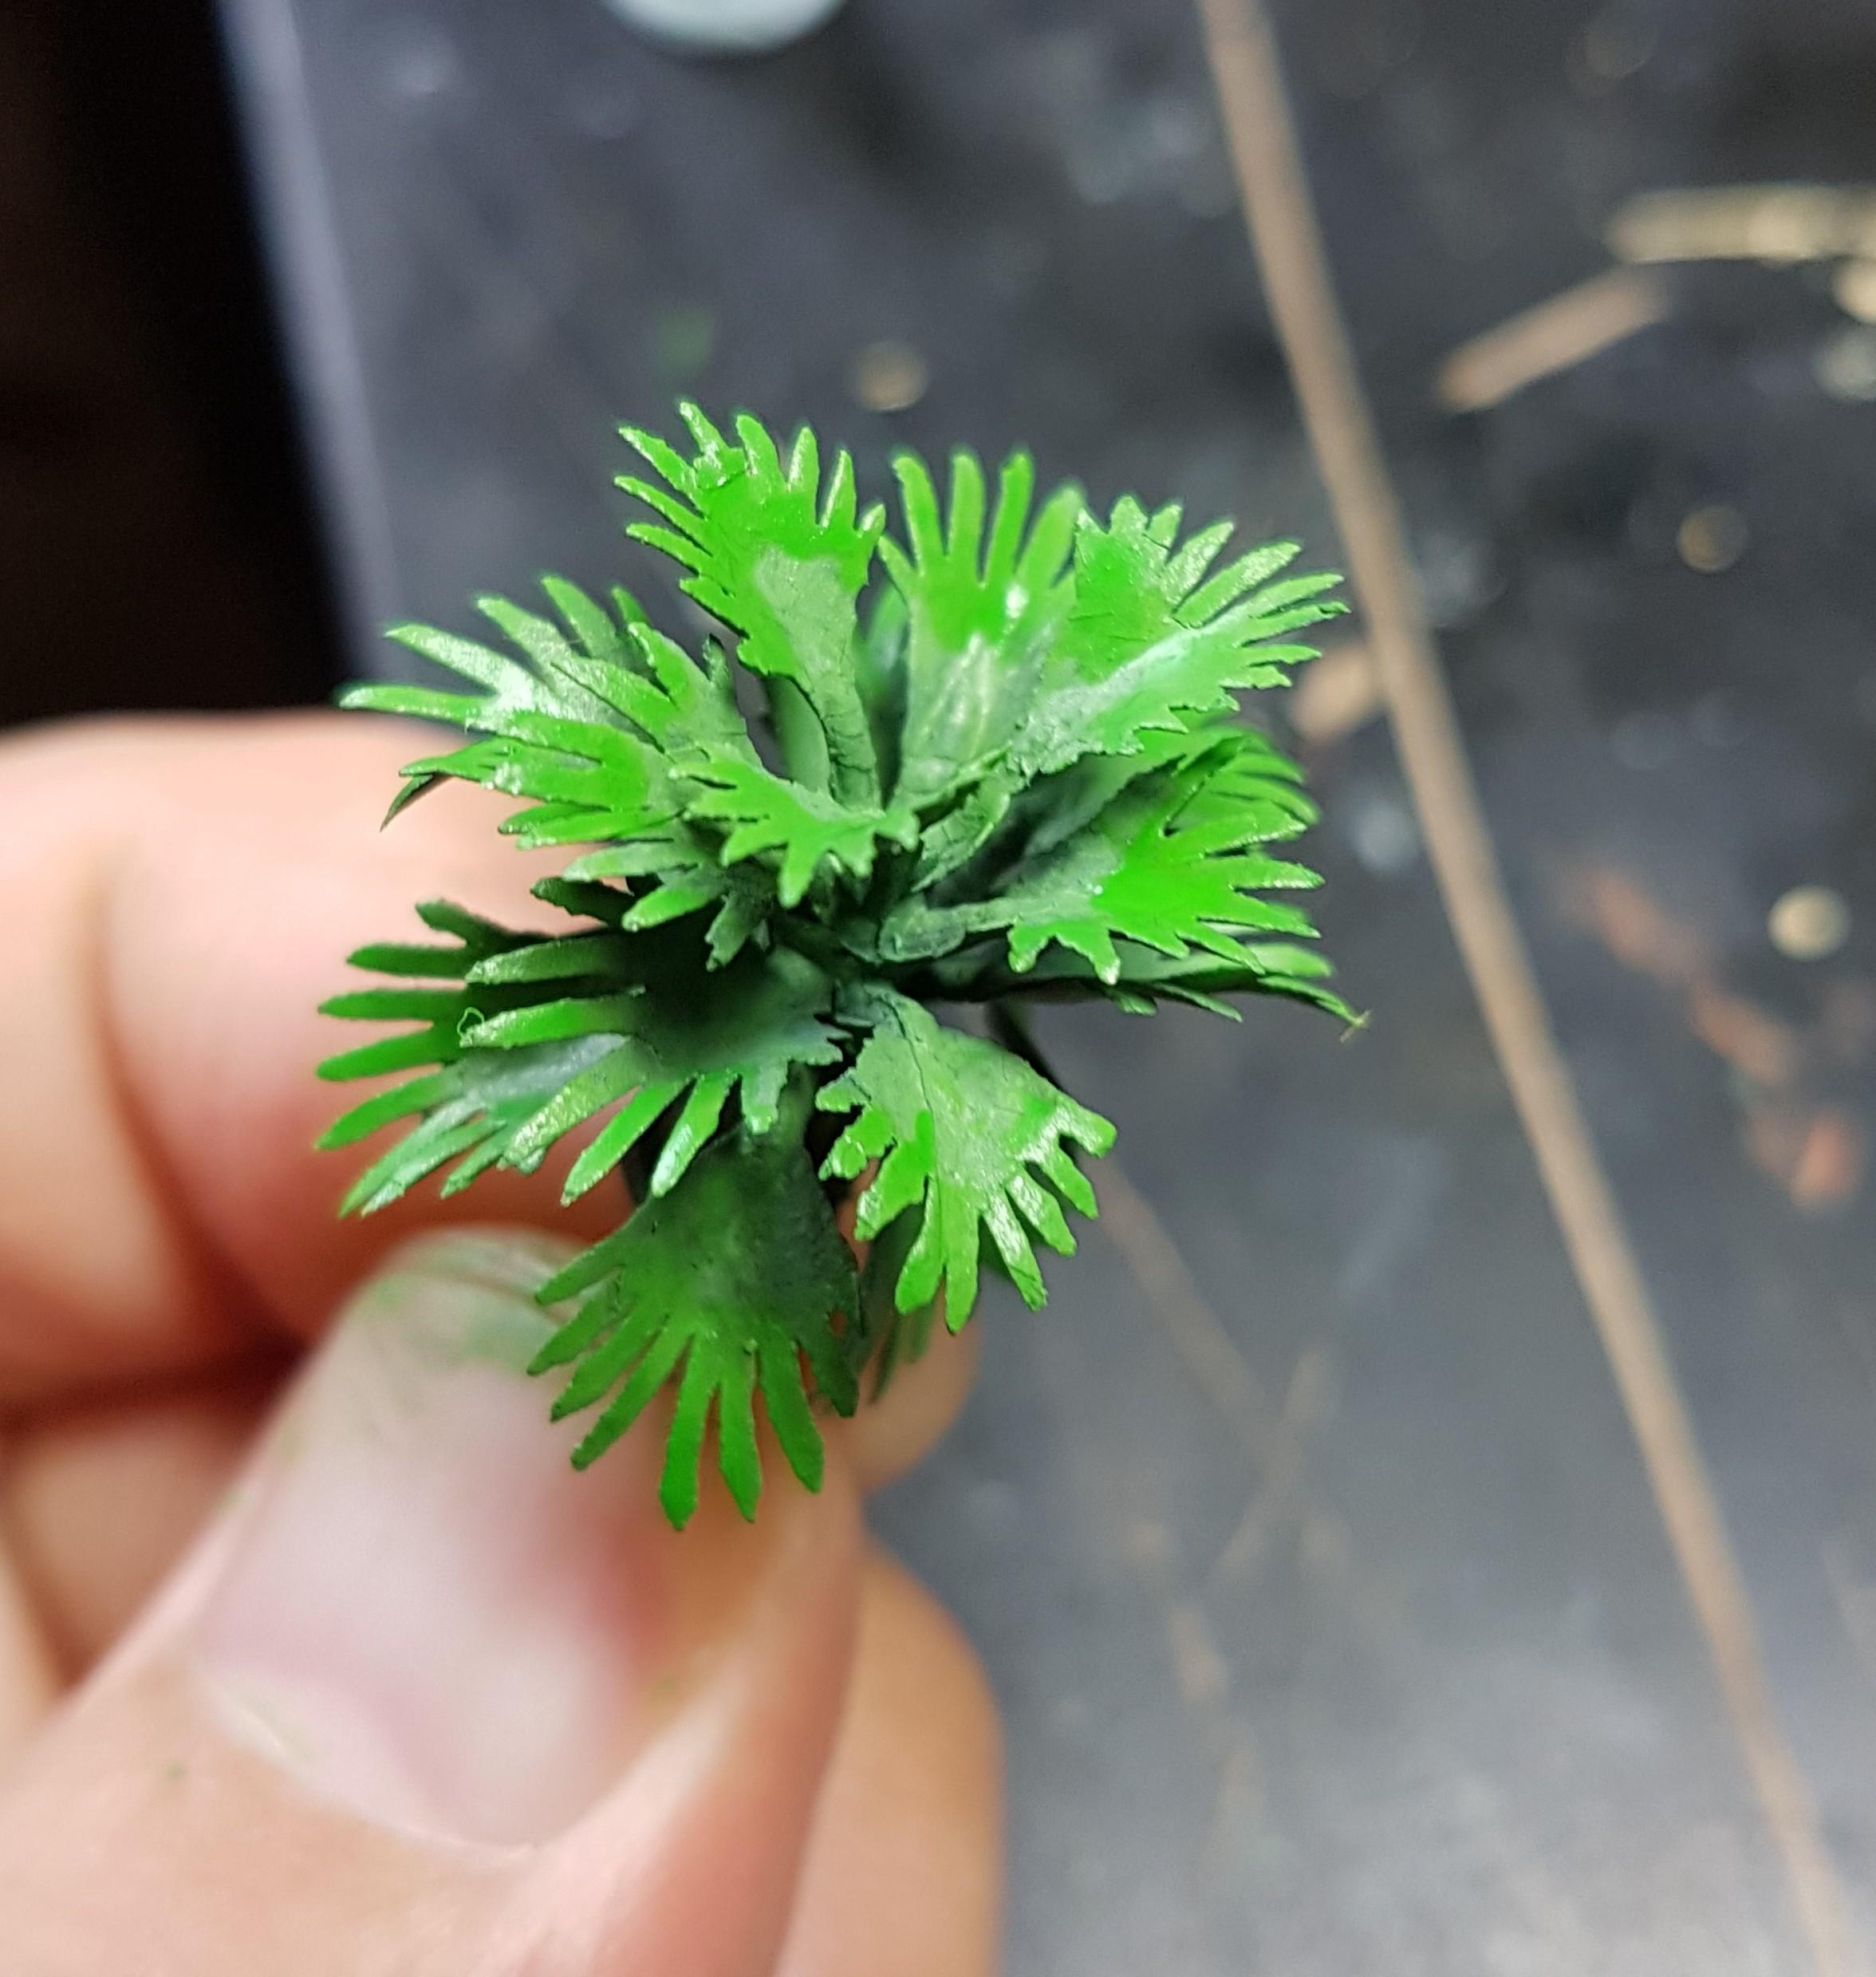
The frondy tree bits however I do prime the underside as these could possibly be seen from the tabletop…15/07/2020 at 12:50 #140383MemberThanks for the tutorial. That makes the painting on the leaves very impressive. I thought it was wondering how you managed to find plastic plants that match colors.
15/07/2020 at 13:31 #140389Angel BarracksModeratorThanks, even if they were all the same colour I would paint them.
I find that as my figures are painted, and the buildings painted, and the rocks painted, in order to maintain a visual consistency, the plant must be painted too.so…
The trunks.
I slap on a slightly watered down green ochre.
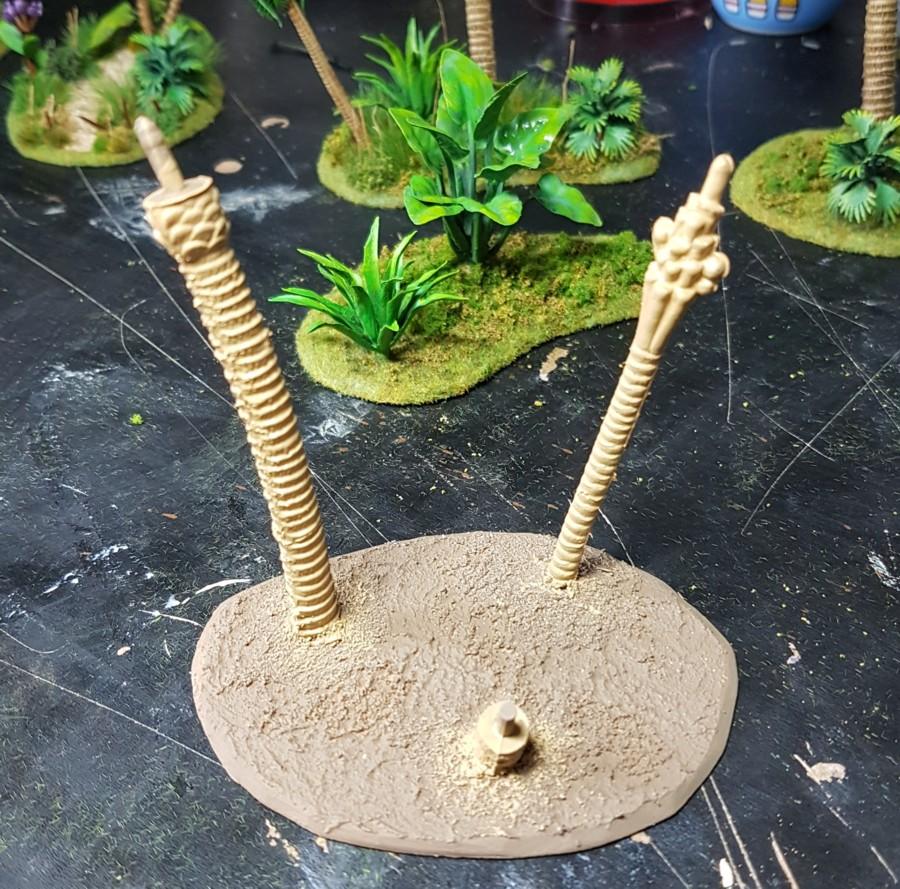
Then apply a wash all over of a medium brown.
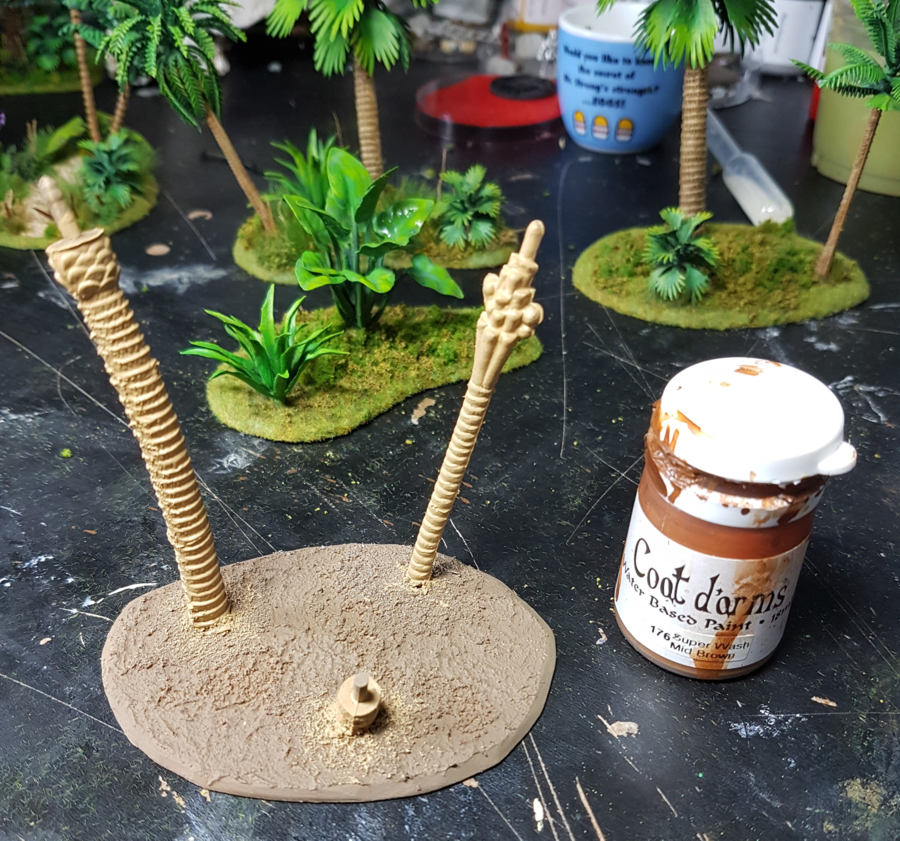

Then once dry, drybrush the original colour over it, this time neat.
Then once dry mix in a bit of white and do a quick drybrush in a few areas.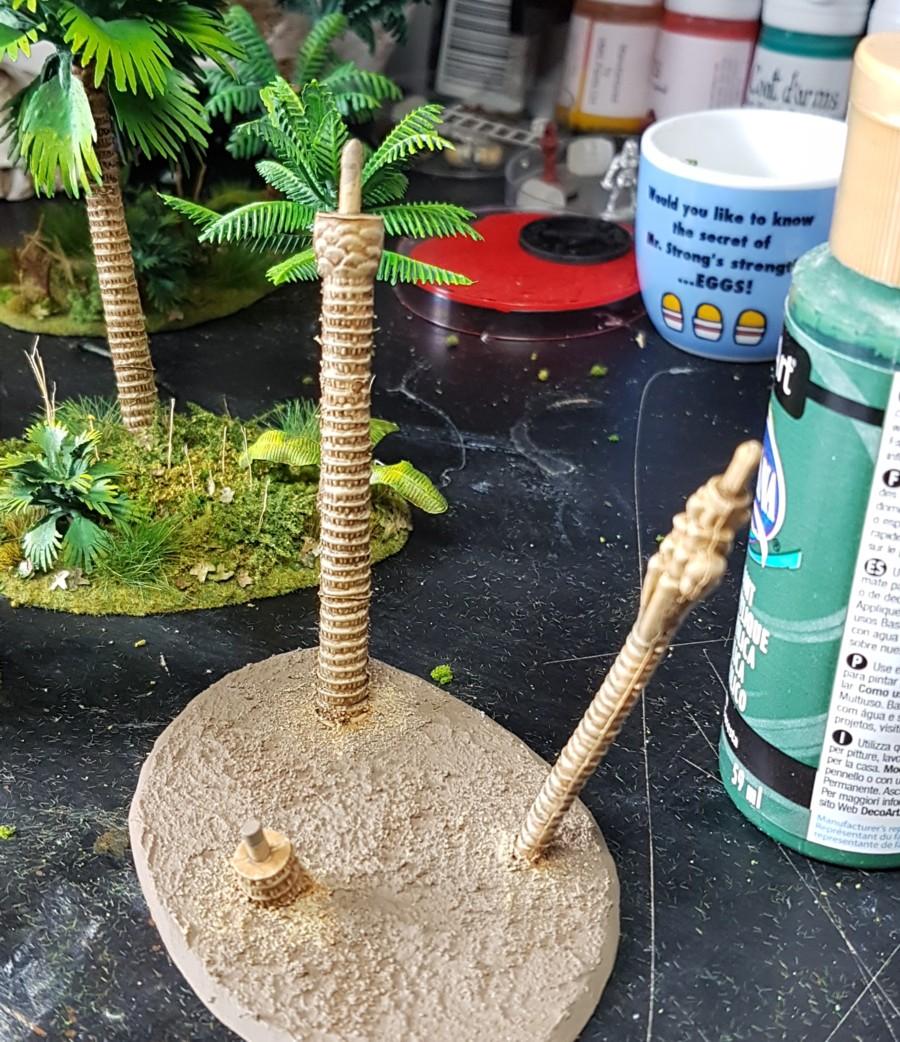
it is not amazing by any standards and to be fair I possibly could do more, but I find that when it is all done the trunks are fine as the eye is drawn to the more interesting green bits.
15/07/2020 at 14:59 #140397Angel BarracksModeratorRight then.
The plastic greenery.I use 3 main colours for the leaves.
Cheapo craft paint as the undercoat.
As well as being cheap, I find it is quite dry in that it soaks up other paints, so you can water down the other colours.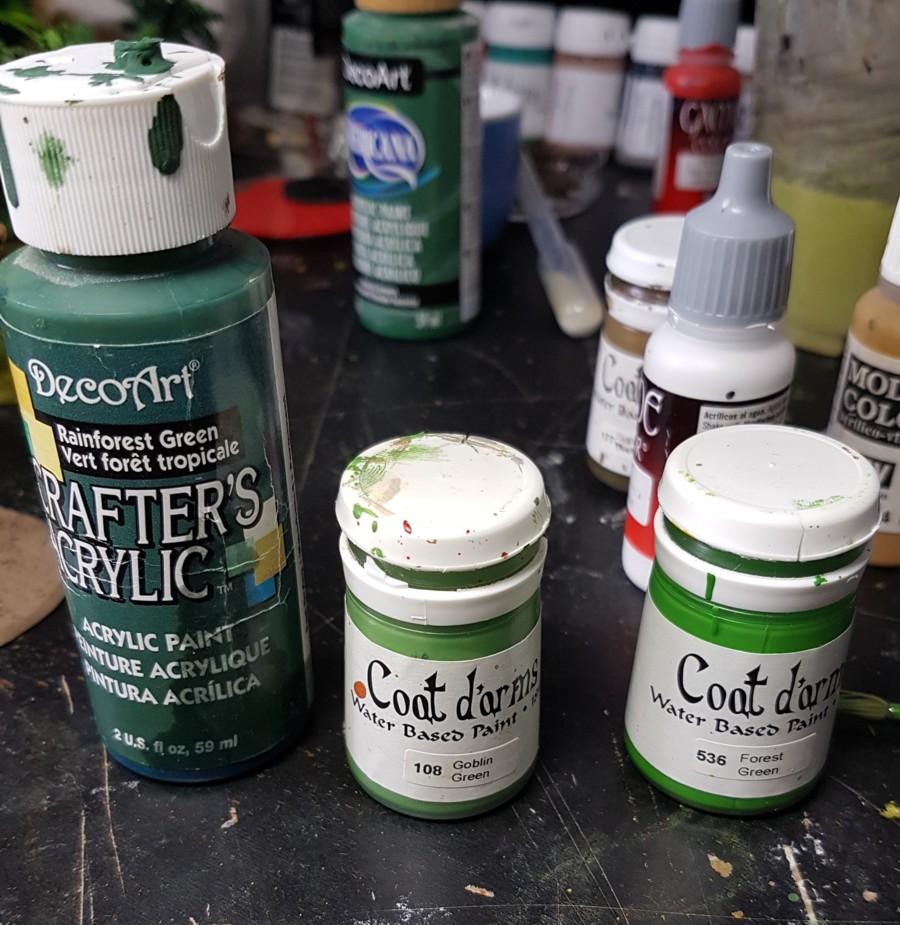
Slap the cheap craft paint all over.
Now I use an old trunk on which to hold the green, it fits as it is meant to and it is a nice shaft to grab hold of whilst you paint.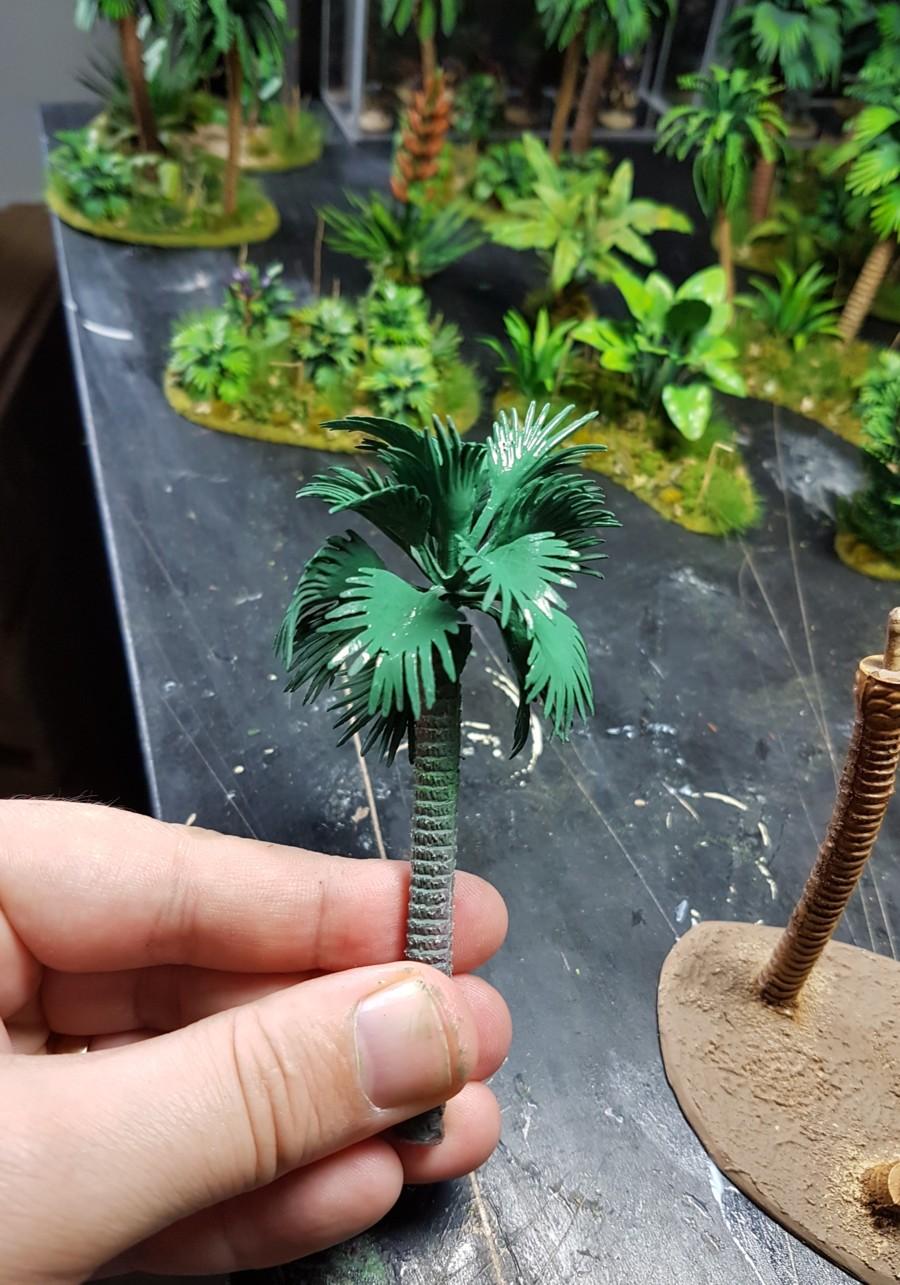
Get underneath a bit on the trees
Blob it onto blu tac and let dry
Then apply the duller less exciting Goblin Green all over, though this can be watered down which makes it easier to apply and easier to get the paint on the bendy front leaf ends.
Having to apply thicker paint on things that bend away from you can be annoying, so watering down helps.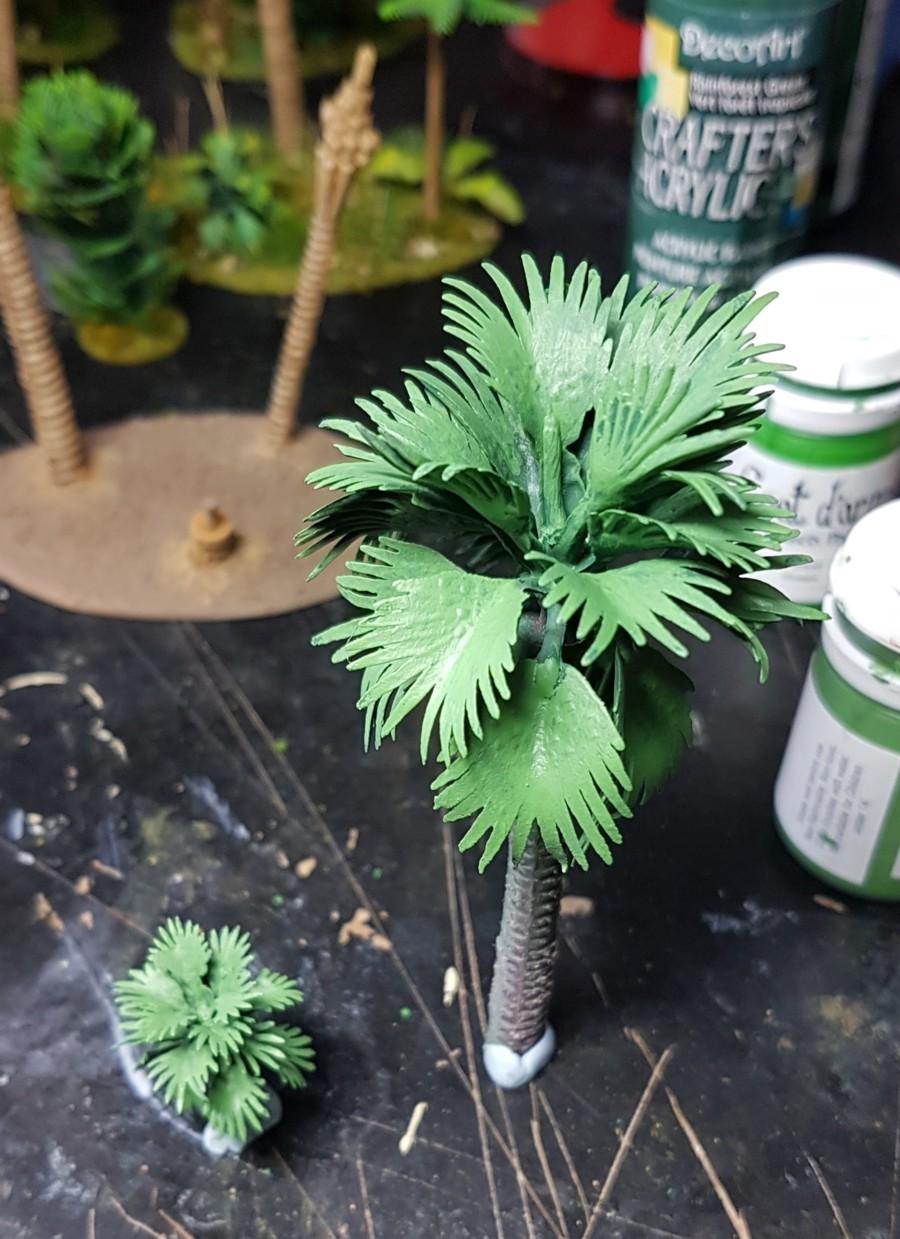
Again going underneath a bit, but dont stress it too much
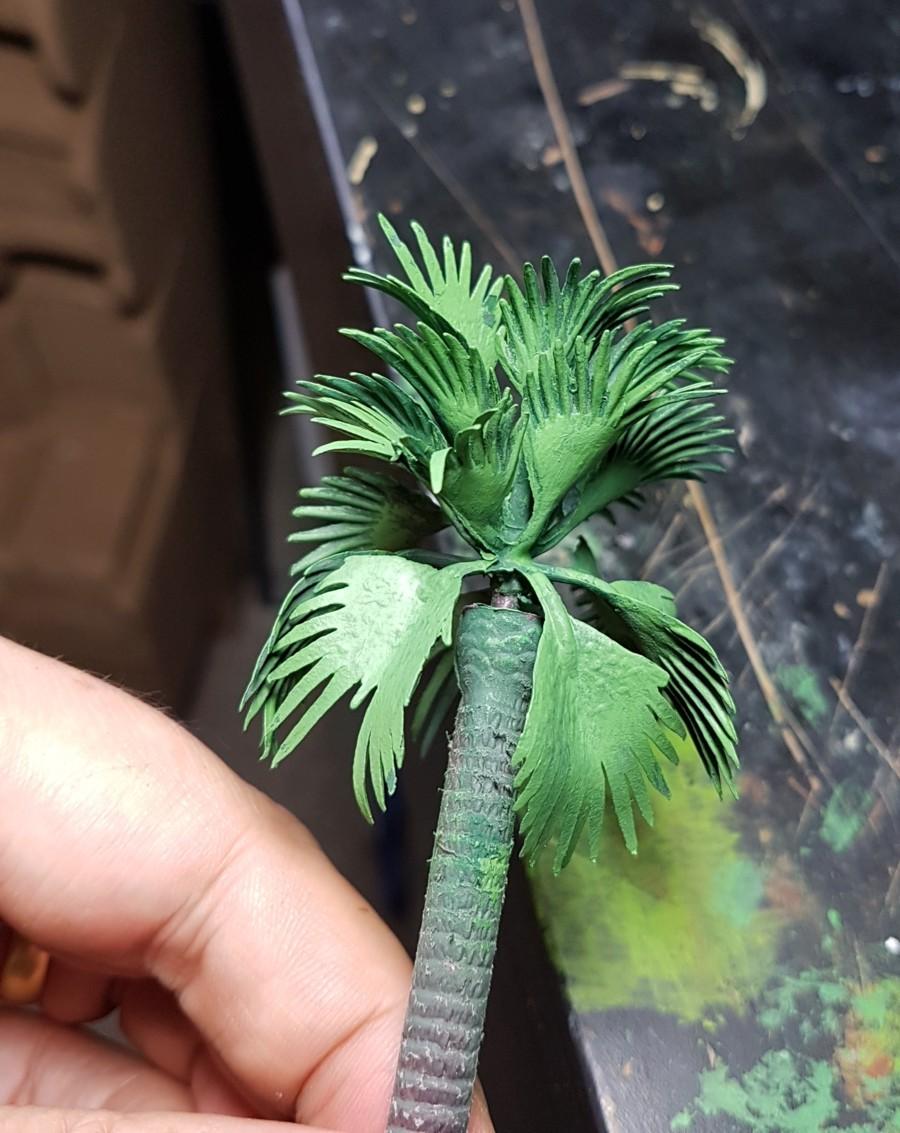
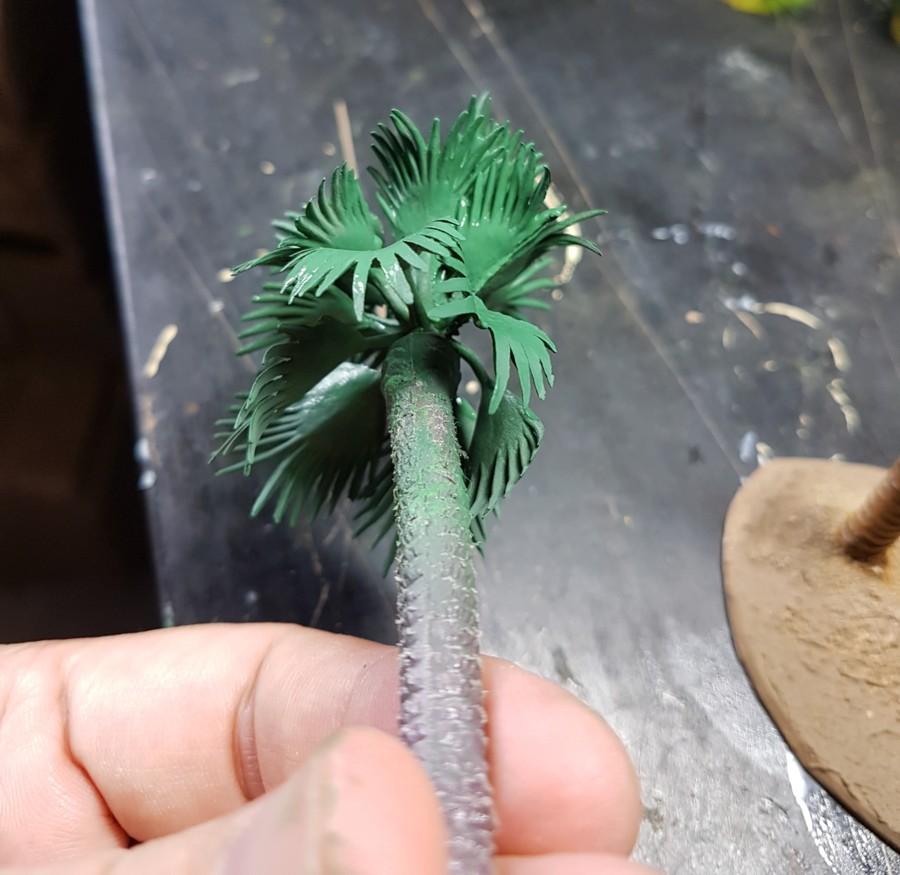
Then once dry we get the jazzier Forest Green and again watered down we apply to the outsides of the leaves, leaving the middle the goblin green.
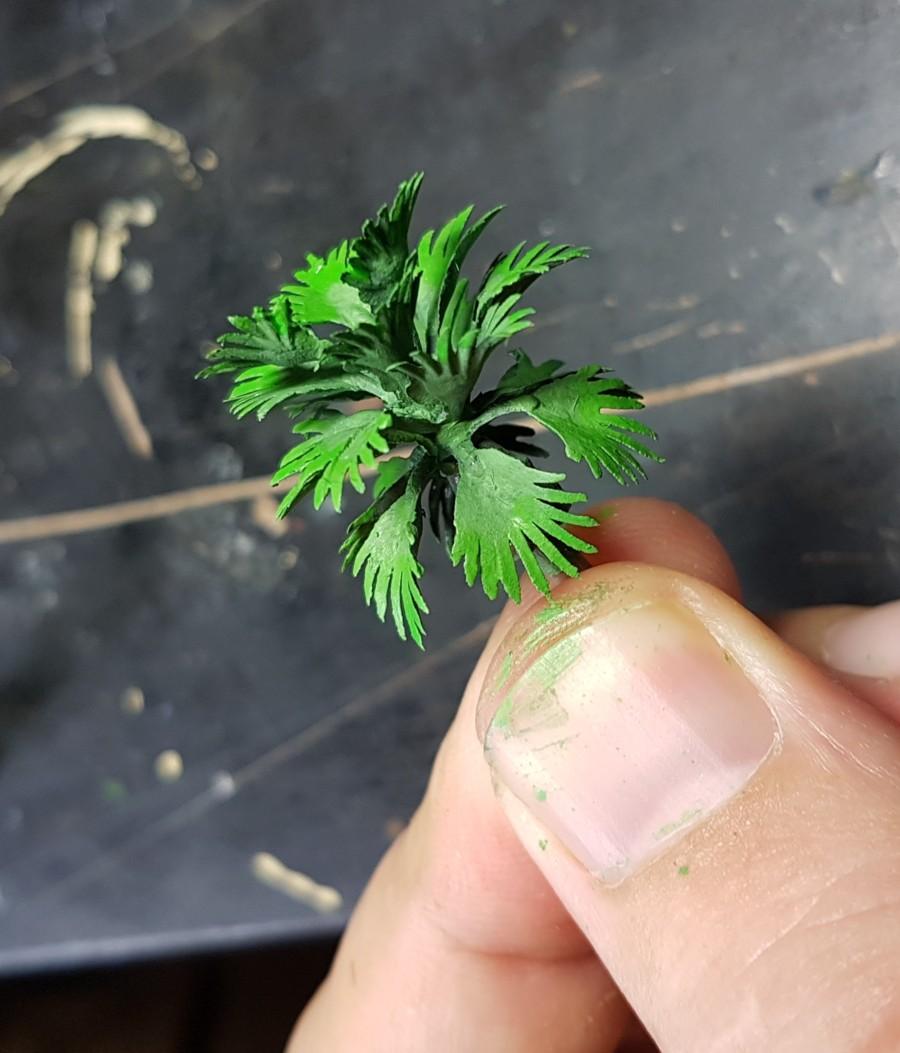
What I am trying to do is make the outer edges of the greenery lighter than the center.
right now it looks terrible, but is better when dry and better when complete!
So don’t worry.Once that is done we get the jazzy forest green and mix in a bit of yellow and again move to the outer edges, leaving the earlier goblin green and some of the recent forest green showing.
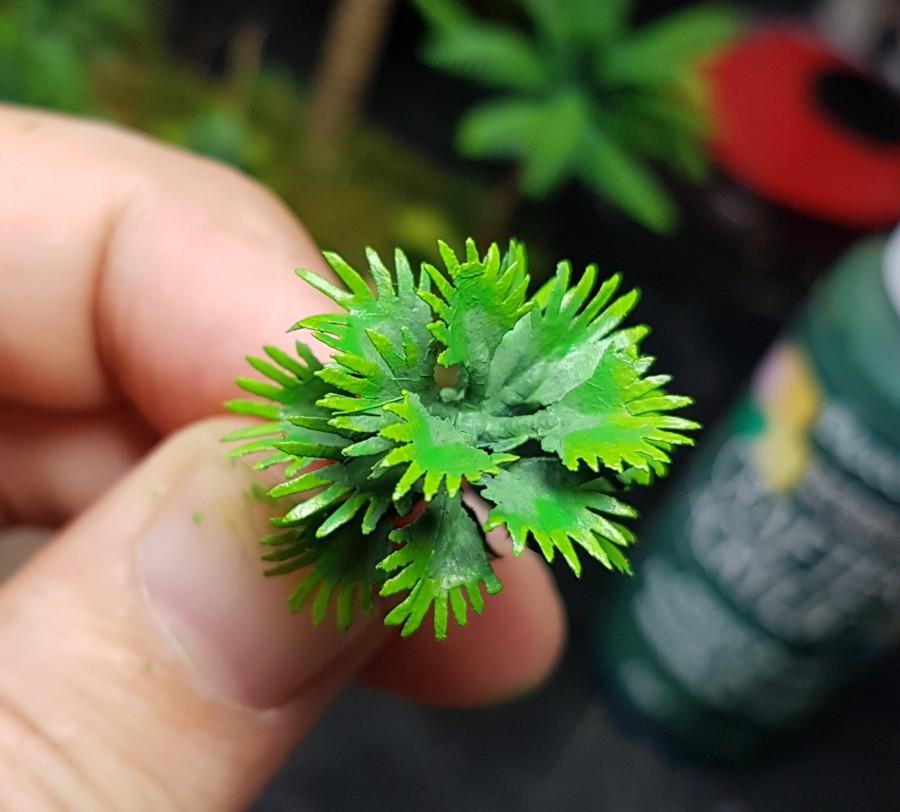
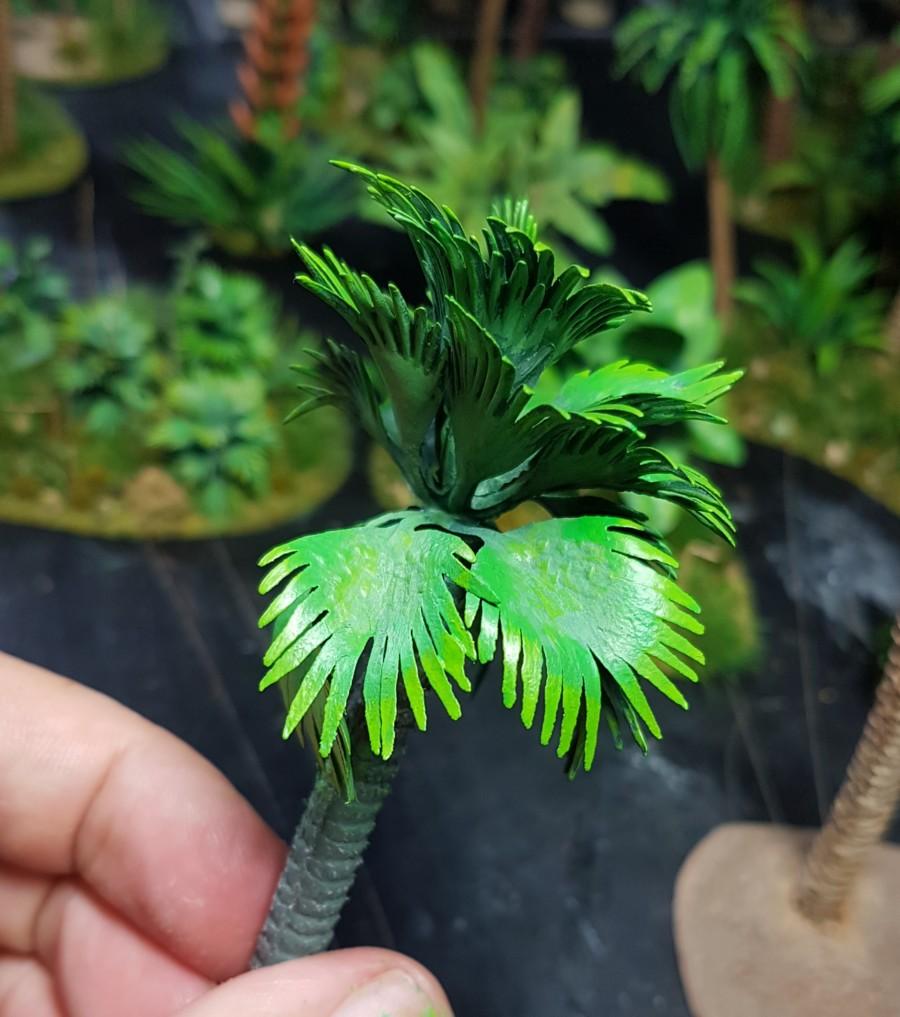
Once dry, again, but with even moar yellow mixed in.
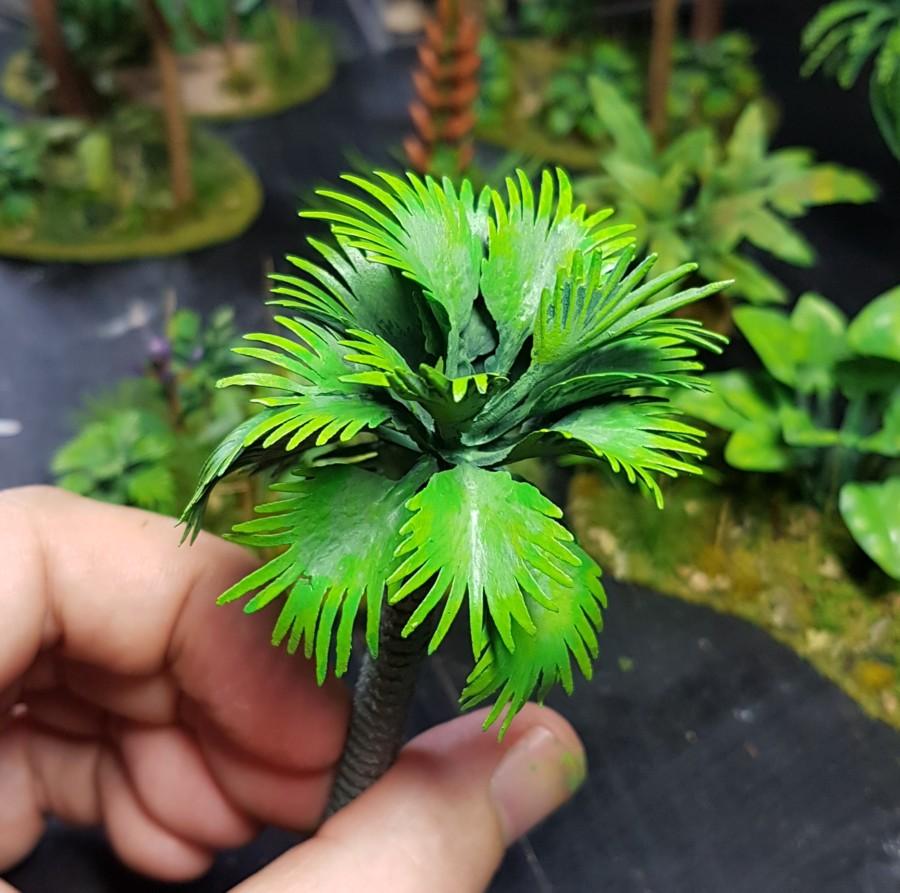
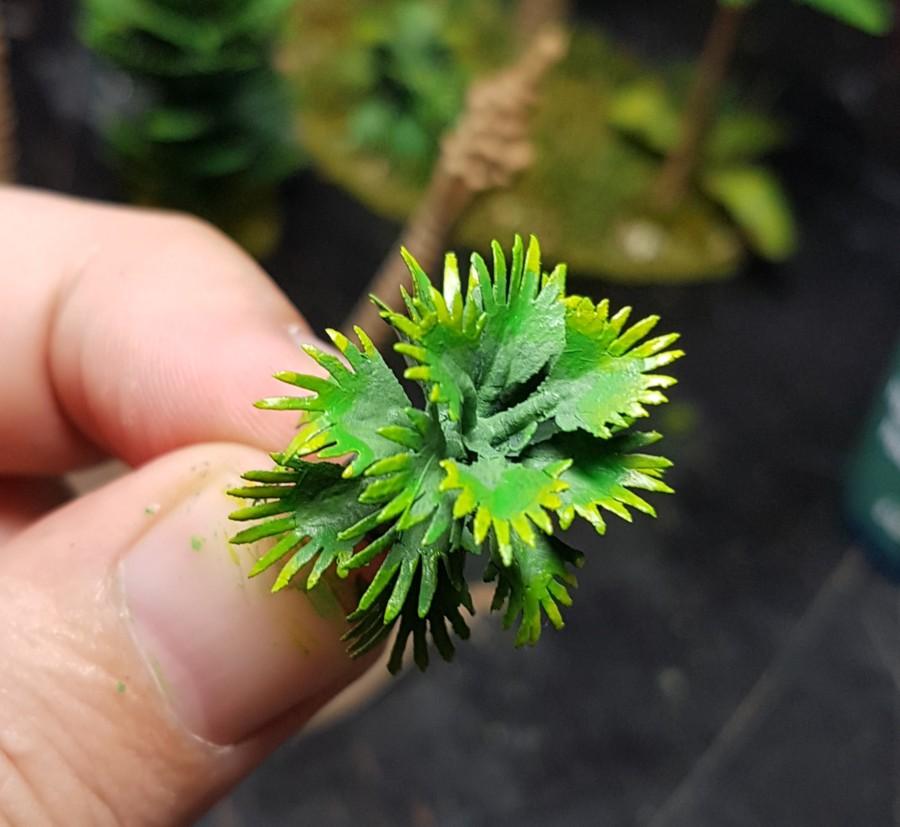
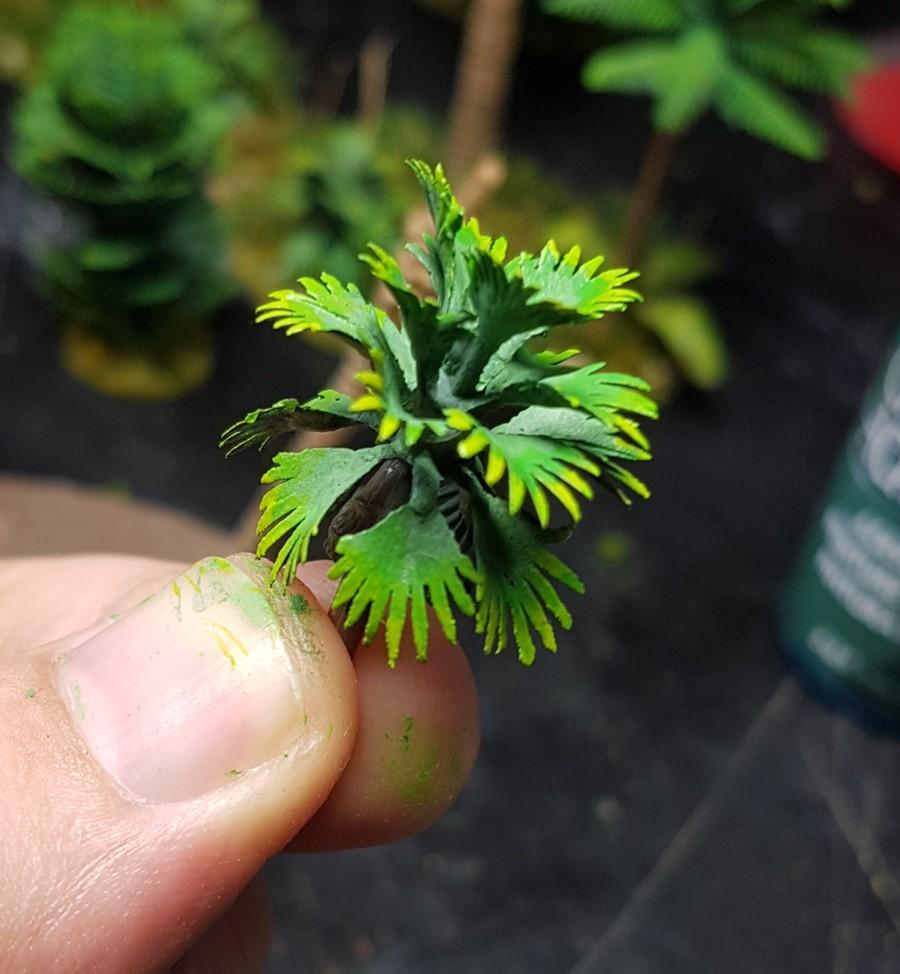
It is about now that I carry on but go and splodge some colour over the inner parts of the leaves that we left craft/goblin green.
I find that leaving them seems a bit flat.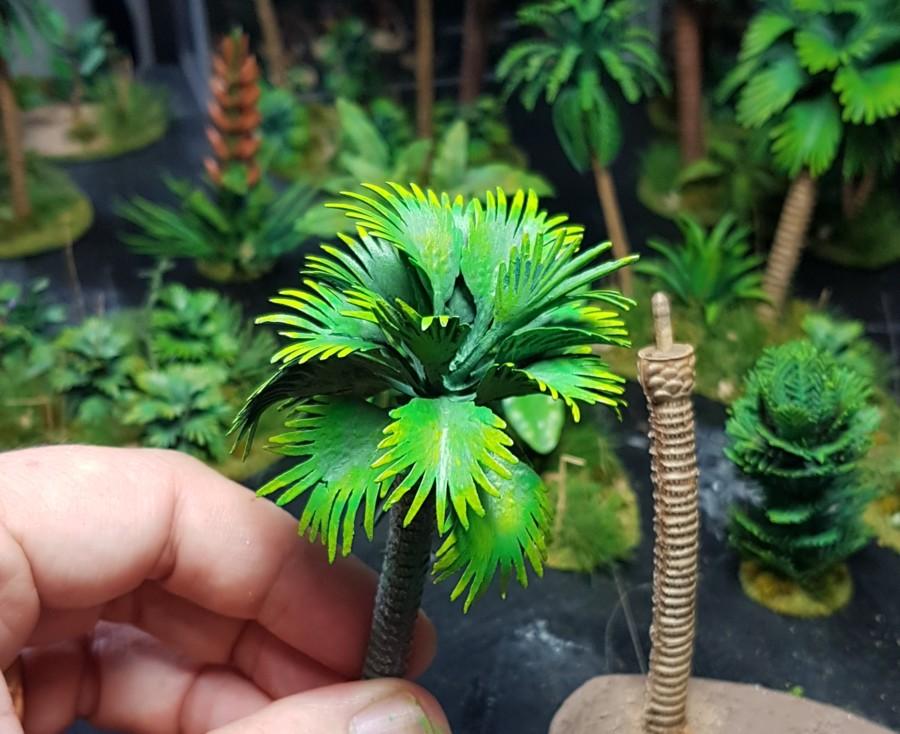
Try and aim for the raised bobbly bits on the leaves.
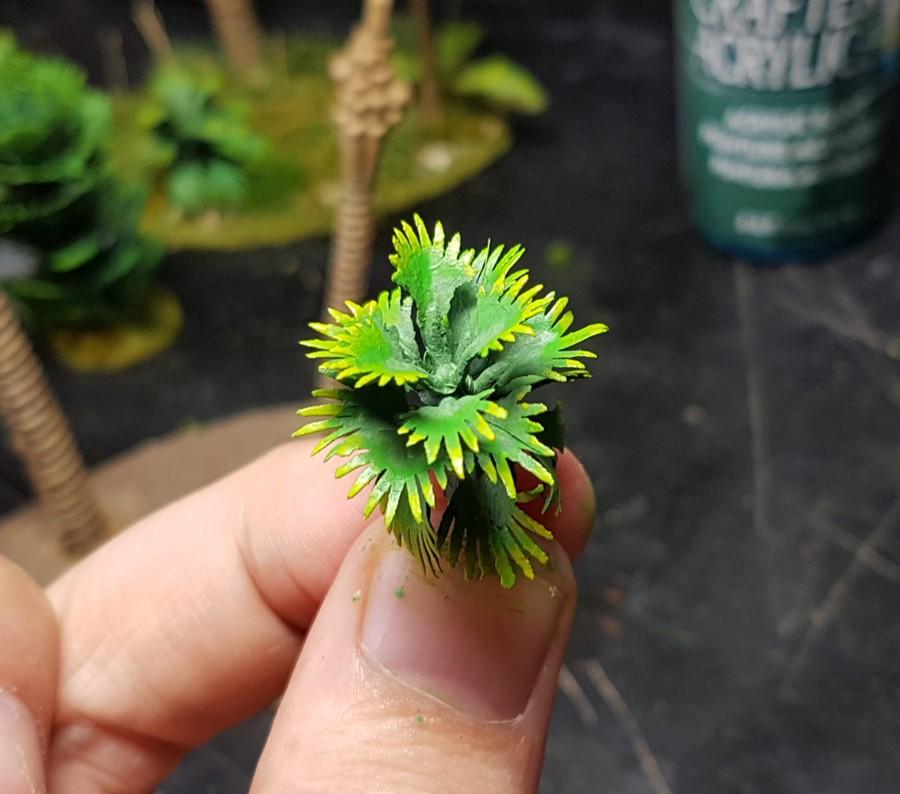
I normally stop here but decided to use some almost neat yellow right on the edges.
Up this close and without the rest of the flock/scatter/tufts added this looks quite mad.
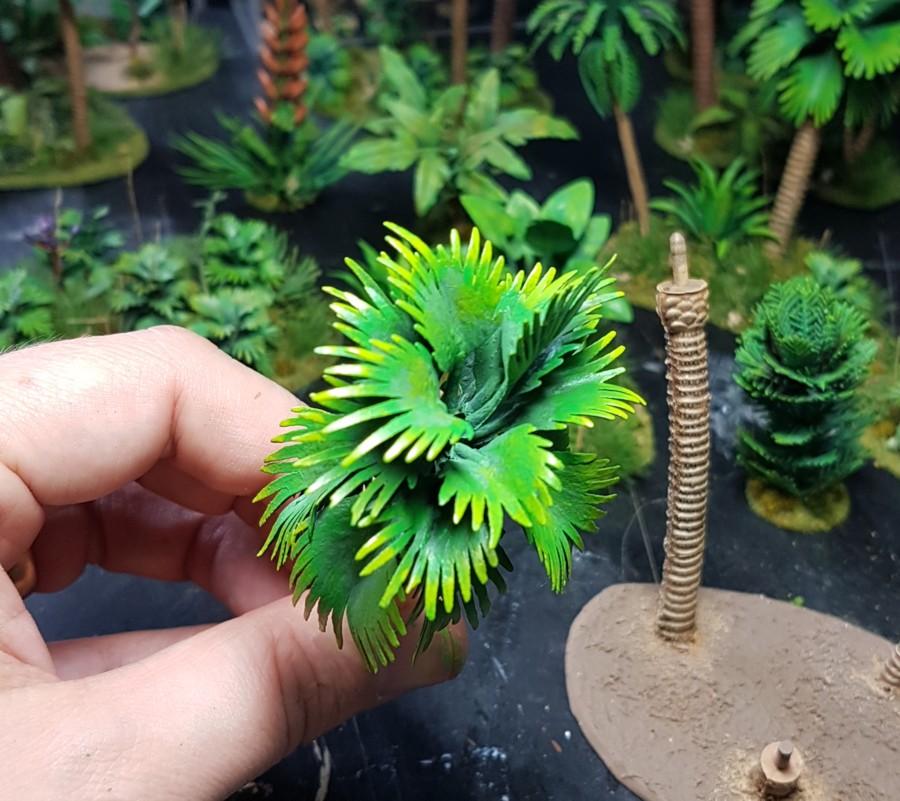
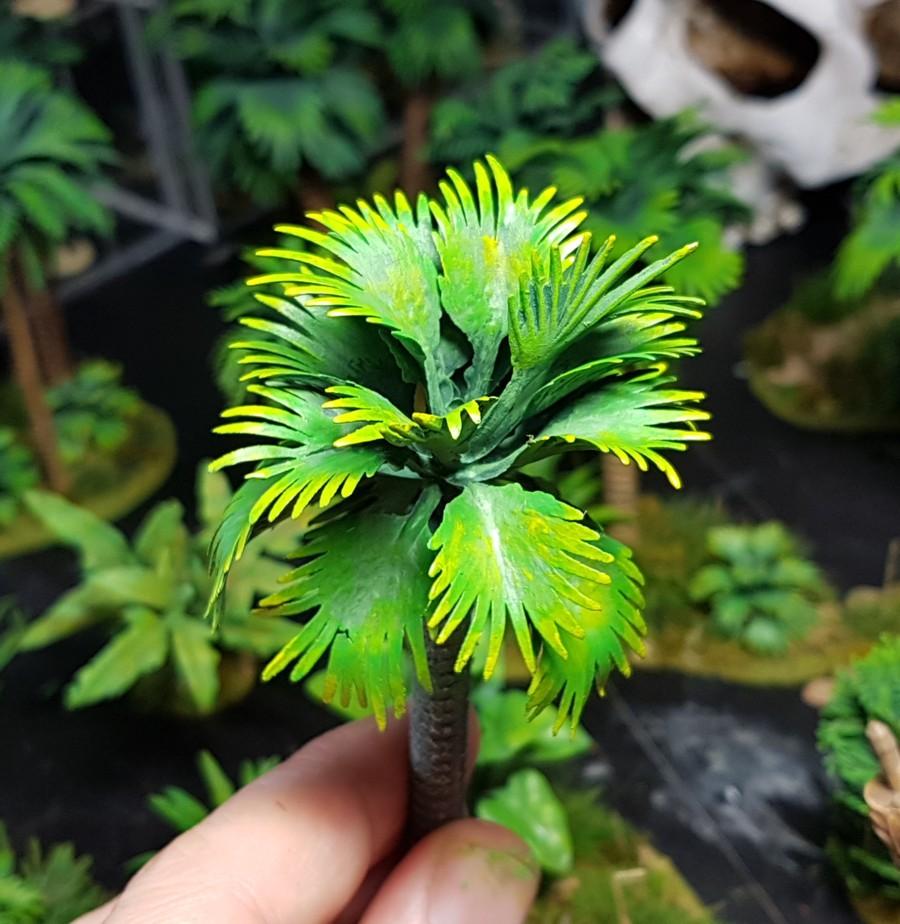
But for me it all comes together later.Though obviously muck about with blends and what not, but once done it is ok for my table.
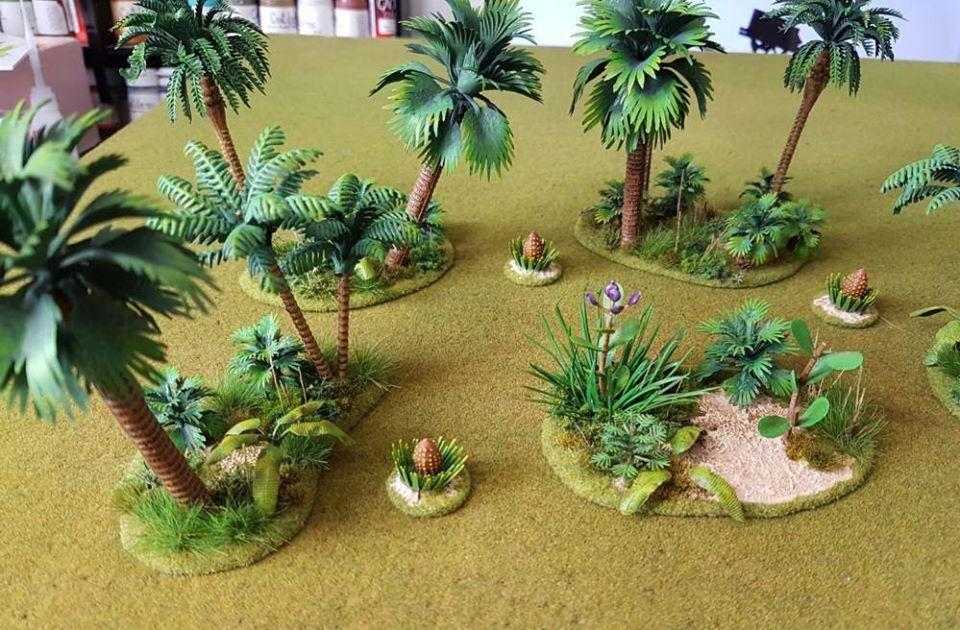
Here it is so far with the others.
As you can see, I did these in various batches and the colours vary.
Which seems fine, pretty sure all trees are not 100% colour matches, and even if they are, I prefer this look!Next, painting then flocking the base.
15/07/2020 at 16:29 #140405MemberI’ve never paid much attention to the greens I used but i’m liking that Forest green, gotta get some.
15/07/2020 at 17:07 #140408 Prince RhysParticipant
Very nice indeed – we use the same brands of paints as well, Deco Art and Coat D’arms!
17/07/2020 at 11:58 #140523Angel BarracksModeratorNext up the base.
Now I did do one with green paint but it looked too green, it was quite intense and seemed a very solid green when flocked.
So with that in mind I wanted a less solid looking grassy area.
Also, as I will be using my desert based miniatures I wanted some areas of the jungle boards where I could plop the desert based figures and they would not stick out like a sore thumb.
So I use the same sand coloured paint as a base and in some cases, leave it bare as it worn and trodden.So the base colour all over.
Then an ink wash as this will have a small area of bare ground.
Then a quick drybrush and that will suffice.
Next the application of the flock as the base grass.
17/07/2020 at 12:24 #140526Angel BarracksModeratorNext I prepare the area for the 1st coat of flocking.
Varnish, flock in a cup, paper with a fold down the centre and the 1mm short strand flock.
So avoiding the green I get some varnish mixed with water and PVA and quickly slap that on the area.
Then hold the base over the paper and just chuck the flock all over and shake it a little bit.
Then hold upside down and tap the base so the excess falls off.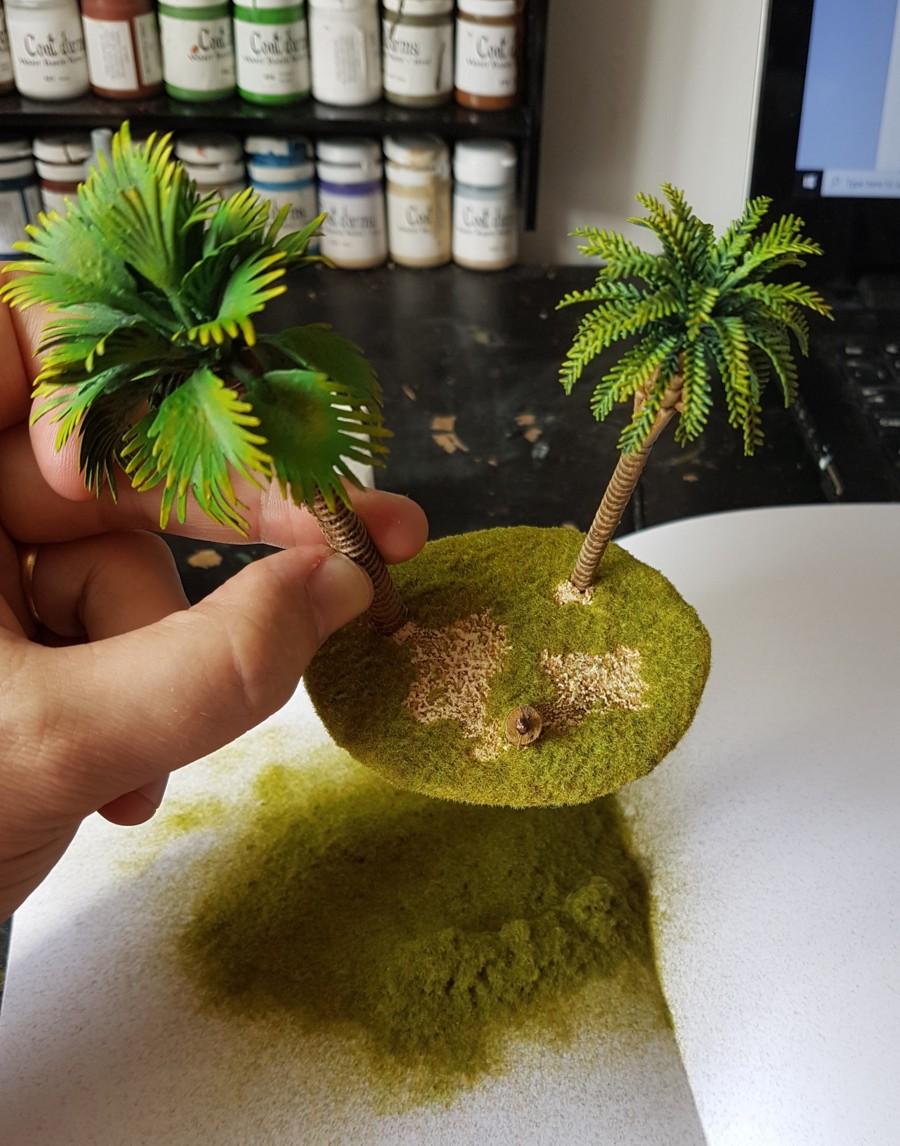
Then we have the first coat of flock.
I find that this has sat ontop of the varnish/glue mix and can and will rub off through use.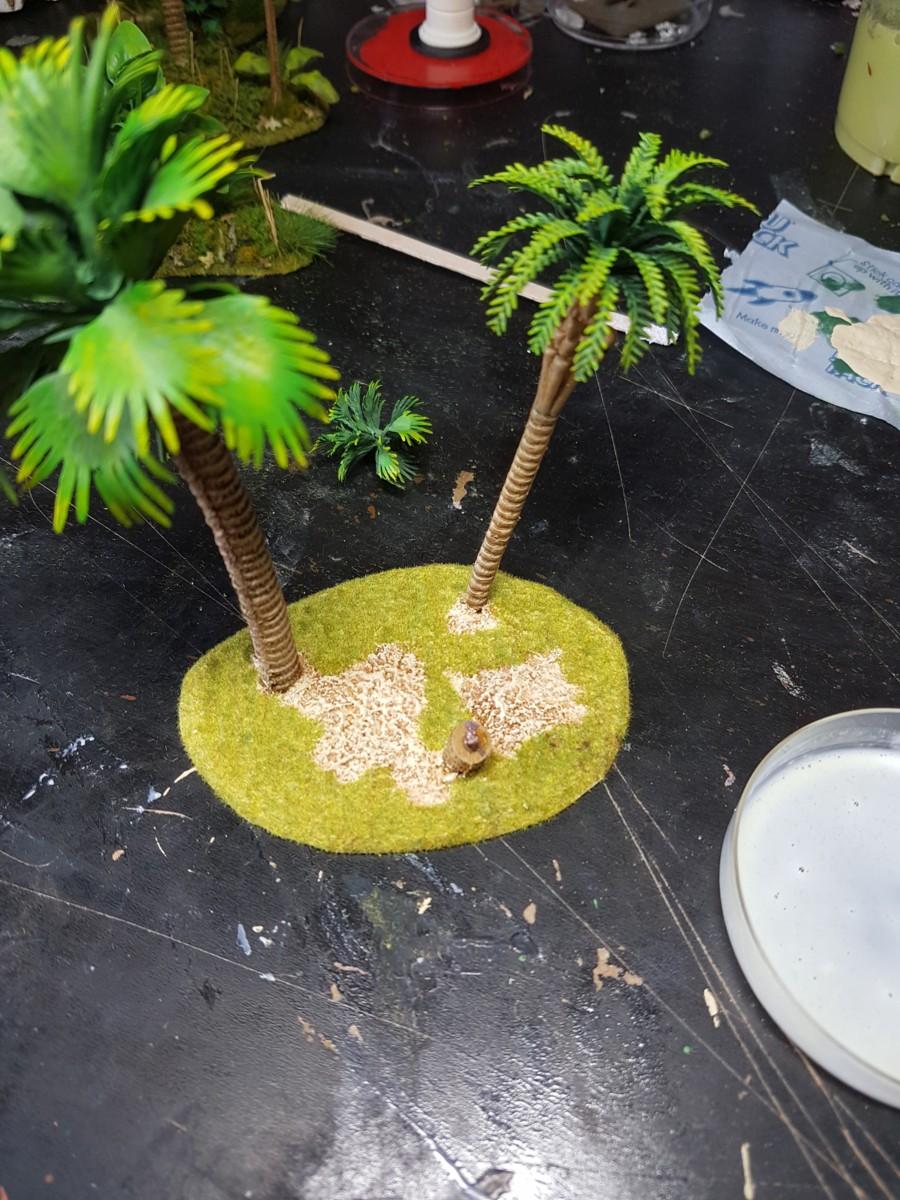
So next I mix up water/PVA and some hand wash or hand soap or dish soap.
This helps break down the surface tension of the water/PVA mix and when applied with a dropper it does not pool and bubble, but rather it spreads out and is much easier to use as it soaks evenly across all the flock.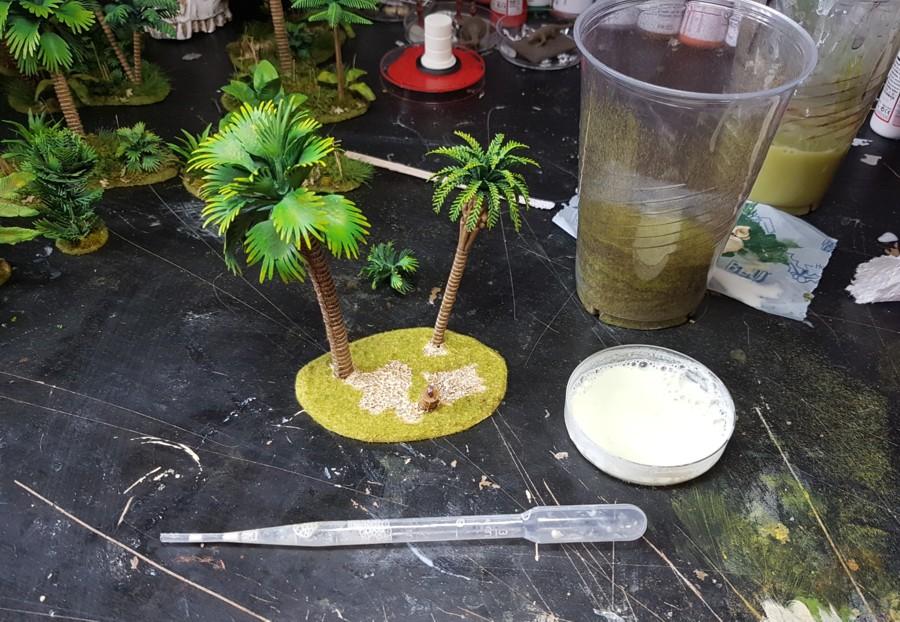
I apply this with a dropper which I purchased a pack of from Amazon.
Then when it is all over the first layer of flock I again tip the flock cup all over the base and this second layer gets nicely stuck to our mix and helps thicken up the ground coverage.
Then we wait for this to dry….
17/07/2020 at 14:26 #140534Whirlwind
ParticipantVery nice! Where do you get the plastic trees from?
17/07/2020 at 15:41 #140542Angel BarracksModeratorVery nice! Where do you get the plastic trees from?
Ebay, plenty of China based sellers with loads of trees and plastic plants.
17/07/2020 at 17:27 #140548 Geof DowntonParticipant
Many thanks for this Mike. I’ve got a bundle of this foliage, and more on the way, to provide cover for my dinosaurs. Knowing how to pretty them up without doing my own failed experiments is a godsend! When you need more droppers let me know, I bought about a million years ago and they’re a long way from running out!
One who puts on his armour should not boast like one who takes it off.
Ahab, King of Israel; 1 Kings 20:1117/07/2020 at 19:47 #140555MemberI’m looking forward to seeing how you lush it up.
17/07/2020 at 21:35 #140560ParticipantGood stuff Mike. Are you thinking of selling the bases you cast?
OB
http://withob.blogspot.co.uk/18/07/2020 at 17:26 #140607Angel BarracksModeratorAre you thinking of selling the bases you cast?
I guess I could, I will think up a price.
So.
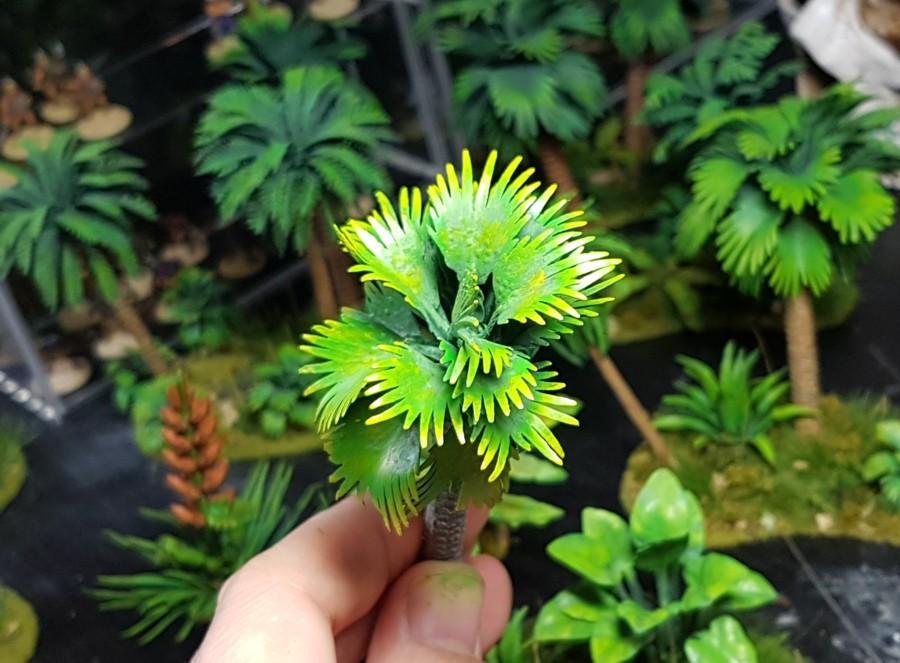
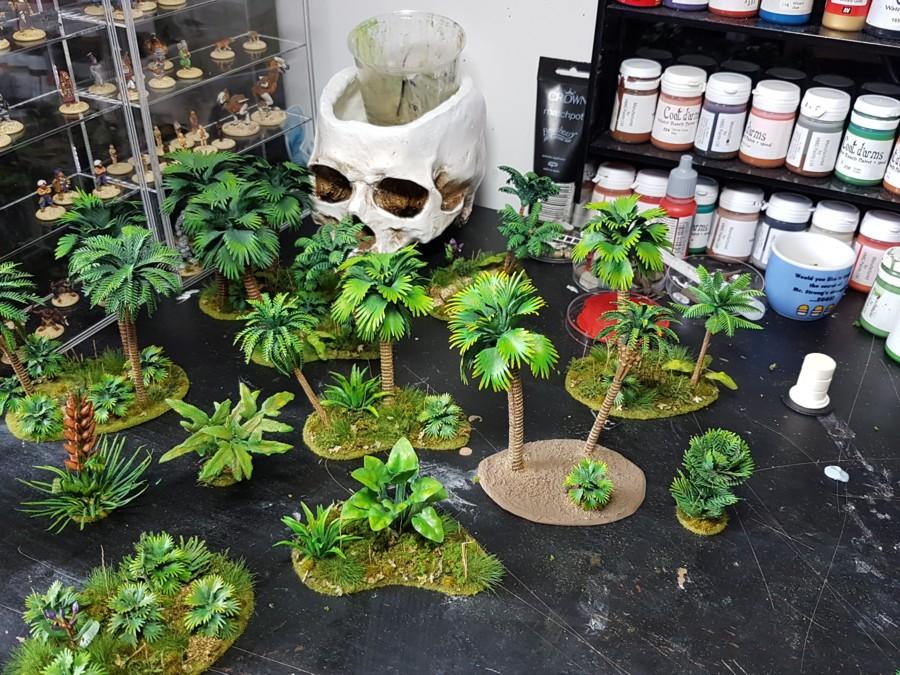
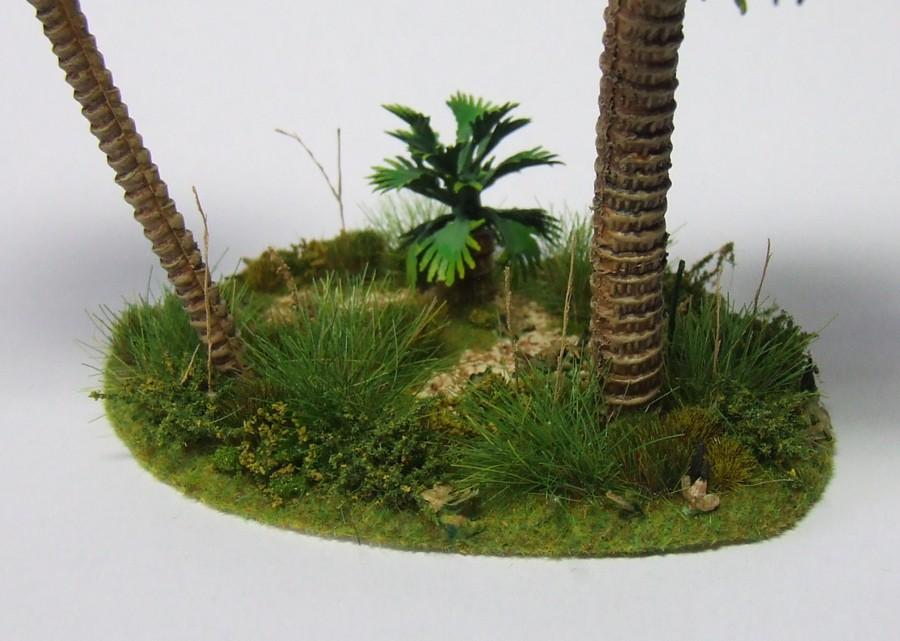
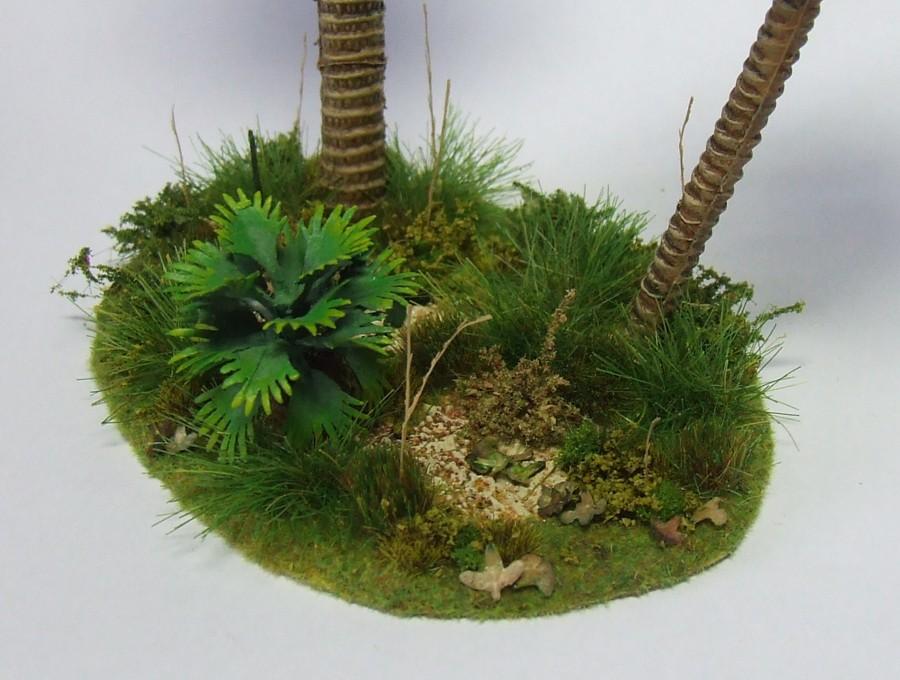
The best bit, the lushification.
Here are my main go to bits.
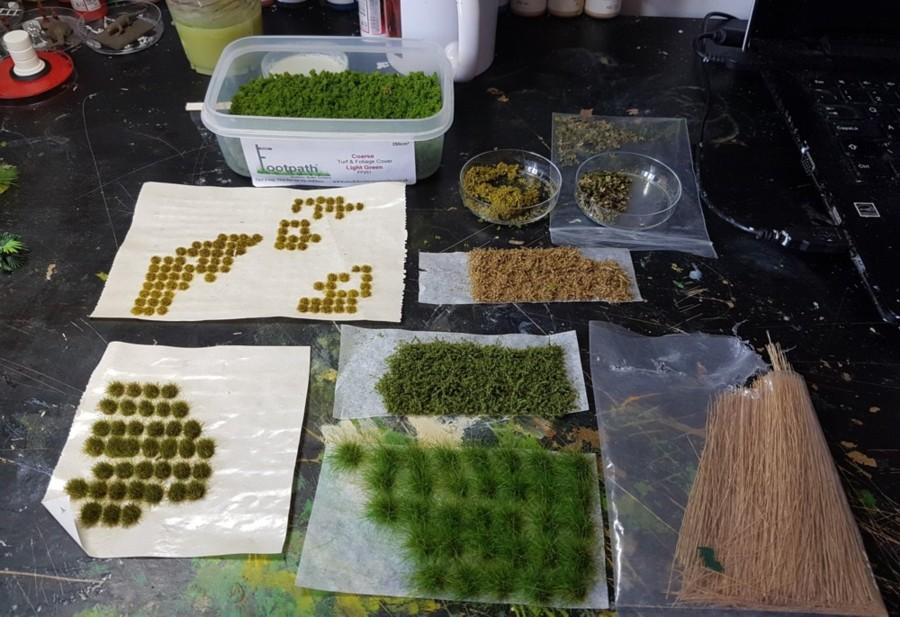
5 types of tufts.
Some reed type things.
Leaves.
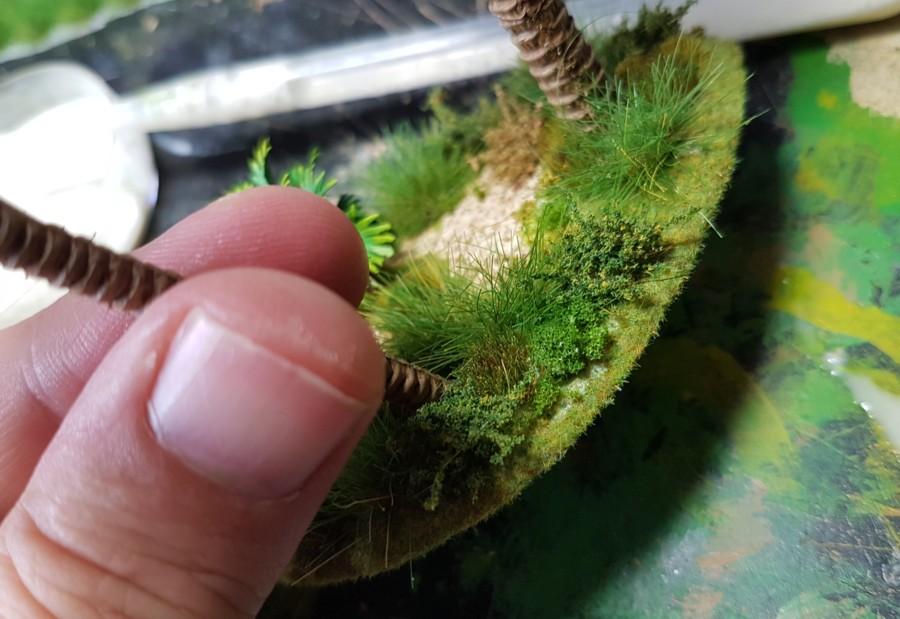
2 types of clump foliage.I get the bigger tufts and apply those in various areas, mostly toward the centre.
With all tufts, don’t be afraid to trim them.
The big ones tend to spread out in all directions and sometimes you don’t want that, so I trim some sides at the bottom so that I can push them up against things without the tufts offering resistance.
Some of the smaller tufts I cut in half and push the cut edge against tree trunks.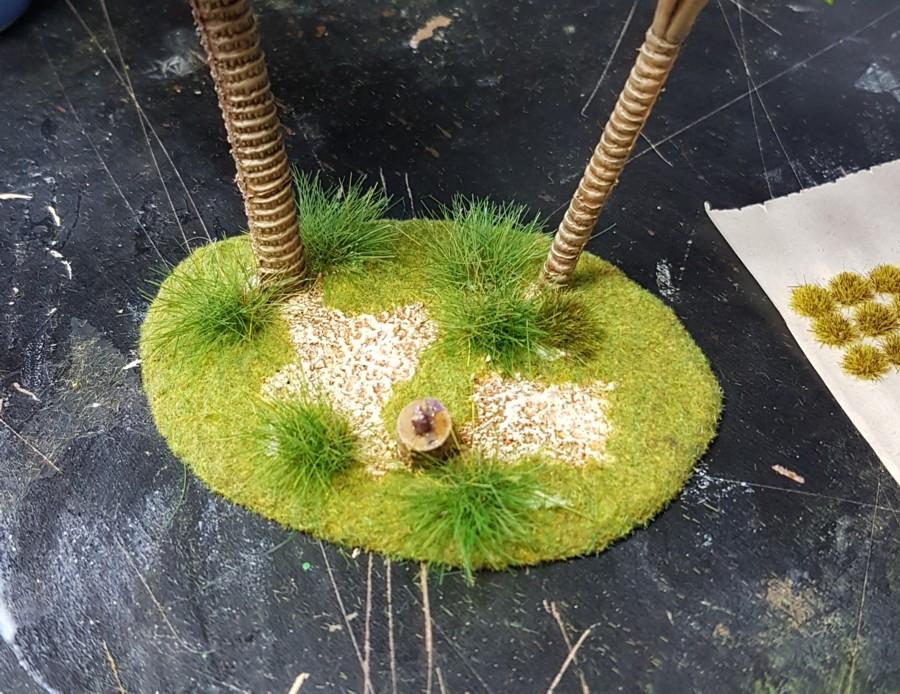
Then I apply the smaller ones in various spots and then the smallest.
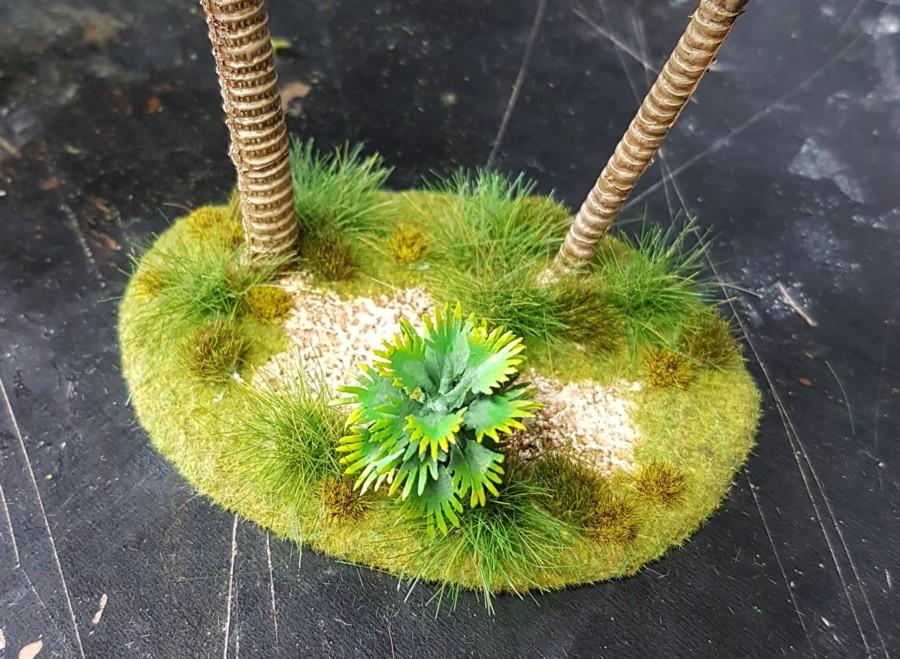
I like to try and clump them together to create a feel of undergrowth, rather than have the tufts apart which seems more contrived somehow?
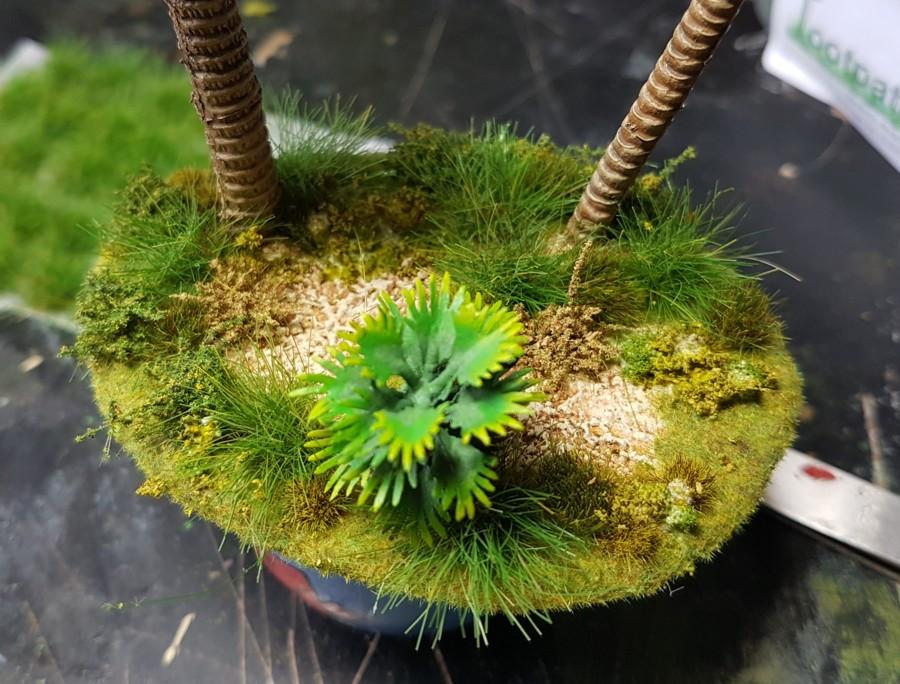
Then once happy with these I apply the fancy tufts that have colour.
I have some green plants with yellow flowers and some desert ones.
I tend for whatever reasons to put the desert ones on the border of the flock and the painted bare earth, in my head it aids the transition from bare hard ground to soft foliage.
I find these tufts are the most interesting as they are not just simple strands of plastic or whatever these things are, but they have differing textures and shapes and colours.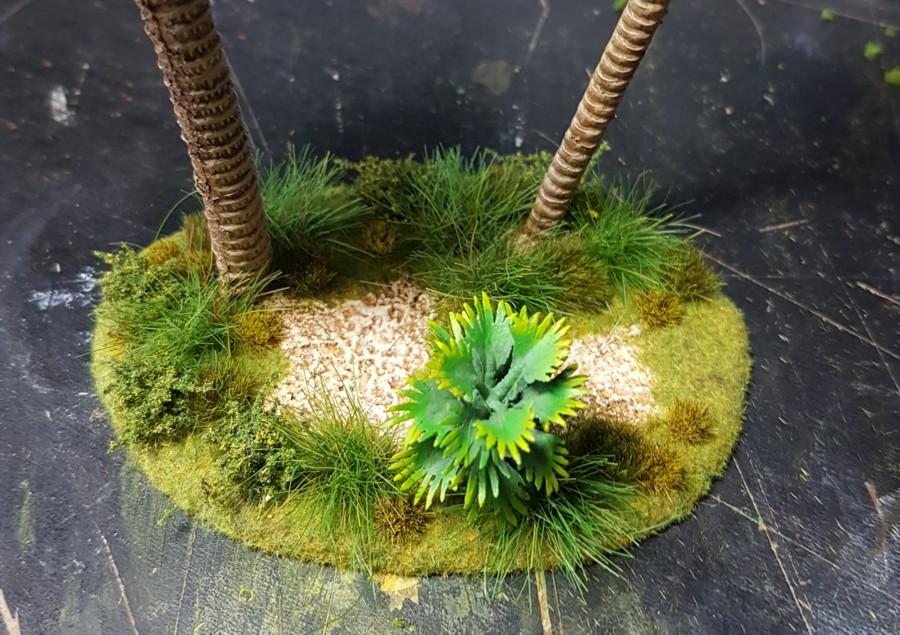
I also splodge a bit of the trusty water/pva/soap liquid next to the tufts and push some of the loose clump foliage into the glue.
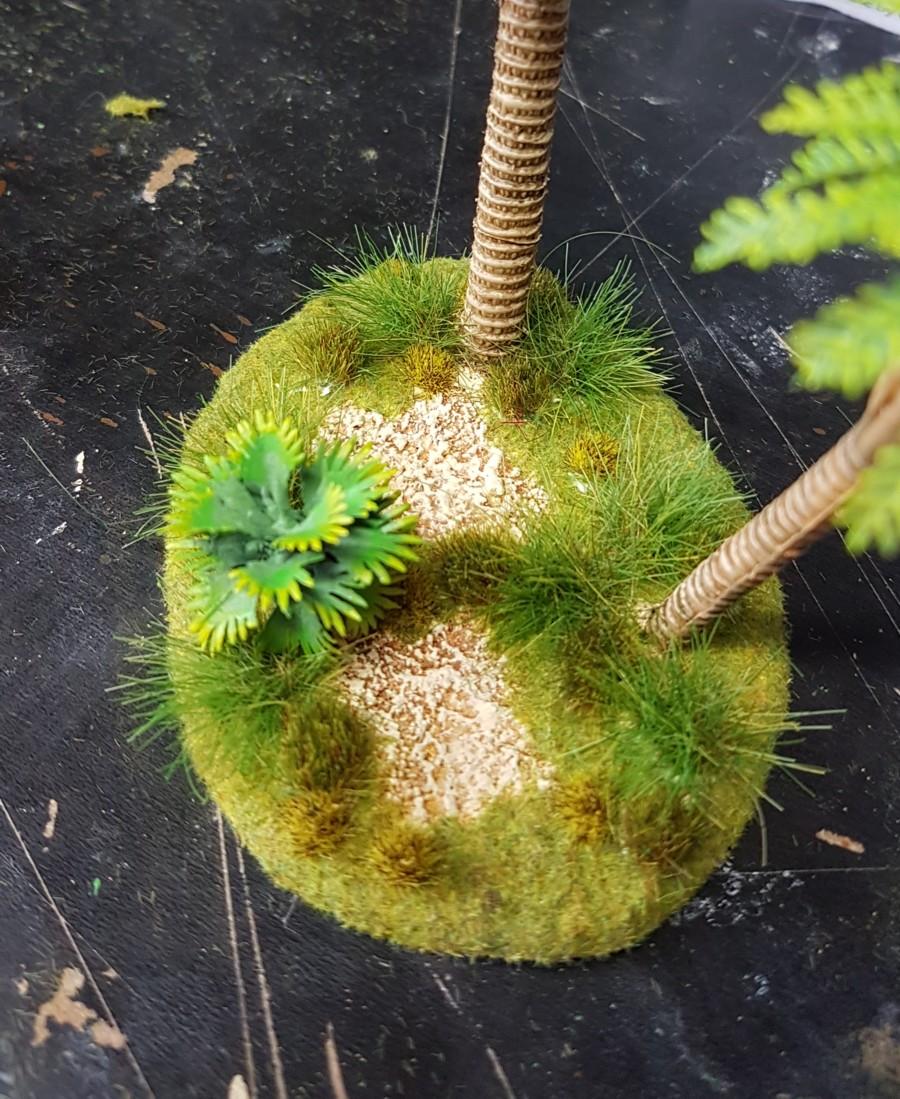
Then once happy with the layout of the tufts, the reeds and leaves.
The reed things I have had for over 10 years and no idea where I got them from, probably a model train show?
Anyway, these are fiddly but great.
I pull a few out the bag and chop them into random lengths.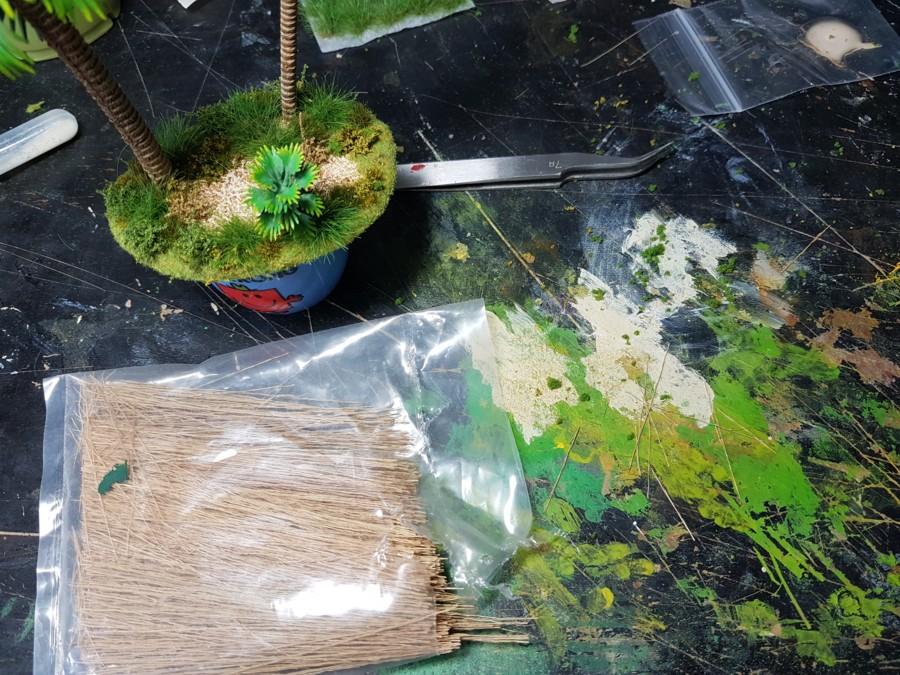
Then hold them tightly with tweezers and blob them in neat pva, then push them into tufts and the dry clump foliage.
This gives them a nice base to sink into.
On my river tile I did prick tiny holes in the clear water and insert a few into the river as reeds, but that is another story.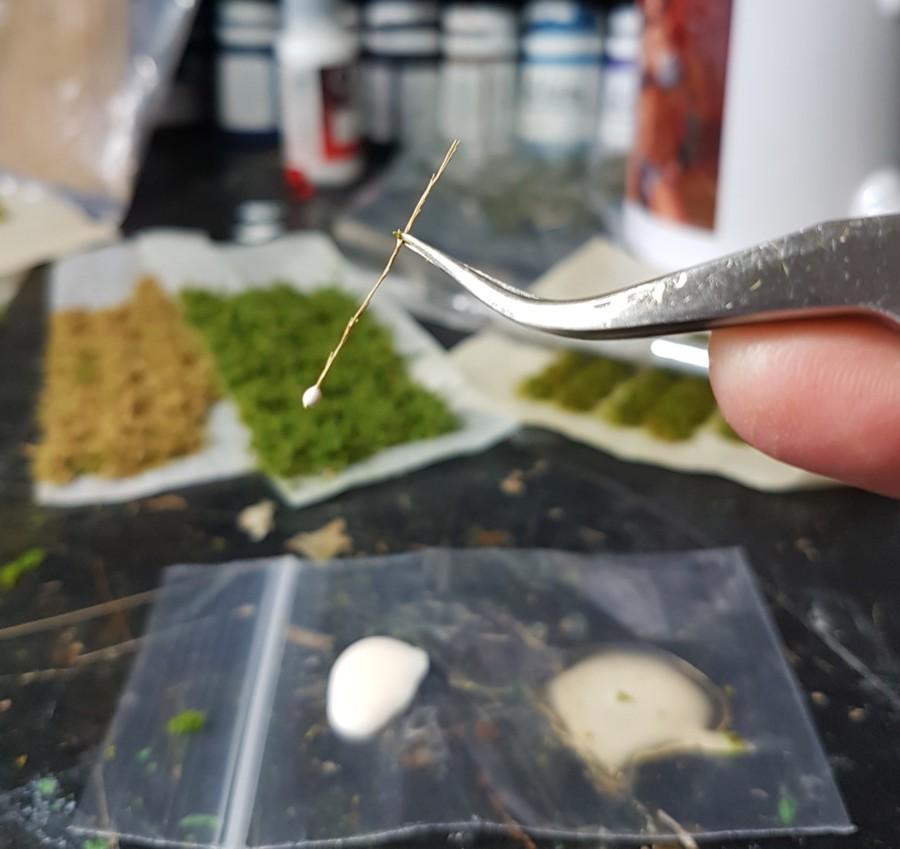
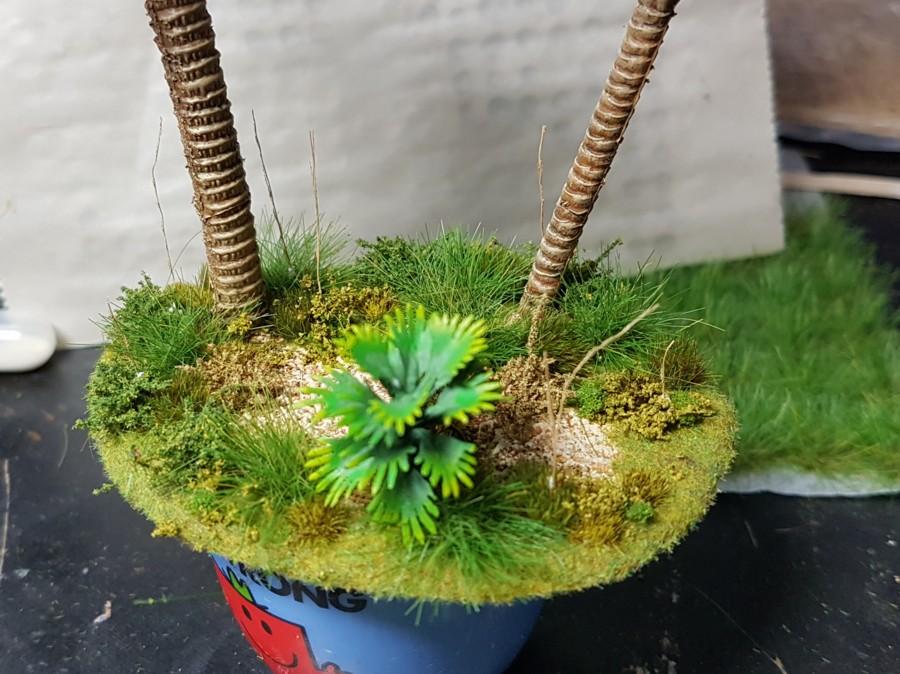
Don’t worry about the height, if they are too tall, you can easily trim them down a bit later.
Better too tall so you can crop them than too short.Lastly the leaves.
These are ready bought painted and stripped birch seed pods.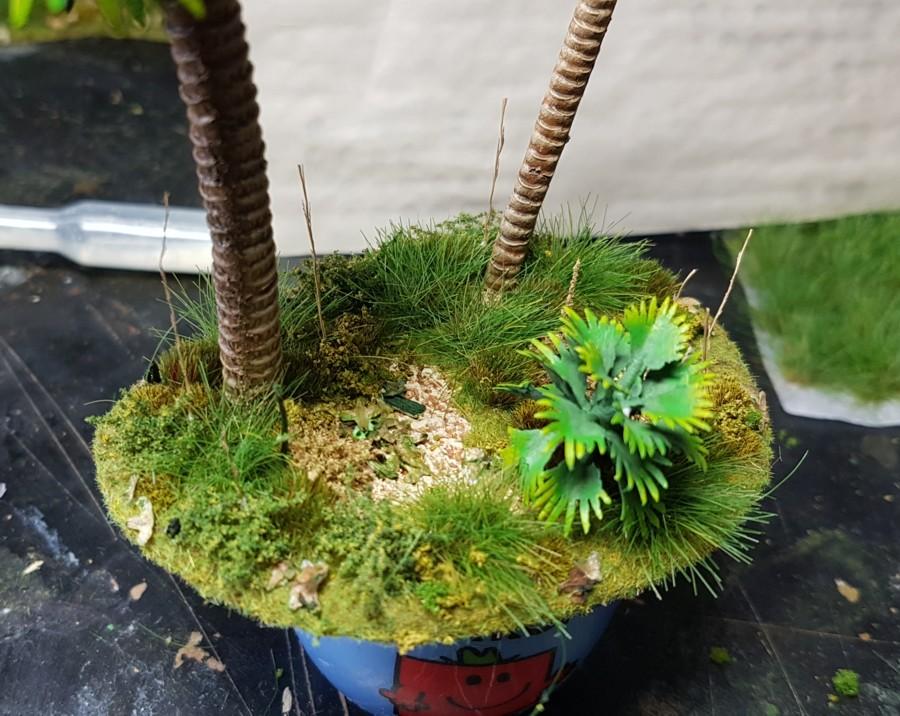
Again neat pva and tweezers.
I find there is a mixture of green and brown leaves in the packs so I like to put green leaves on the brown earth and brown leaves on the green grass.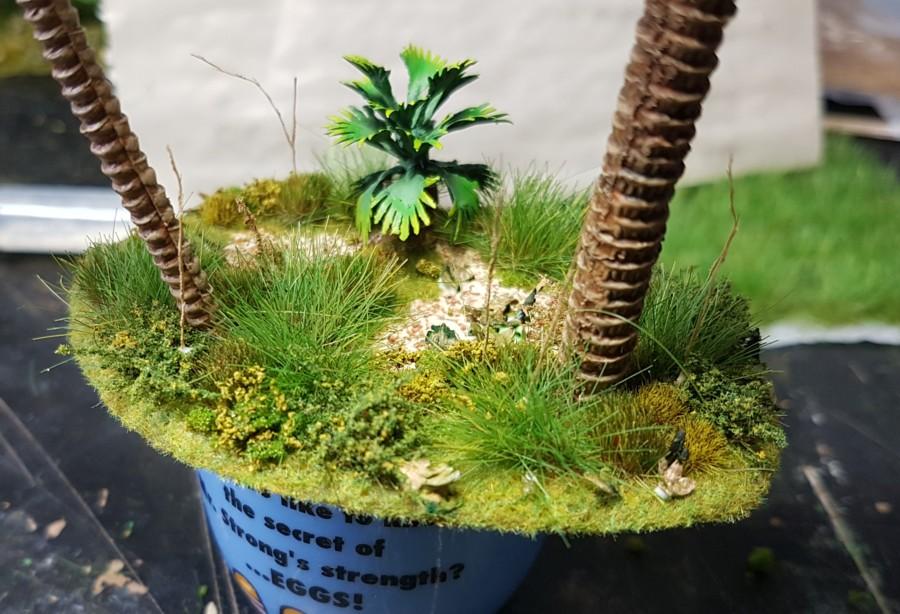
Then trim any tall reeds, rogue tuft strands and we are done.
18/07/2020 at 17:27 #140608Angel BarracksModerator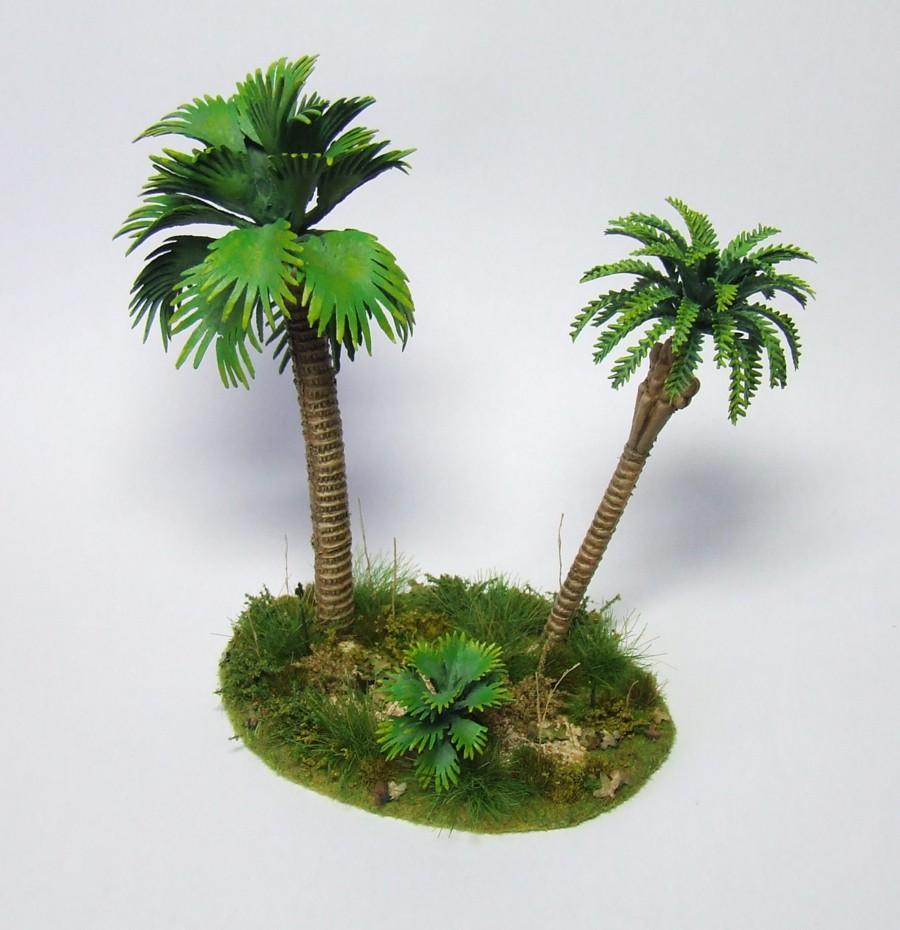
 18/07/2020 at 20:23 #140620Member
Thanks for the lushification. Now I’ll have to figure out to to replicate it in 3mm.
19/07/2020 at 04:01 #140645BravoSixParticipantNow I’ll have to figure out to to replicate it in 3mm.
I’d be interested in to hear how you get on with that Thomaston.
Fields of Fire:Reloaded - The Online Community for Vietnam Wargaming
19/07/2020 at 07:19 #140648MemberThe finished product reminds me of SE Asia. It wasn’t a jungle though but pretty dry area. The ground was sandy and dries very hard, light colored and cracked. Mostly dried leaves and grass on the ground but grass grew very tall and green in semi shades from bigger trees. The only thing missing from the scatter are stray dogs.
<p style=”font-size: 16px !important; line-height: 20px !important;”>I’d be interested in to hear how you get on with that Thomaston.
<p style=”font-size: 16px !important;”>It’ll probably take years for me to come up with anything passable.
19/07/2020 at 10:47 #140654ParticipantI’m impressed. The end result makes it well worth while putting the work in. Good news on the bases do let us know when they become available .
OB
http://withob.blogspot.co.uk/21/07/2020 at 07:29 #140762 Cacique CaribeParticipant
AB
Fantastic progress! I’m saving this topic for sure. Wow.
Dan
Loads of WIPs: https://www.flickr.com/photos/9593487@N07/albums/with/7215771063052937621/07/2020 at 17:35 #140791 Darkest Star GamesParticipant
Really fantastic work there Mike! A lot of really neat details.
"I saw this in a cartoon once, but I'm pretty sure I can do it..."
31/08/2021 at 15:10 #161169Angel BarracksModeratorThanks, these will be for sale on the website very soon.
-
AuthorPosts
- You must be logged in to reply to this topic.