- This topic has 11 replies, 6 voices, and was last updated 4 years ago by
Just Jack.
-
AuthorPosts
-
27/04/2020 at 04:05 #135402
Just Jack
ParticipantAll,
Morning, 13 April 1941
Here we are, continuing Kampfgruppe Klink’s campaign in Greece. The first battle saw Captain Freitag’s 1st Schutzen Battlegroup take a key mountain crossroads manned by members of the British Royal Engineers supported by Armored Cavalry from New Zealand. The fight saw the Germans infantry nearly eliminate the Commonwealth battlegroup, which fell back in disarray. Captain Freitag pressed his advantage, immediately pursuing south down, where it ran into defensive positions manned by the remnants of the New Zealand 21st Infantry Battalion. 1st Schutzen then evicted the NZ 21st Inf Bn from its positions, forcing them to fall back. The third fight saw 1st Lt Ginter’s 2nd Schutzen moving secure a crossing over the D3 bridge, forcing the 27th MG Battalion back. The fourth fight saw Major Bohm’s 2nd Recce Battlegroup push back the Australian 2nd Battalion, 8th Infantry Regiment after some fierce fighting. The fifth battle saw Captain Freitag’s beleaguered 1st Schutzen Battlegroup defend the B3 bridgehead against attacks by the British Rangers/9th King’s Royal Rifle Corps, and the Royal Engineers/New Zealand Cavalry, pushing the former back and destroying the latter! The sixth battle saw Battlegroup Wehner (1st Recce) attack and destroy the Lee Force/Australian 2nd Battalion, 7th Infantry Regiment, though they suffered so many casualties they were in then combined with the 2nd Recce battlegroup. The seventh fight saw Lt Loeb’s Panzers absolutely shellack the Allies’ 4th Hussars, seeing the final defeat of Allied armored reserves, opening the road to the campaign objective of Servia, and unhinging the Allied defensive line. The eighth fight saw Col Klink lead the Panzer Battlegroup in a hard-fought victory that saw the Australian 2nd Battalion, 8th Infantry Regiment destroyed. Now we see Captain Freitag’s 1st Schutzen Battlegroup attempting to fend off a spoiling attack by the British Rangers/9th King’s Royal Rifle Corps, in an attempt to buy their comrades more time to withdraw from the German encirclement.
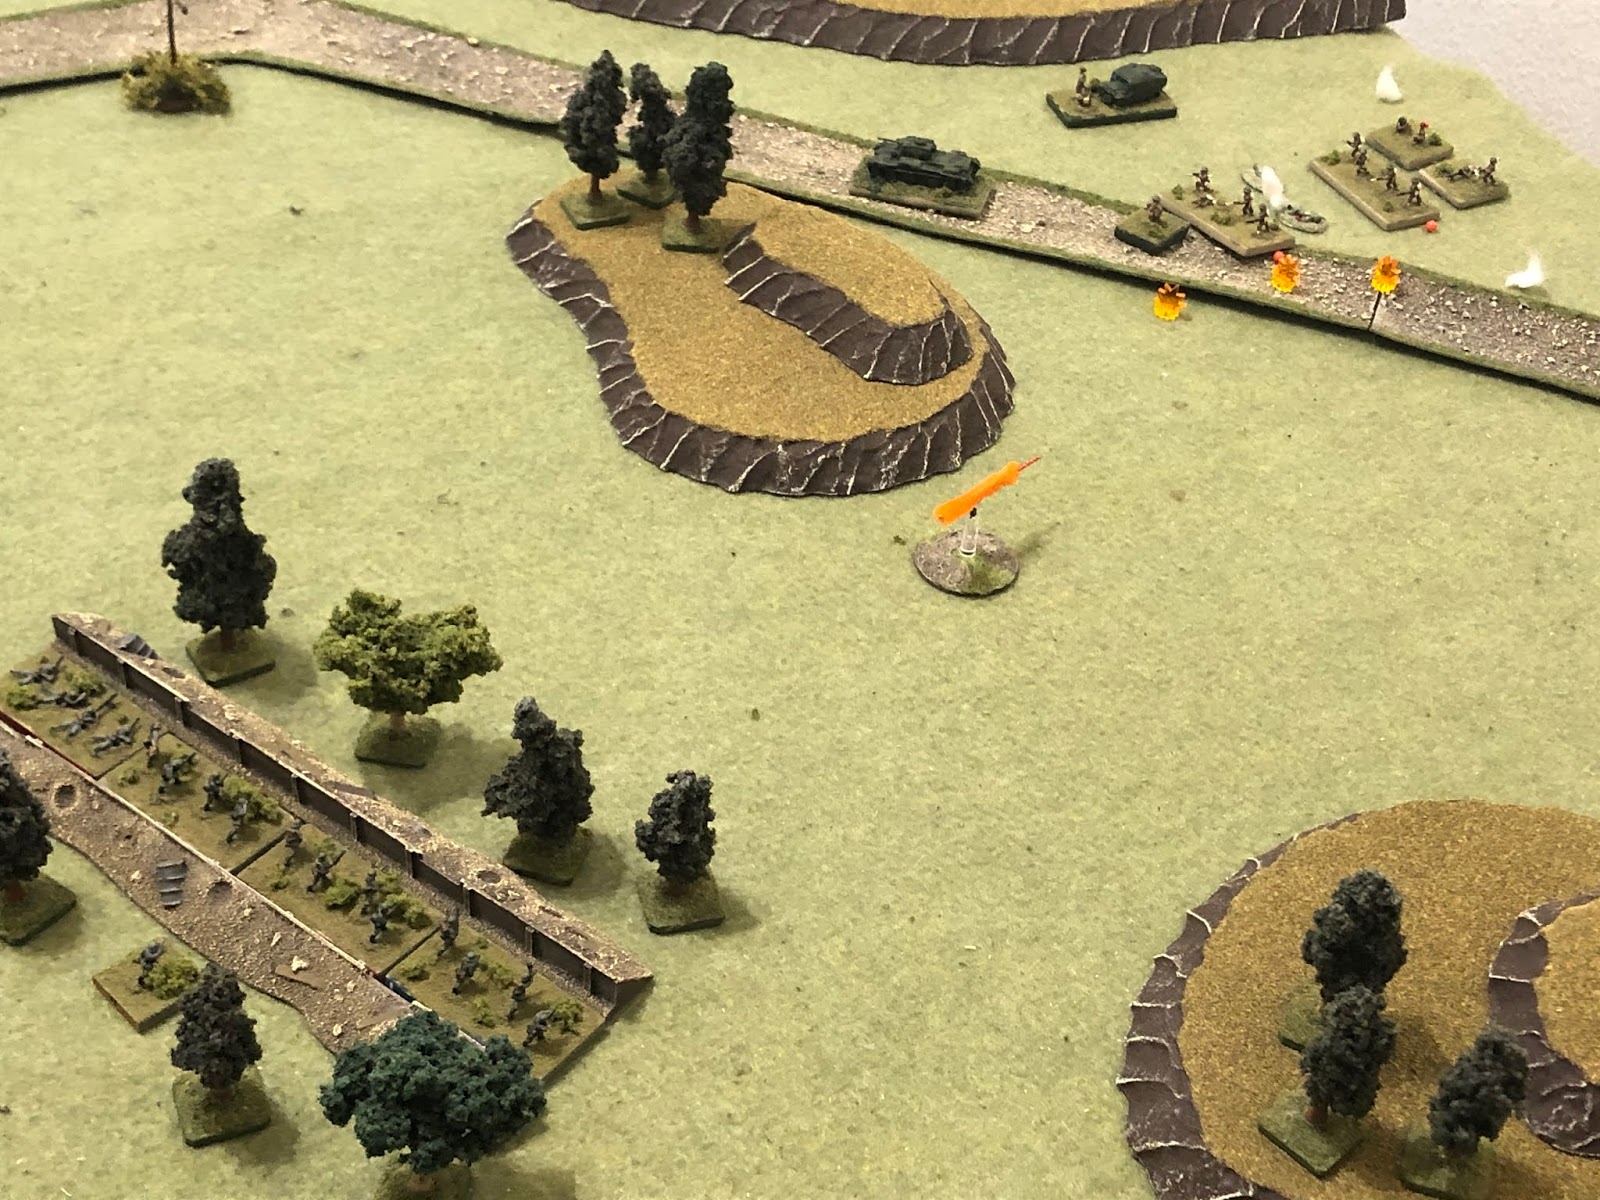
The British are on the attack but the entrenched Germans are roughing them up before they even get off their start line.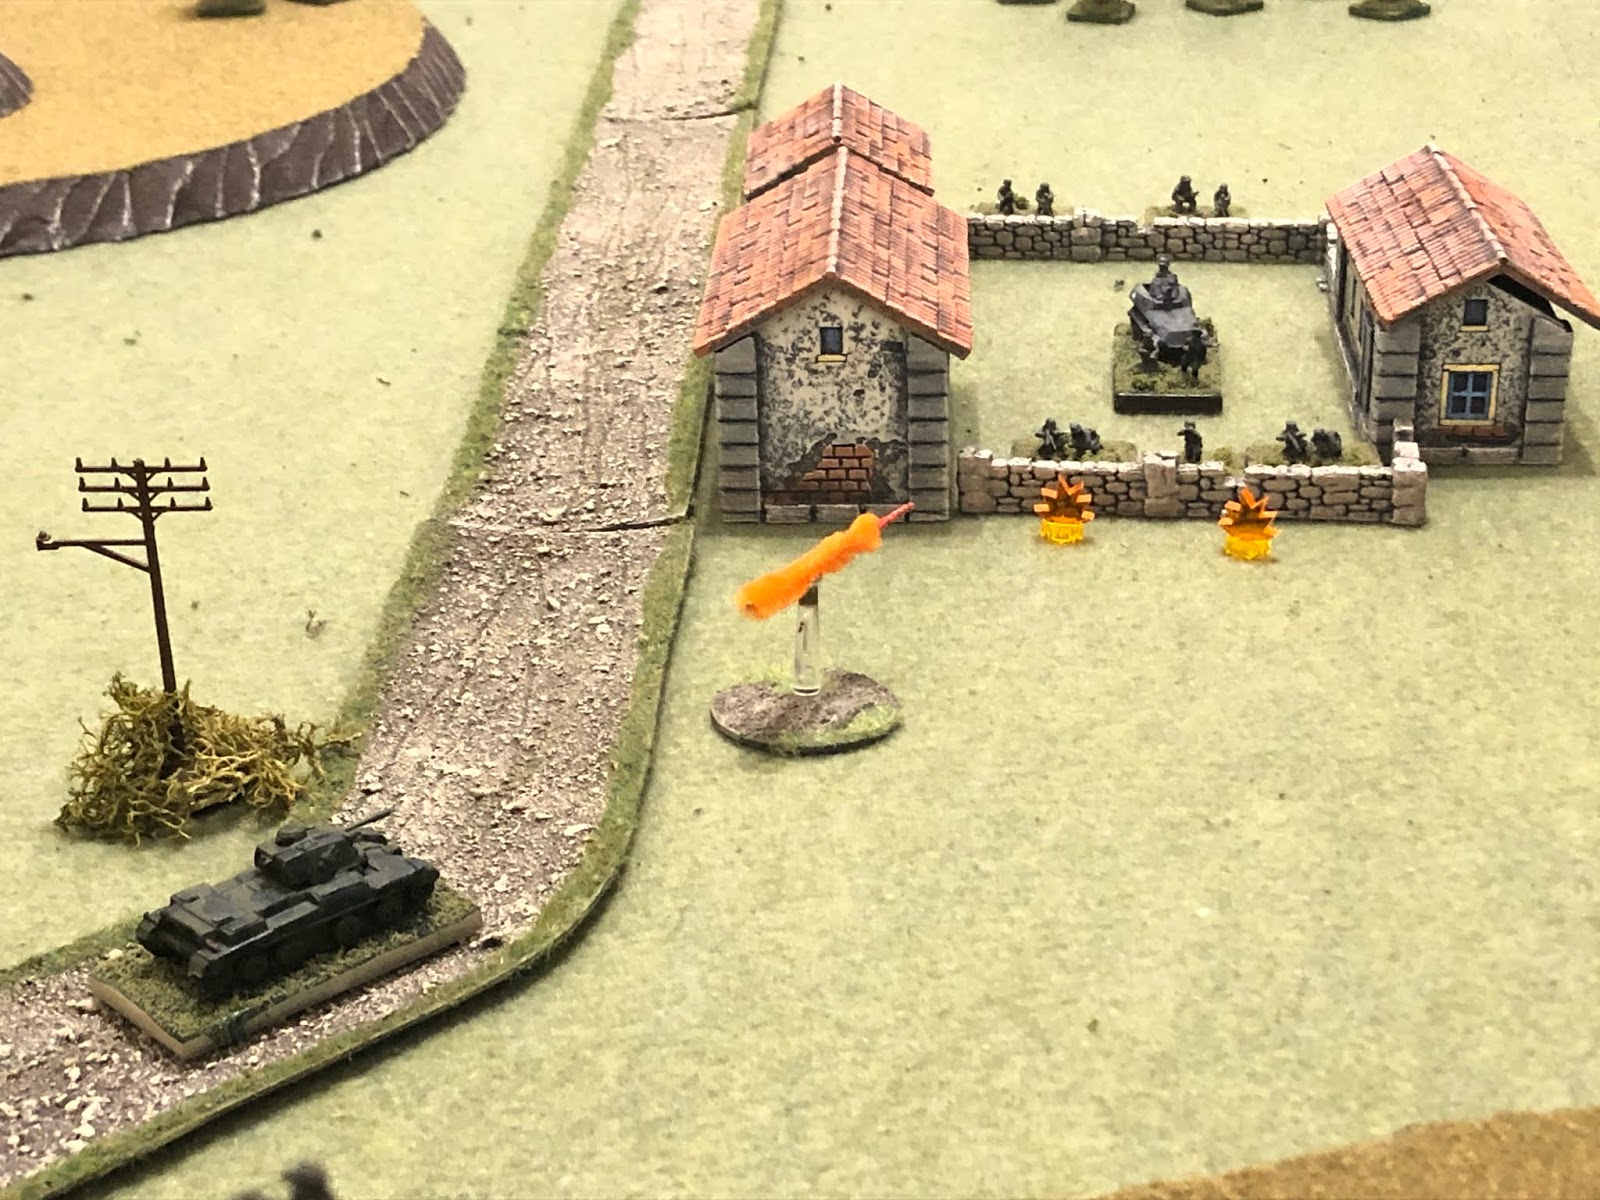
The Allied armor decides it’s time to do something about all these pesky Germans!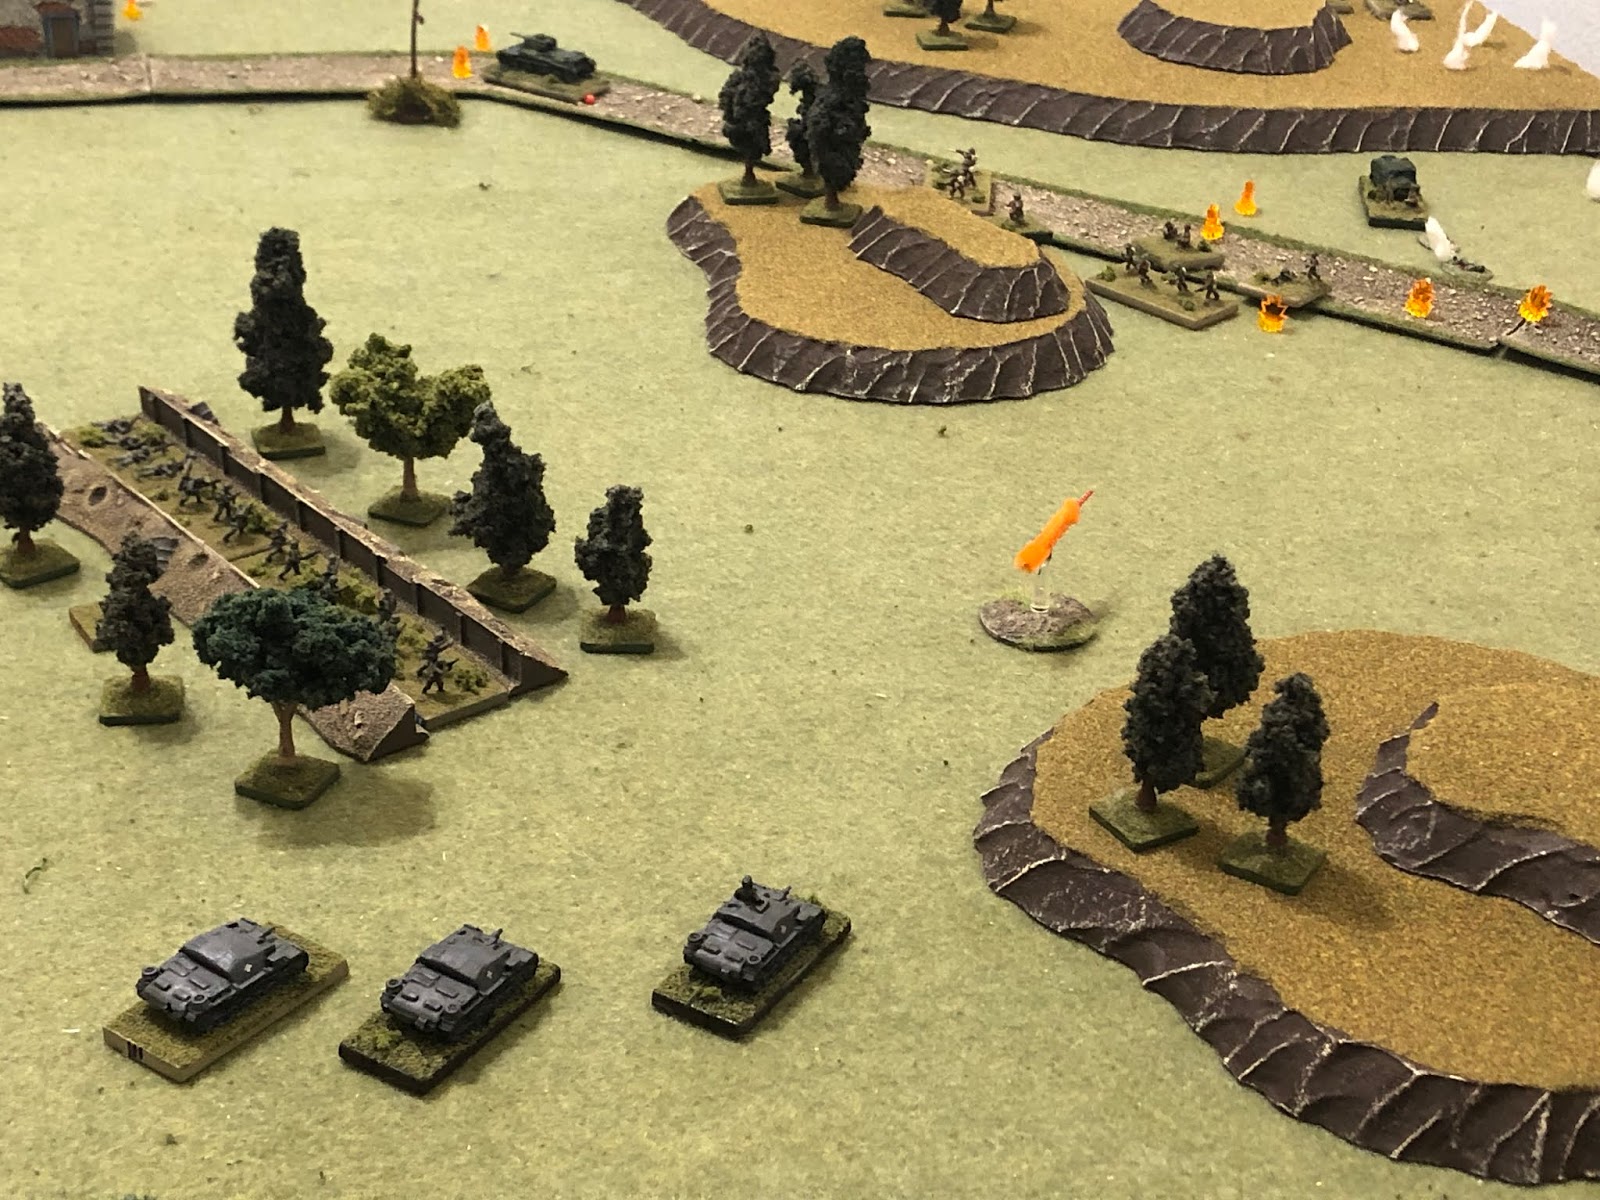
But things take a turn for the worse when the German Stugs come rolling up.To see how the fight went, please check the blog at:
https://blackhawkhet.blogspot.com/2020/04/kg-klink-in-greece-fight-9.htmlNext up we witness Colonel Klink leading the Panzer Battlegroup in an attack on the lightly armed Wellington Force, a hodge-podge of cooks, bakers, and candlestick makers hastily thrown together. A victory here for the Germans will likely see the Wellington Force destroyed and the gate shut behind the retreating Commonwealth forces.
V/R,
Jack27/04/2020 at 05:45 #135406 kyoteblueParticipant
Kinda doomed.
27/04/2020 at 06:23 #135408Whirlwind
ParticipantI think that this battle shows why in reality (IIRC( the Commonwealth generals were in retreat long before this kind of thing happened!
27/04/2020 at 08:57 #135417ParticipantBy this stage the Allied forces were adept at rapid retreats and evacuations……..
"Even dry tree bark is not bitter to the hungry squirrel"
27/04/2020 at 10:20 #135430 deephorseParticipant
What is that orange missile I can see flying across the table?
Play is what makes life bearable - Michael Rosen
27/04/2020 at 23:02 #135477ParticipantYeah, sorry guys, I really didn’t even want to post this one, but it was part of the campaign, so… Absolutely nothing went right for the Allies (minus the short bit of inaccuracy by the German mortars), and it really didn’t feel like it could have gone any other way, due to the force composition of each side and the way I was doing the defender’s deployment.
Seeing as how I’m playing solo, maybe I need to work out a way to make it more difficult for myself when I’m playing the defense; I typically have problems when I’m solo-playing as the defender; when I’m tied into fixed positions I tend to slaughter the enemy in solo games, no matter what era/theater I’m playing. I’m really not sure how to change that, so what I typically do to make defensive games interesting is have the attackers coming from an unanticipated direction so my defenders have to maneuver in order to meet the threat.
Deephorse – It’s not a missile, I actually have some of those and you’ll see them in the next campaign I’m going to post 😉 It is a short section of orange pipe-cleaner that I use to show firing, sort of like tracers, in order to aid the reader in understanding who is shooting and who is being shot at. Guess it’s not working…
V/R,
Jack28/04/2020 at 01:18 #135479kyoteblueParticipantMaybe the next game will not be so lop-sided.
28/04/2020 at 08:39 #135499ParticipantSeeing as how I’m playing solo, maybe I need to work out a way to make it more difficult for myself when I’m playing the defense; I typically have problems when I’m solo-playing as the defender; when I’m tied into fixed positions I tend to slaughter the enemy in solo games, no matter what era/theater I’m playing. I’m really not sure how to change that, so what I typically do to make defensive games interesting is have the attackers coming from an unanticipated direction so my defenders have to maneuver in order to meet the threat.
Yes, I have encountered this a lot too when playing “solo vs. the system games”. I have been fitfully working on the problem for a new version of the Threat Generation System and an upgraded AI for Nuts!
I think perhaps the best implementation I have seen in this is in the old boardgame Ambush! when the defensive scenarios were just as tricky as the attacking ones.
28/04/2020 at 14:06 #135510 ThuseldParticipant
I don’t know what I was even expecting to he honest.
Experiments here: http://inexperiencedmodelmaker.blogspot.co.uk/
Tranquil Stars updates: https://tranquilstars.wordpress.com
28/04/2020 at 15:05 #135514ParticipantThuseld – Well, I was just hoping for interesting fights where either side had a shot at winning, but this one kinda let me down…
John – I’m familiar with ‘Ambush,’ though I’ve never played it. How did it handle the defense?
V/R,
Jack
28/04/2020 at 15:24 #135516Participant‘Ambush’ uses a combination of random events, trigger events, decision points and situation levels, so:
The enemy might be brought on by a random event, or by the friendlies triggering them by moving inot a certain area (very computer game-ish really)
Once they are on, they will have suggested routes, but that can be changed by cirumstance, random event and so on (e.g. once at high ground, if EN visible, take cover at wall and fire; if not visible proceed W towards road)
The situation levels (called condition levels) bring on more troops, or get them to act in a different way depending upon what had happened so far (so if the first German patrol has survived and got to point x, the second patrol will follow the same route: if not, they will enter at point y).
I have expressed this in general terms rather than the specific game mechanics, but that is roughly how it works.
28/04/2020 at 15:43 #135517ParticipantThat sounds pretty cool, but a lot of situationally-specific stuff to work out. Interesting nonetheless.
With this game, I’m more focused on how I handled deployment to the Germans, which allowed me to place anywhere behind an arbitrary line on the board, which presented a deadly ambush and crossfire, which made life pretty boring.
I’m not saying it wasn’t realistic for the under strength Commonwealth force to get beat up right there on it’s starting line by a superior enemy force, I’m just saying I need to change the dynamics/variables as it wasn’t a lot of fun.
V/R,
Jack
-
AuthorPosts
- You must be logged in to reply to this topic.