Home › Forums › Terrain and Scenery › My Portable Wargame tile project
- This topic has 36 replies, 10 voices, and was last updated 2 months, 3 weeks ago by
 shelldrake.
-
AuthorPosts
-
16/01/2024 at 04:45 #194217
 shelldrakeParticipant
Having recently purchased three of the Portable Wargame books, I thought long and hard about the playing area I would use for the game.
I considered squares vs hexes, and if I should have a plain playing area and then place scenery in the squares/hexes, or if I will buy enough bases to make modular tiles.
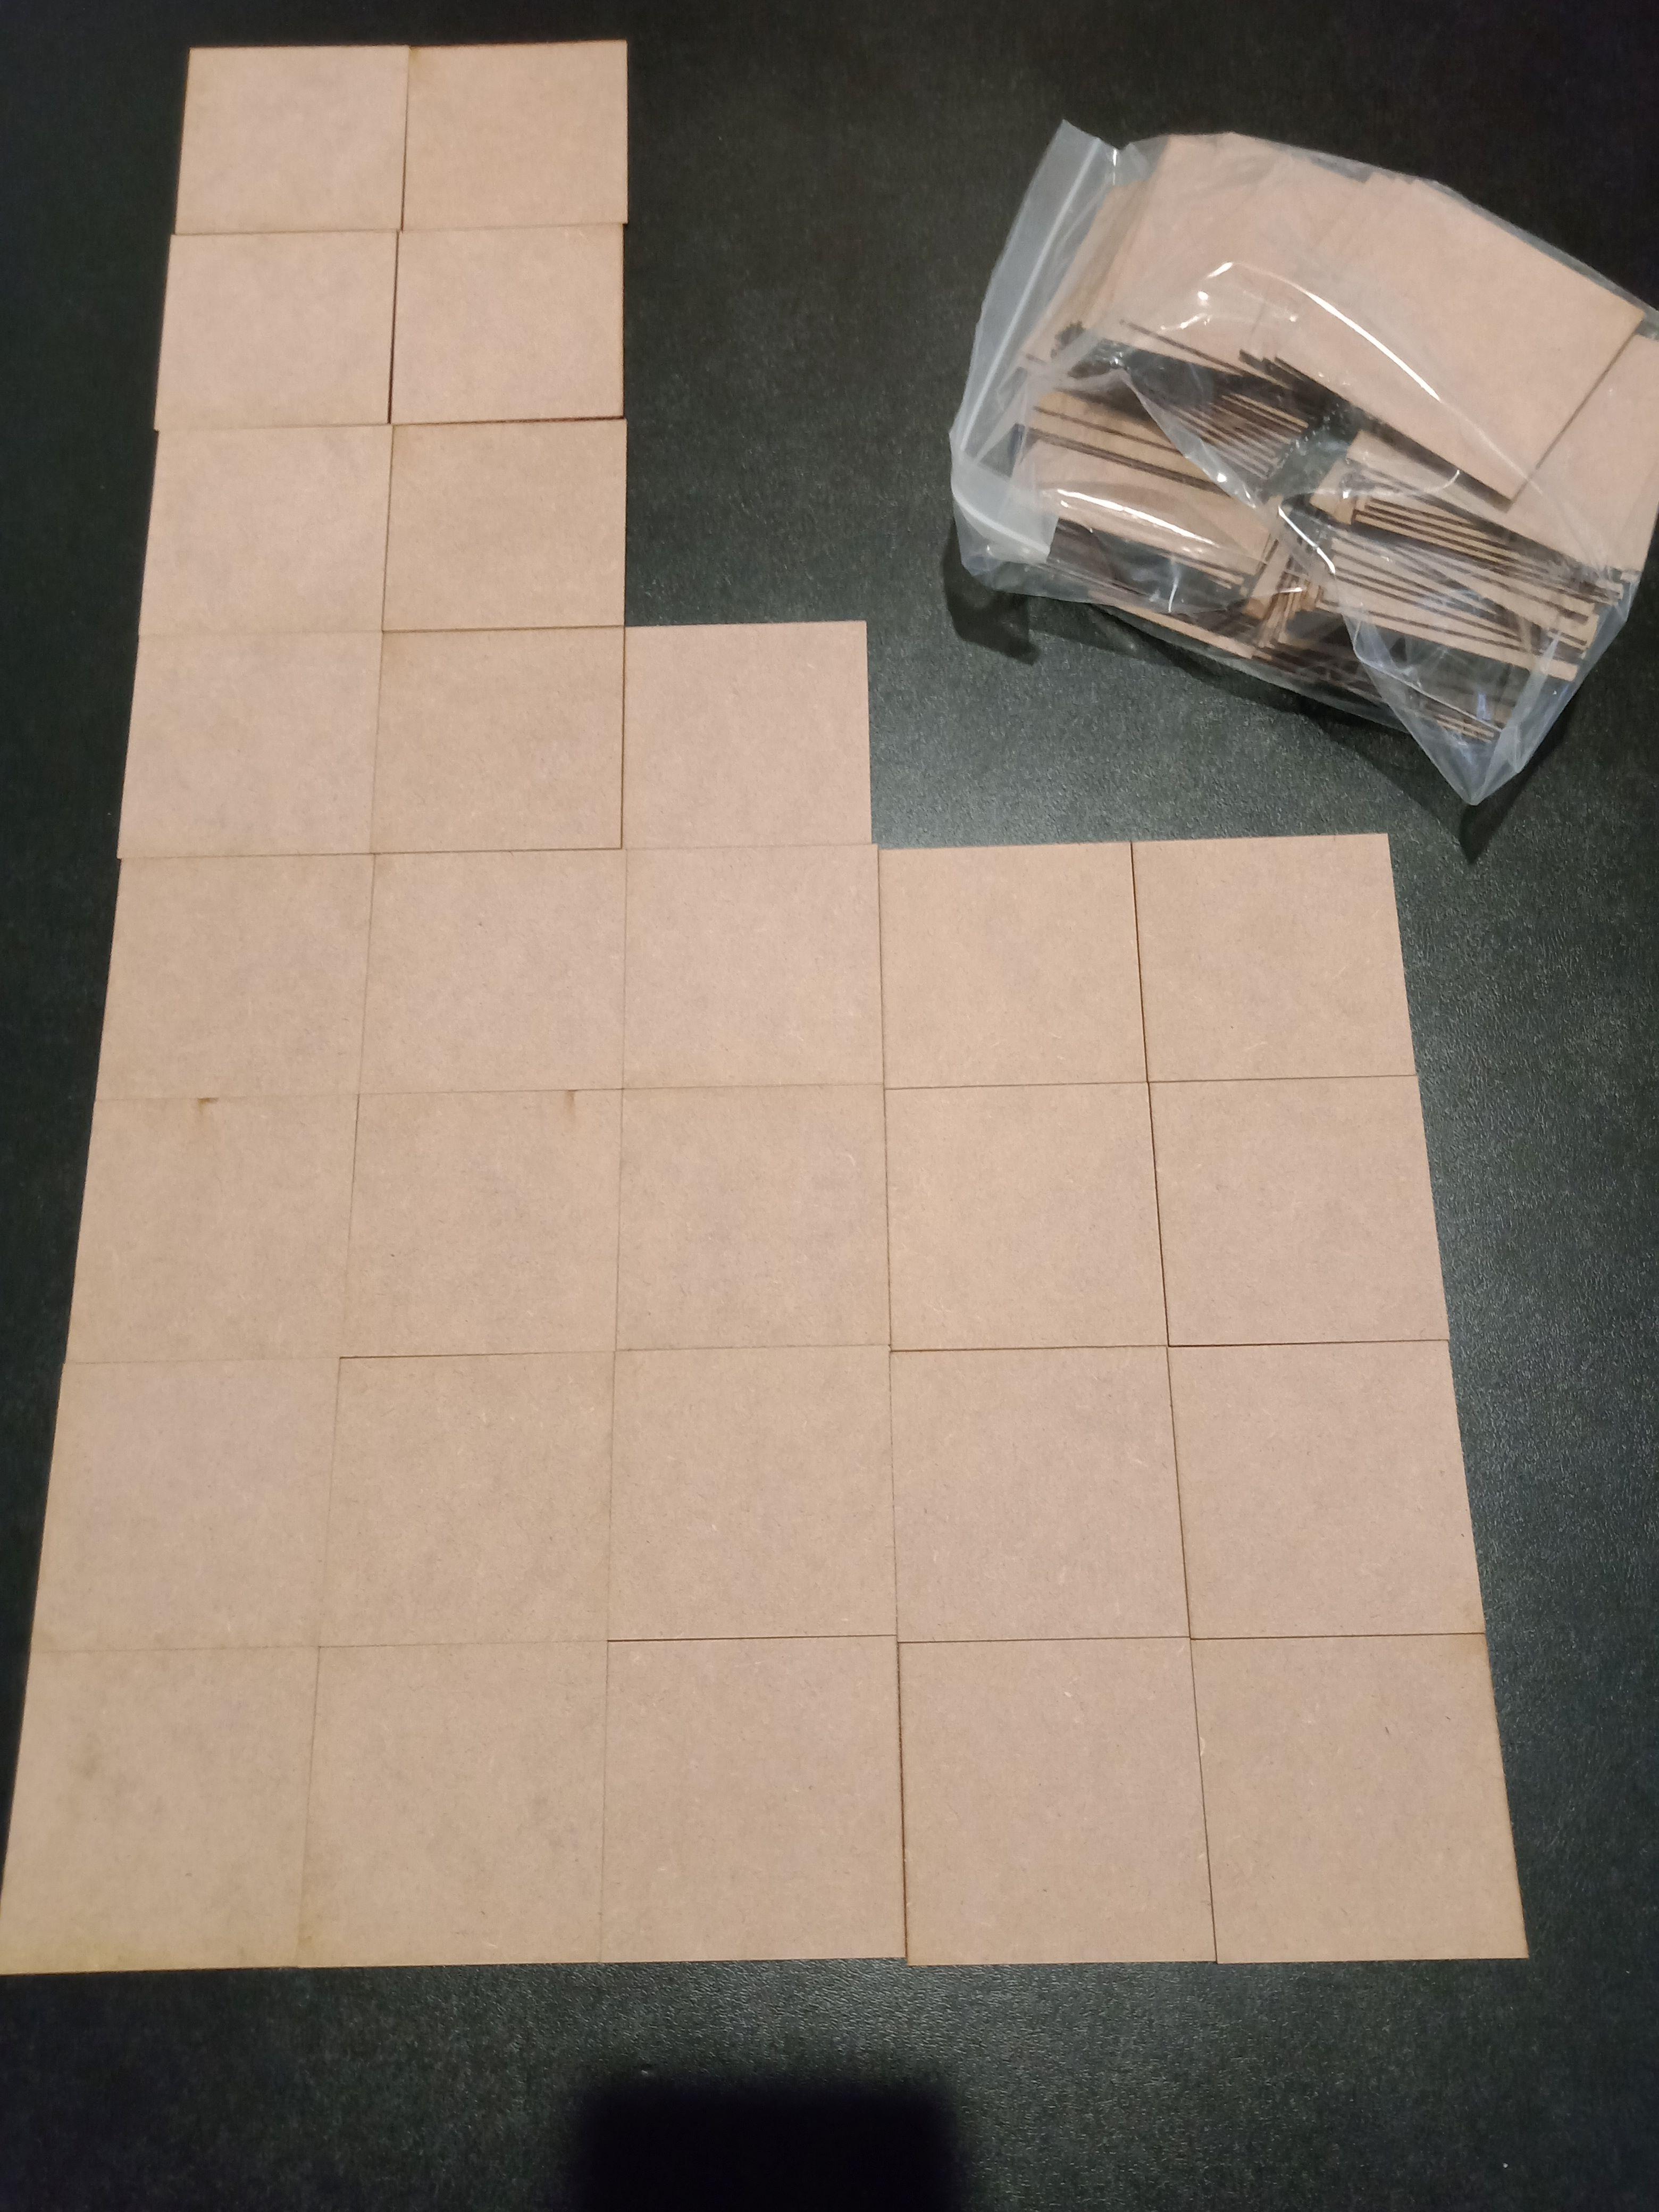
In the end I chose 8cm squares made from MDF, and ordered enough to have an 8 x 9 square playing area and extras to allow for different scenery types to be build on top of a number of the tiles.
I chose 8 cm squares, as this would allow for me to use 6mm, 10mm and 15mm armies, with the 6mm and 10mm being the main focus.
I intend to make a mix of fields, forests, hills, roads, rivers and towns/cities on the tiles, with some being made for WW1, and thus shell holes, trenches and other iconic WW1 scenery upon them.
Before I go full tilt at the project, I will do a bit of research on 3mm and 6mm scenery items such as bridges and buildings. I am thinking of using 3mm buildings to represent towns and cities for my 6mm Napoleonic games, and maybe 6mm Ruins for my WW1 10mm games.
Game settings I intend to play using the Portable Wargame rules are: Napoleonic Division level games, WW1 and the Boer War.
I invite interested readers of this post to follow my progress, to post positive replies and suggestions/helpful tips and thus keep me moving forward.
And if somewhere along the way someone borrows an idea of something I have done, then glad to have been helpful to the wargaming community.
16/01/2024 at 05:17 #194219 ian pillayParticipant
Shelldrake, looks like a cool project. I shall follow this one with interest.
Have you thought about building a frame so the tiles don’t move during a game? I think it will be worth it as I can only imagine the frustration caused if the table got knocked during a game and the tiles go everywhere.Tally-Ho! Check out my blog at…..
http://steelcitywargaming.wordpress.com/16/01/2024 at 10:41 #194224shelldrakeParticipantYes, I did consider a frame… but have no idea how to make it 😁
I did think makebe velcro dots on the rear to hold it in place on some material.
16/01/2024 at 11:23 #194226 Andrew BeasleyParticipant
Should be interesting.
I found felt stuck to the bottom stops the tiles moving around – esp when on a ‘mouse mat’ style gaming sheet though they can help on any surface. Maybe a simple cloth sheet as an under cover would suffice? I’ve used cork tiles before as a base layer and then put tiles on that – OK but the cork can split / fray at the edges and corners over time.
Are you going 3D for the trenches or flat representations? I do enjoy the “toy land” style boards from the early games (Ian Dury’s Salute game or RC’s chess board) – hence my use of felt.
As for a frame – how about a simple picture frame? These can be made to any size and can be found cheap on eBay last time I looked (search bespoke picture frame). I’ve also used a dry-wipe board and a pin board BUT had these before buying the tiles! No reason you could not add a small edge to pad out the board if they do not fit exactly. Of the three, the dry wipe board was the strongest as the pin boards here seem to have cardboard backing now.
One other thought is to get some ‘half tiles’ as well so you can try the offset square layout without the ragged edges (pg 15 of the original book and this example from The Duchy of Tradgarland).
I do like the smaller buildings to represent whole towns – there are a few on my main thread (see here and here) if you care to have a look.
Expecting to see you pop up on Mr Cs blog at some point (though I do think he collects examples off the FaceBook group posts TBH) 🙂
16/01/2024 at 16:18 #194245 Geof DowntonParticipant
I have painted the underside of my Sarissa tiles with non-slip paint (Rustoleum SuperGrip) and place them on a felt cloth. They stay where they are put!
One who puts on his armour should not boast like one who takes it off.
Ahab, King of Israel; 1 Kings 20:1116/01/2024 at 17:08 #194249 Mr. AverageParticipant
I have been seeking to do portable modular wargame terrain for many years and I am in sympathy with all who attempt it, though I have never managed to make a good set myself.
16/01/2024 at 18:53 #194259 MikeKeymaster
Yes, I did consider a frame… but have no idea how to make it 😁 I did think makebe velcro dots on the rear to hold it in place on some material.
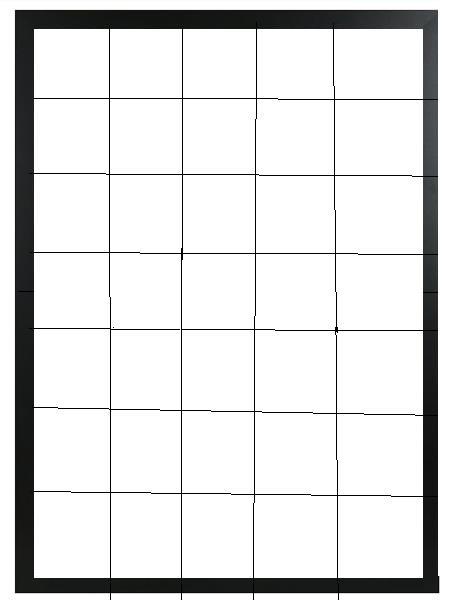
I think maybe buy a large picture frame and then get tiles cut that would fit.
No good after the deed though.Like this with a load of 10 x 10’s.

 16/01/2024 at 19:02 #194261MikeKeymaster
As for a frame – how about a simple picture frame? These can be made to any size and can be found cheap on eBay last time I looked (search bespoke picture frame). I’ve also used a dry-wipe board and a pin board BUT had these before buying the tiles! No reason you could not add a small edge to pad out the board if they do not fit exactly. Of the three, the dry wipe board was the strongest as the pin boards here seem to have cardboard backing now.
Dang, only just read this.
Sorry Andrew.
16/01/2024 at 23:19 #194263shelldrakeParticipantThank you for the suggestions and links in your reply Andrew. Seeing Ian’s Salute board and the way the carpet tiles were used is very tempting to investigate further.
I had thought about buying some ‘offset’ tiles as you suggested, and may do so once I have the main tiles up and running.
I would like to make 2D or 3D trenches – I just need to come up with an idea that will look good and not take a lot of time or be overly complicated to make. I will post updates on what I experiment with as I go.
16/01/2024 at 23:21 #194264shelldrakeParticipantStill a great idea Mike even if it was already suggested, and making an image as to how I can do it is very helpful too, so I appreciate your reply.
16/01/2024 at 23:55 #194265shelldrakeParticipantUpdate #1
I just placed an order for some small scale bridges and churches from Brigade Miniatures, and some 3m houses and 6mm ruins from Battlescale.
The 6mm ruins are for use with the WW1 game, and all the smaller items are for use with 6mm battles.
Once they arrive I will start making river and town sections for the project.
17/01/2024 at 06:35 #194268 Cacique CaribeParticipant
Ooo, nice!
I can’t wait to see where you take this project next.
Dan
Loads of WIPs: https://www.flickr.com/photos/9593487@N07/albums/with/7215771063052937617/01/2024 at 21:52 #194289McKinstry
ParticipantI’ve made a little over 200 hexagon tiles for my 6mm Command & Colors project. Being lazy I bought the 3mm thick hexes from Litko and magnetic .8mm rubber to attach them to 26 gauge steel flashing material in 2×3 foot sheets.
The tree of Life is self pruning.
17/01/2024 at 23:29 #194292shelldrakeParticipantUpdate: I have started undercoating my squares so that I can flock them over the weekend.
I have marked out two curving corner pieces, one cross road, one t intersection, and about 15 straight road sections, which should be enough.
I was contemplating if I should make scenic bases, i.e. bases with hills and forests etc. glued on, or make scenic pieces to place on the squares, but decided to stick with my original plan of glueing them on to the bases permanently.
Thus, I have ordered another 100 squares, which will allow me to make rivers, lakes, trenches, shell holes, and hills to allow greater flexibility with how and what I can lay out on the table.
I also ordered some rectangles to allow for an offset playing area, as per Andrew’s suggestion in an earlier reply. This will give me even more set up options.
Thank you to everyone so far for ideas on ensuring my bases won’t slip around when playing.
I discovered this morning that I can purchase large magnetic sheets, which could be laid on the table like a gaming matt, or I can buy a customised sized magnetic white board, which would allow for the game to be portable, in that I don’t have to pack up my tiles if I need to move the game around.
I have some magnetic tape I can place on the back of my tiles, which can then be placed on the white board when setting up a game.
Note: I just checked the prices and options for the white board and the custom sized sheets, and whilst the white board is more expensive, I can actually have it made to the size I want.
I will make the tiles for the game and then look at getting the white board later on… especially as I have a few bills to pay this week.
18/01/2024 at 13:49 #194299Andrew BeasleyParticipantAre you raising up the general ground area to allow you to sink rivers / ponds / trenches etc down or accepting river etc sit on top of the ground?
Sunk in / down:
Raised up / sat on top:
18/01/2024 at 18:50 #194307shelldrakeParticipantI will probably go with raised ever so slightly to keep the costs down on how many tiles I need.
19/01/2024 at 13:32 #194329 Albert of WinterpigParticipant
if you can just stright and right angles, an easy way to add depth to the squares is glue the mdf to 6mm (or 10mm or even 20mm) foam core board, Use the mdf side for level areas and the card side to dig in trenchs and shell holes, rivers etcs…
20/01/2024 at 05:52 #194348shelldrakeParticipantif you can just stright and right angles, an easy way to add depth to the squares is glue the mdf to 6mm (or 10mm or even 20mm) foam core board, Use the mdf side for level areas and the card side to dig in trenchs and shell holes, rivers etcs…
It is actually my intention to use foam card/board to the squares for my trenches… I just need to make the measurements that will make reasonable looking trenches.
20/01/2024 at 05:57 #194349shelldrakeParticipantUpdate: I have painted the majority of the squares and have started flocking some of them.
Here is a sneak preview of the work done so far:
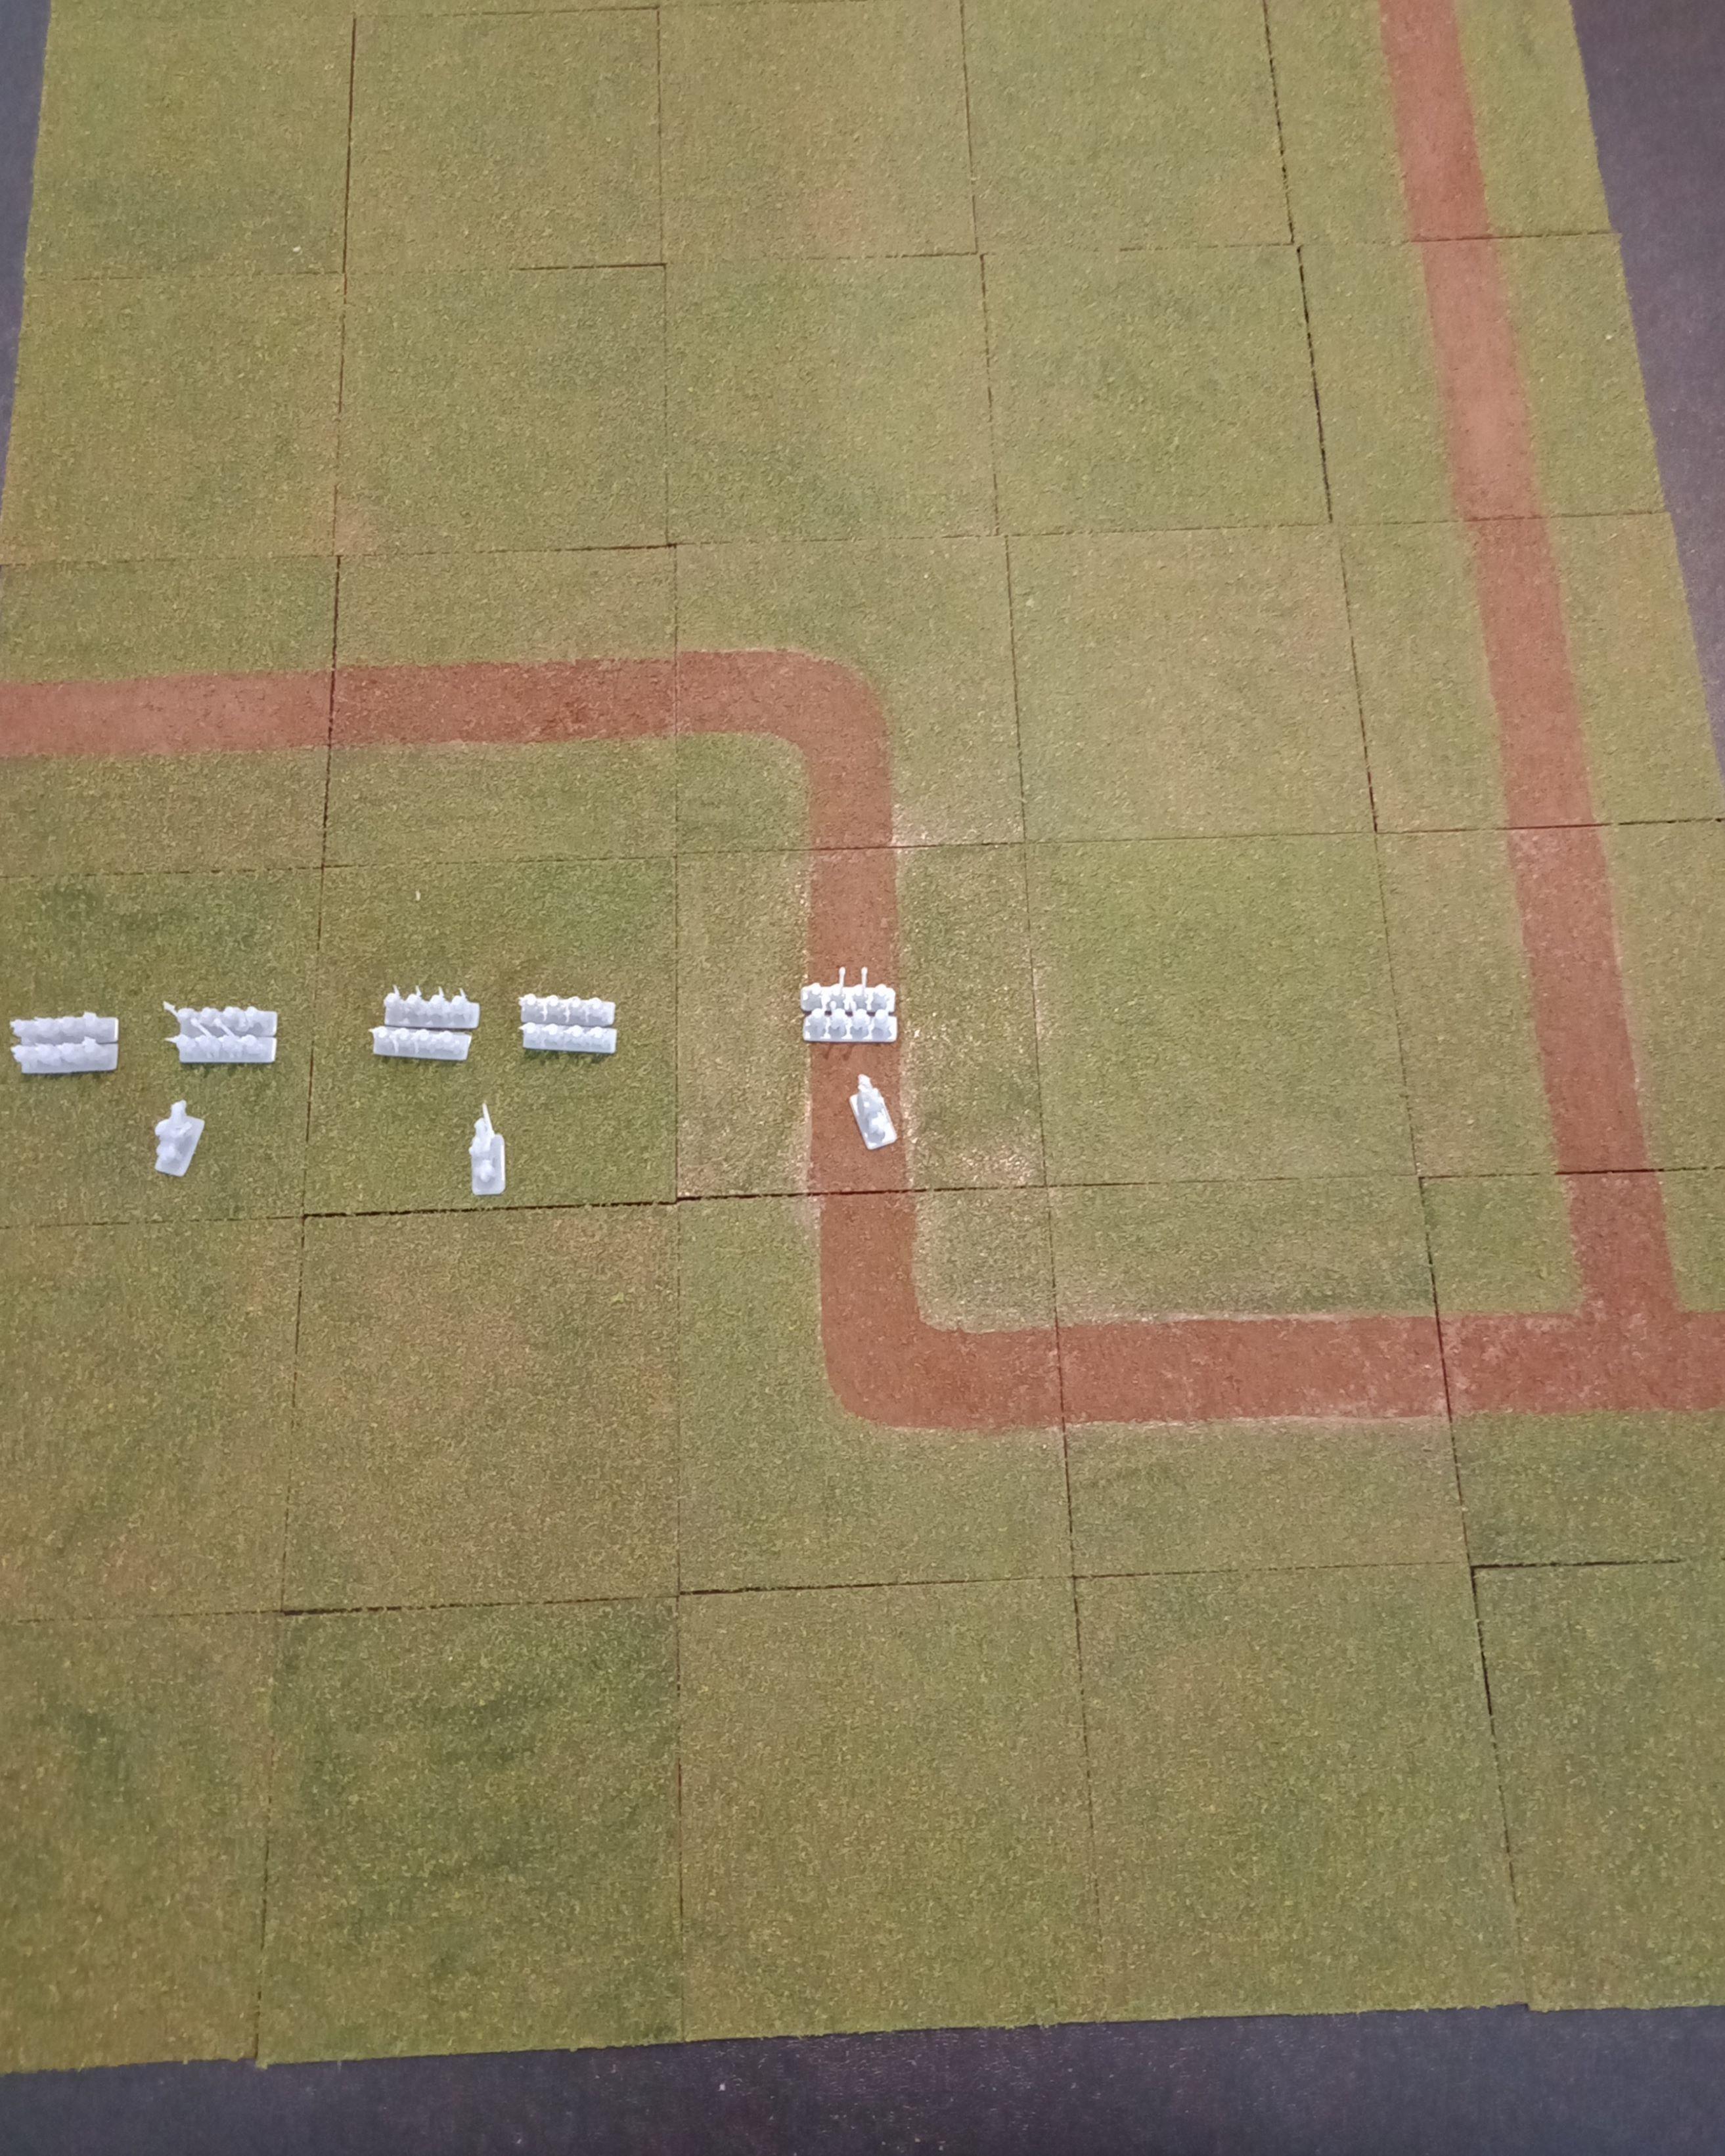
I am working on hills and forests for the table, and as previously mentioned, once my 3mm scale buildings and bridges arrive, I will start making river and town tiles for the game.
The figures on the table are 6mm 3d printed Napoleonic British that I have as samples.
My French and British Division+ should be arriving on Tuesday or Wednesday.
20/01/2024 at 15:06 #194372Andrew BeasleyParticipant🙂
20/01/2024 at 15:08 #194373ian pillayParticipantLooking really good, I do like the idea of reversible tiles with the 2.5D features on one side of them.
Tally-Ho! Check out my blog at…..
http://steelcitywargaming.wordpress.com/23/01/2024 at 00:28 #194457shelldrakeParticipantMy latest update:
I have flocked all of the basic squares, made the roads, some modular hills and a test forest square.
I am very keen to get the bridges and houses I have ordered, so that I can make river and towns squares, but that could be some weeks off now.
Here are some photos of the work completed so far:
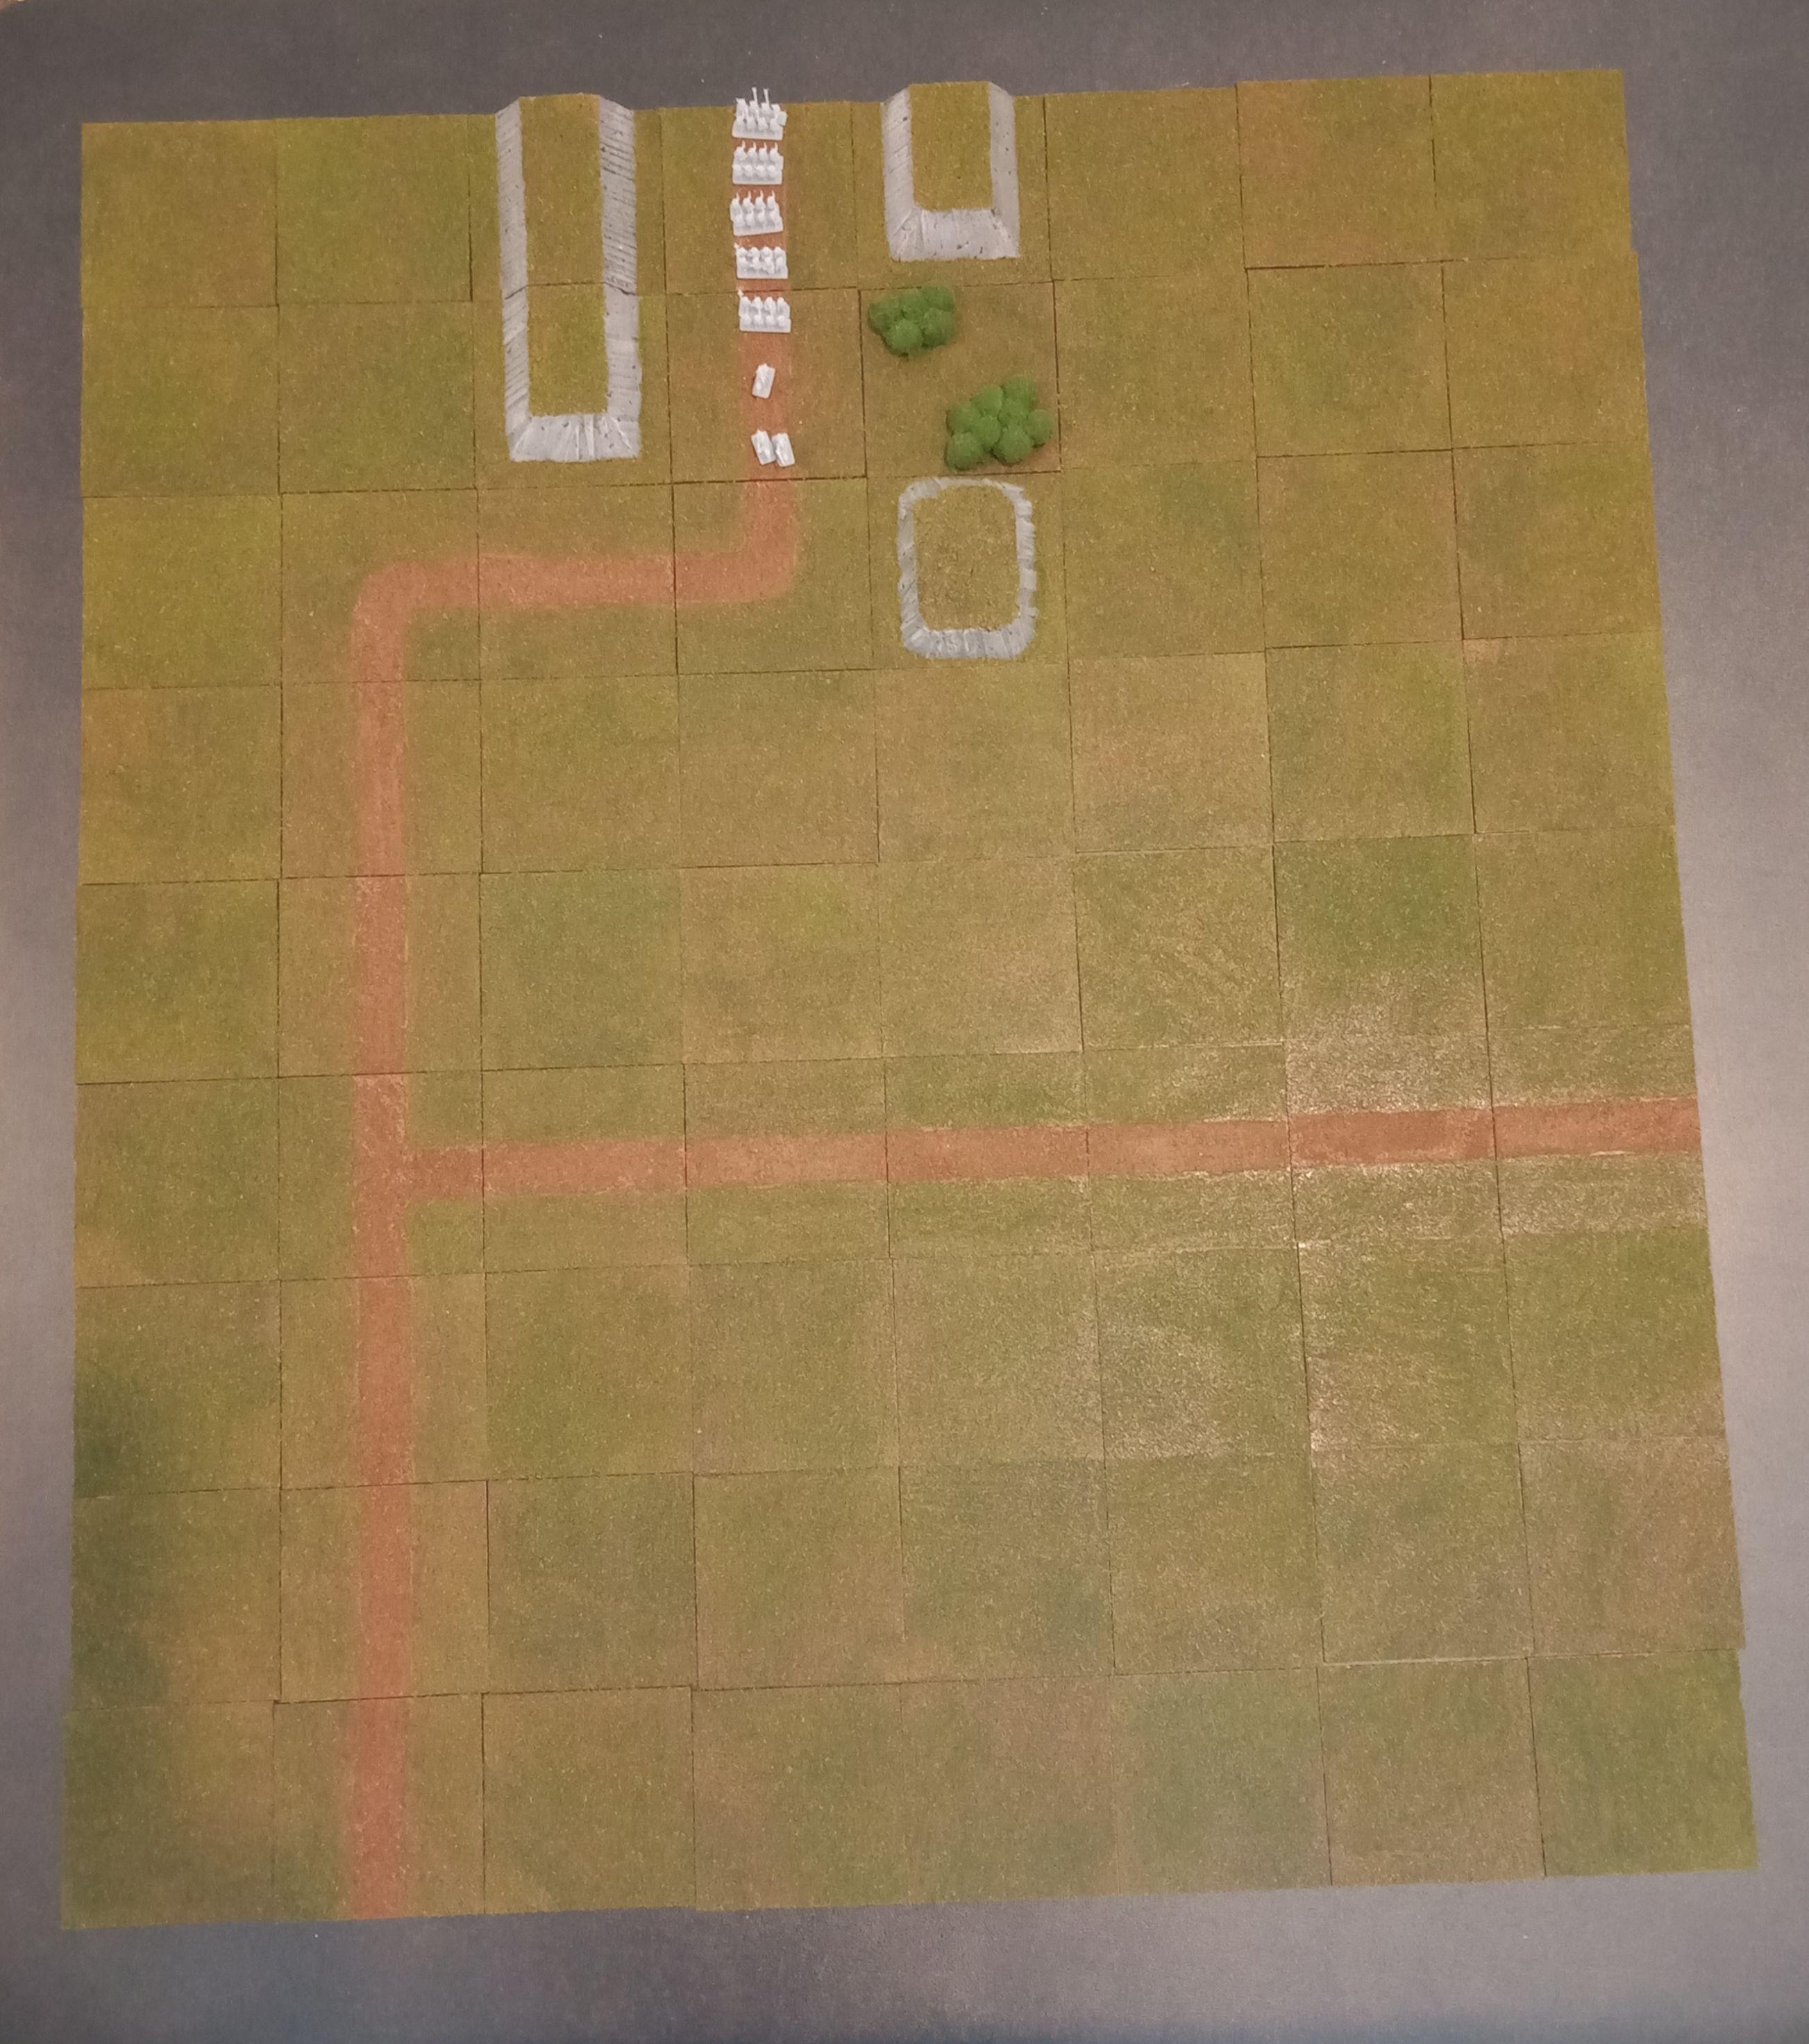
I intend to make some more forest tiles and more hills. I have made extra road and field sections to allow for greater variation in the playing area, and I will be making some hedges to boarder some of the tiles. I will also find a different colour flock to help make some crop fields.
My 6mm Napoleonics should arrive today or tomorrow, which will give me something to do whilst waiting for the bridges and buildings to arrive.
23/01/2024 at 08:42 #194461ian pillayParticipantWow that’s looking really good. Great job
Tally-Ho! Check out my blog at…..
http://steelcitywargaming.wordpress.com/23/01/2024 at 12:05 #194473Andrew BeasleyParticipantVery nice.
How did you make the forest? I’ve not seen anything like than and the closest I can think of is flocking a polystyrene ball but that would be more regular I think…
23/01/2024 at 21:55 #194506shelldrakeParticipantVery nice. How did you make the forest? I’ve not seen anything like than and the closest I can think of is flocking a polystyrene ball but that would be more regular I think…
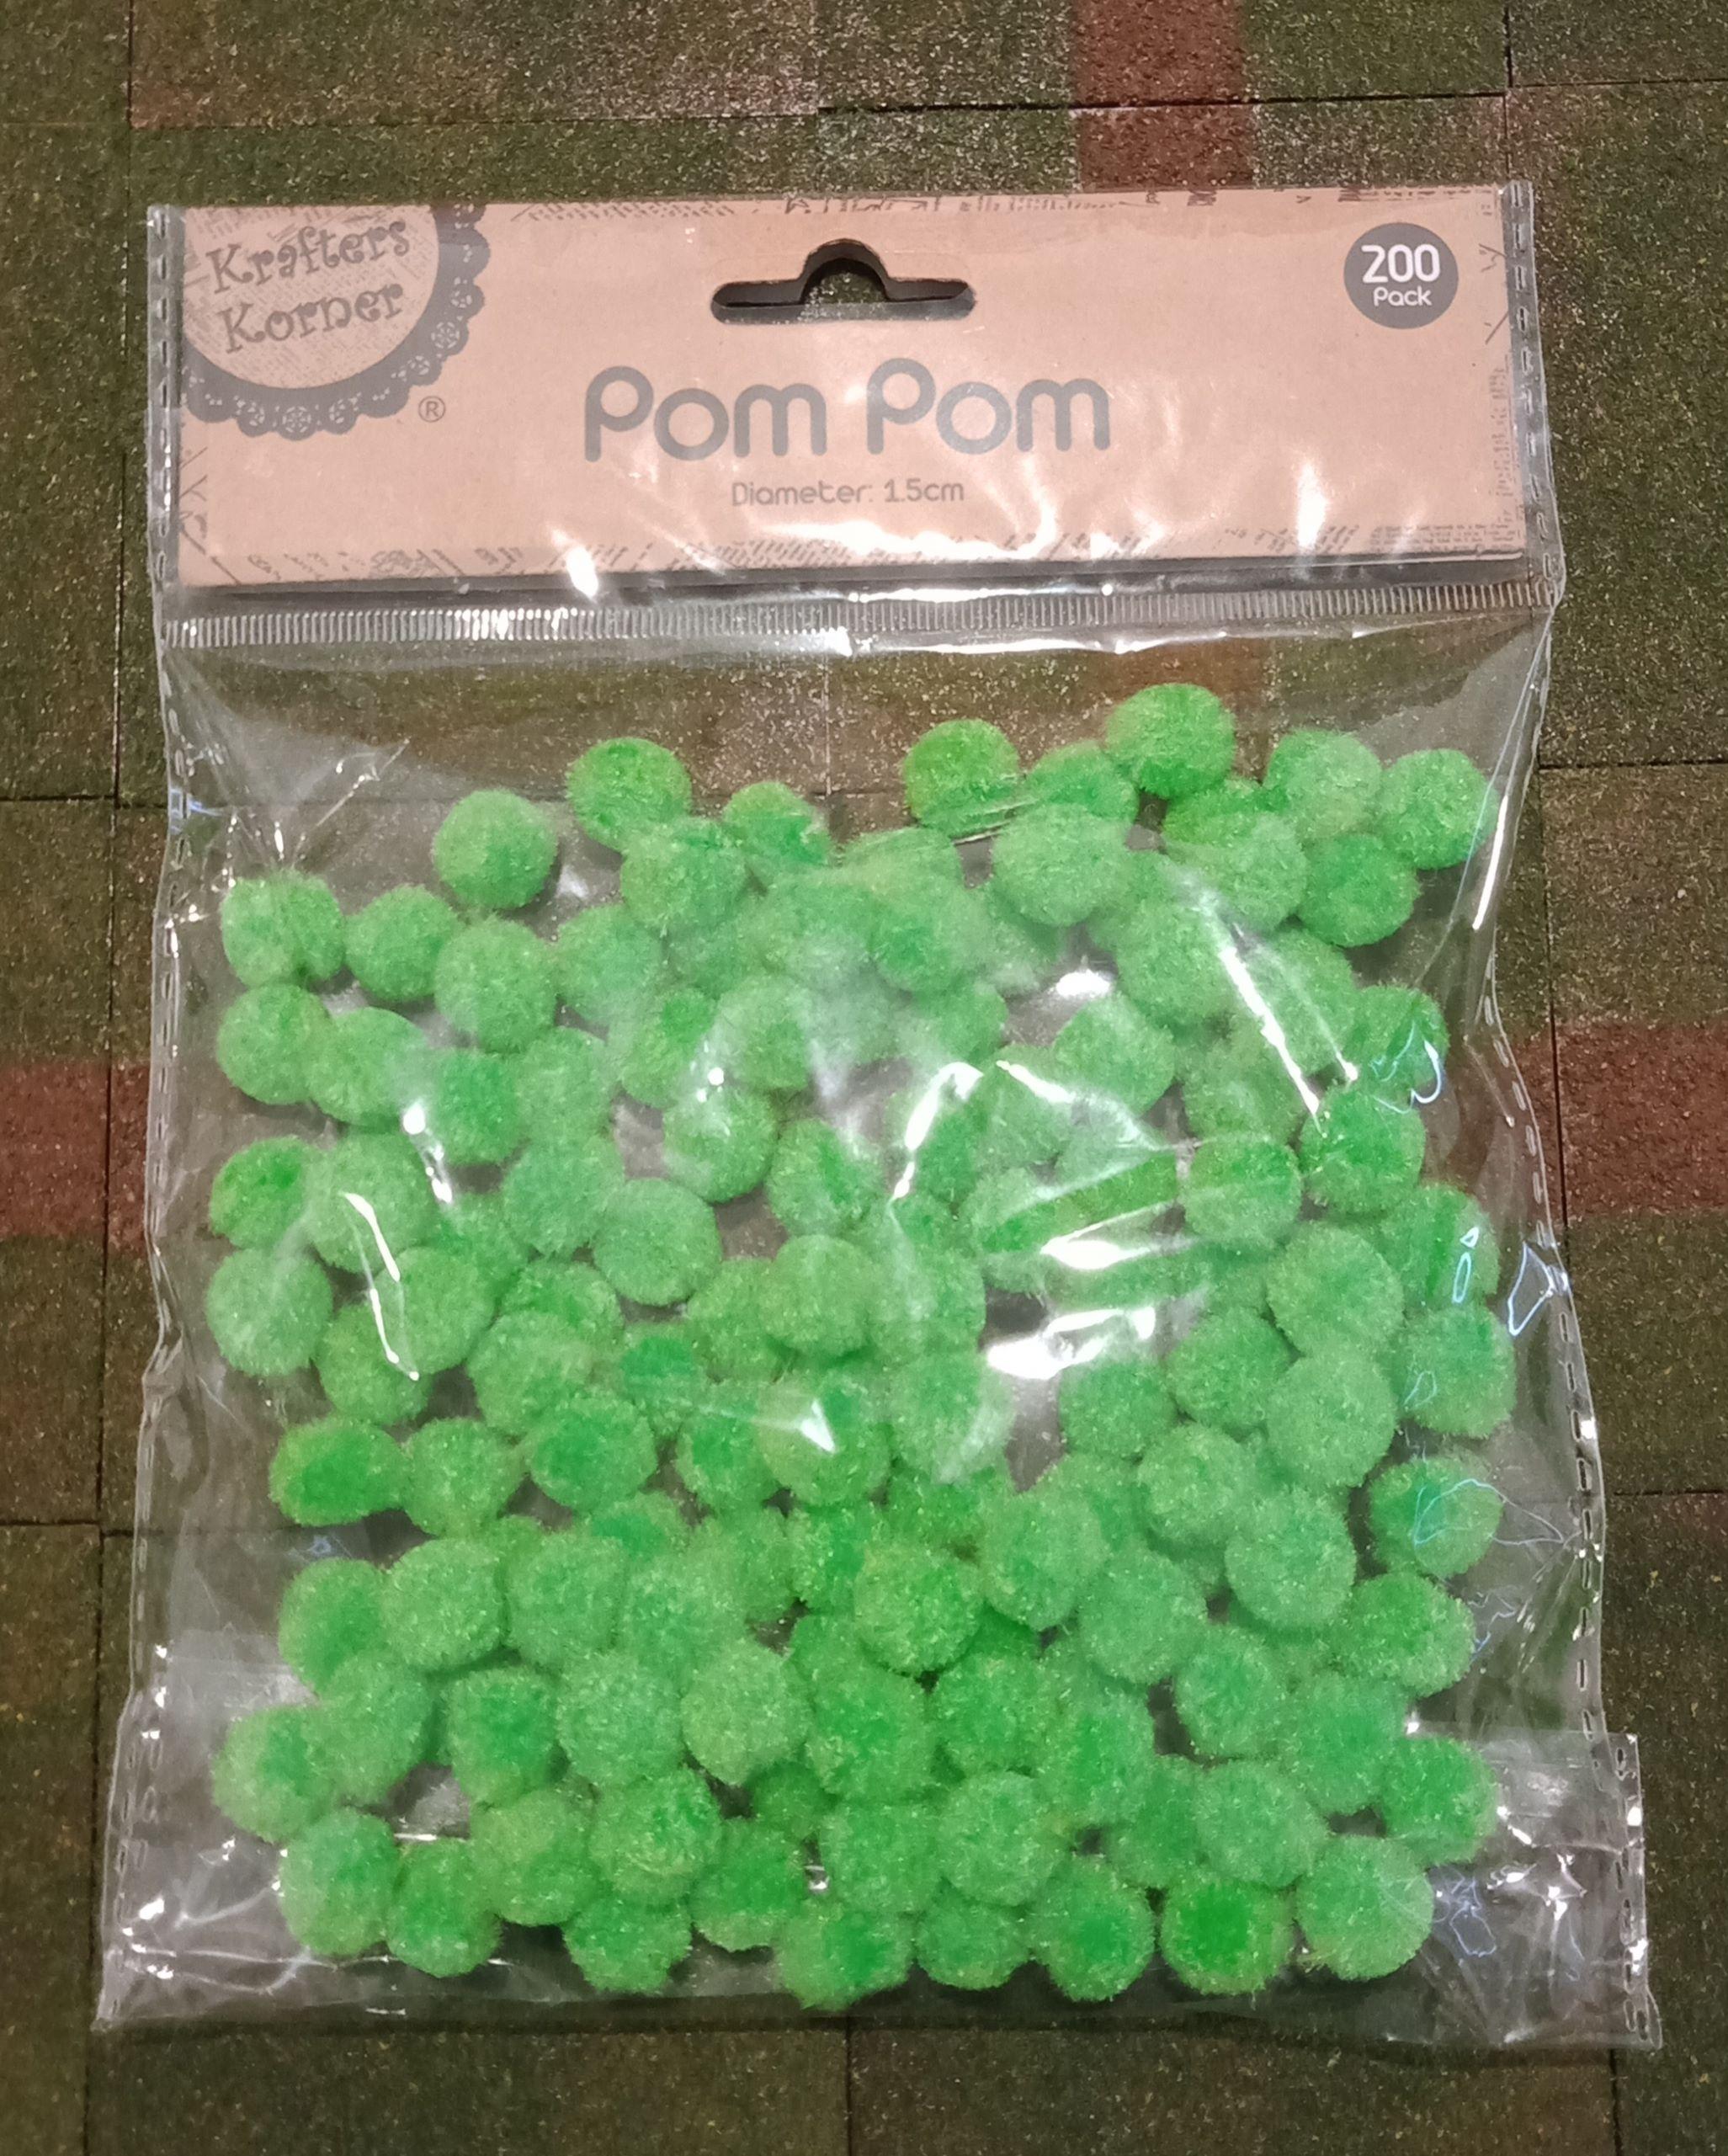
I am using some 1.5cm pompoms that I found in a random store near where I live.
They are a pain to glue together; I had to glue them in small batches and push weighted objects up against them to keep them in place whilst the glue dried.
I haven’t been glueing them directly on to the squares as I wanted to keep the mess down when painting and flocking the pompoms and the squares, but might give it a try if it will be faster and easier to manage.
I also contemplated adding trunks to the pompoms, but that seemed like a very large amount of work for somethings that is abstract.
23/01/2024 at 22:42 #194508Andrew BeasleyParticipantClear find – never seen any without silly silver threads in them around here for Christmas (really need to get to a ‘big’ town).
Would hot glue fasten them together well enough as it ‘dries’ quickly? My only concern is it’s not very flexible and bits have a habit of peeling off it.
25/01/2024 at 10:19 #194570shelldrakeParticipantWell, a bitter sweet update. My 6mm Napoleonics arrived today.
The sweet part: They are lovely 3d printed miniatures.
The bitter part: the order wasn’t 100% correct (missing some French Infantry and Line Lancers), and the seller has decided not to sell them anymore as his printers are busy printing out other items, thus I can no longer complete my armies, nor get the figures from the collection that were not listed on the web site yet.
Feeling absolutely gutted by this. I will be able to play smaller Brigade level games with what I have, but really wanted to have a complete French and British Infantry Division, with two Cavalry brigades to go along with them.
I will make the best out of the situation and scale down to Brigade level games as mentioned, but unless I can someone selling 3d prints of the same range, I can shelve my long term goal of adding Russians and Dutch to the collection for 1814 & 1815 campaigns.
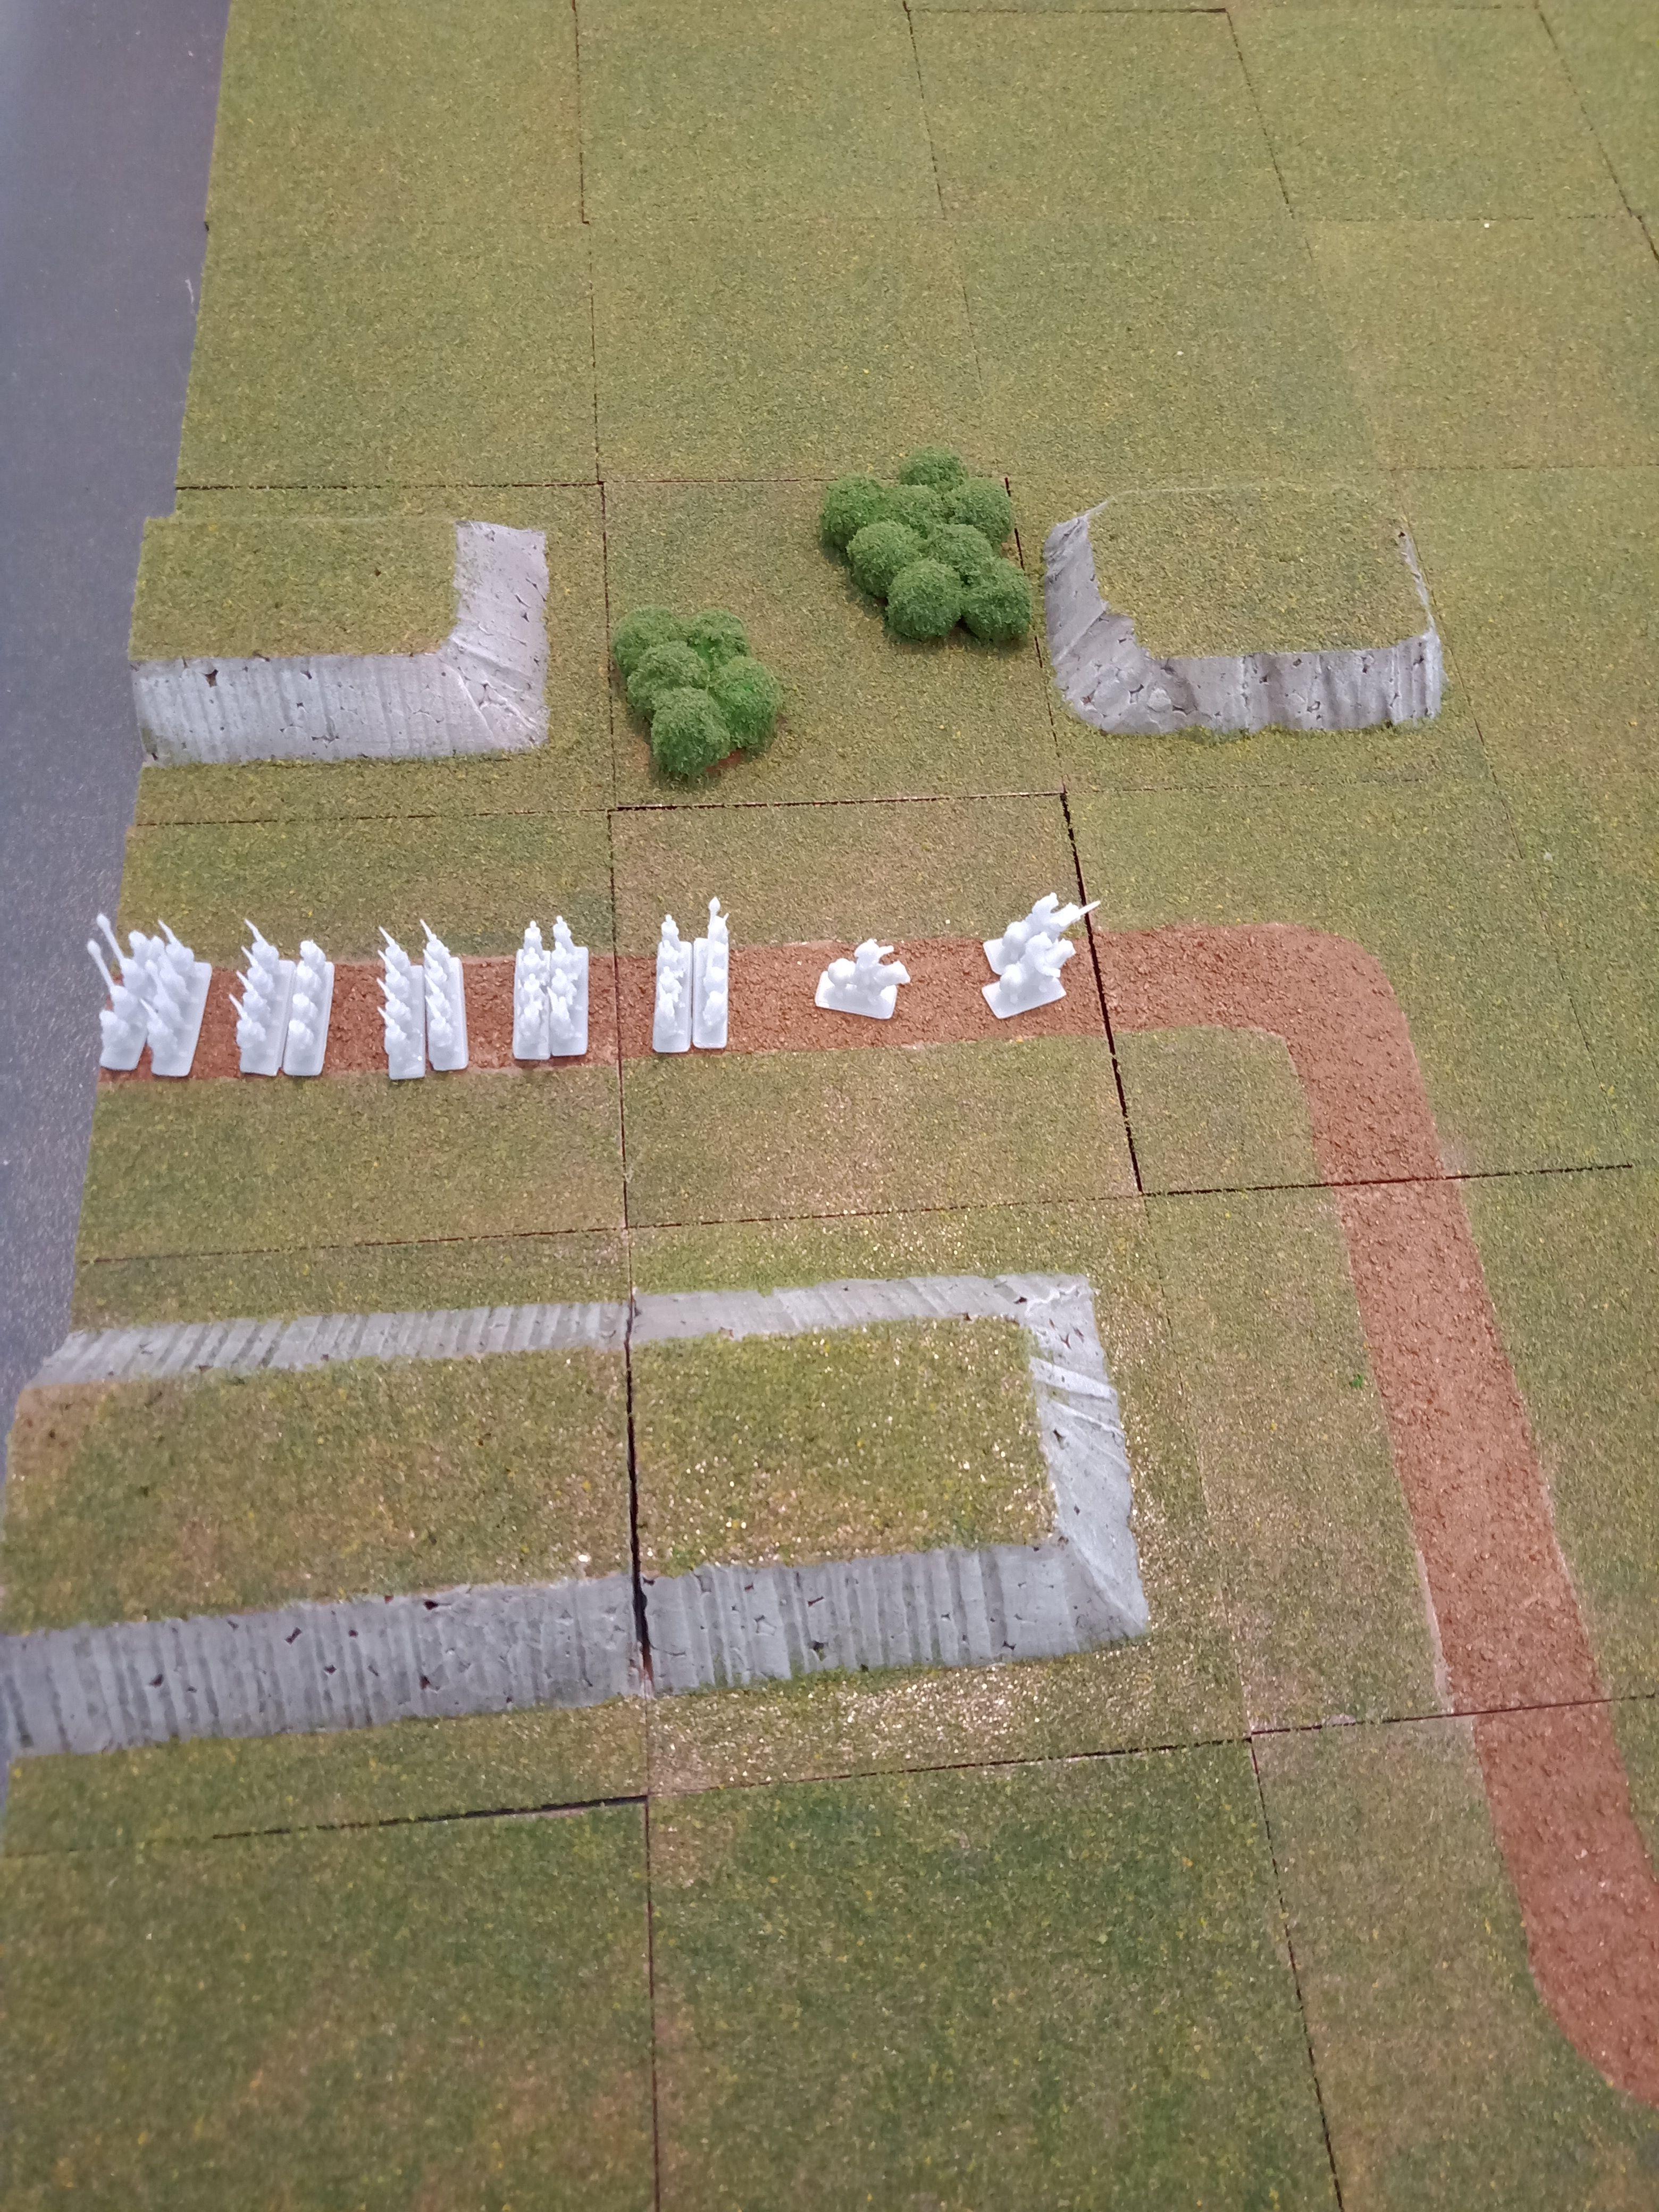
Photos attached is of a historical strength French Brigade with a battery, two cavalry regiments and brigade command (seen on the right side) and a historical strength British Brigade with a battery, two cavalry regiments and the brigade command.

Now to order bases for the figures, and whilst waiting for those to arrive, I can begin painting at a very basic level.
25/01/2024 at 12:00 #194581MikeKeymasterAre the STLs available anywhere else?
25/01/2024 at 12:29 #194585shelldrakeParticipantAre the STLs available anywhere else?
I tracked down a Uk seller that prints the minis and will post to Australia, and as an added bonus, they sell the complete range of Waterloo Napoleonics, so can add the unit types that were missing from the Australian seller.
25/01/2024 at 13:46 #194586MikeKeymasterThat sounds like a result!
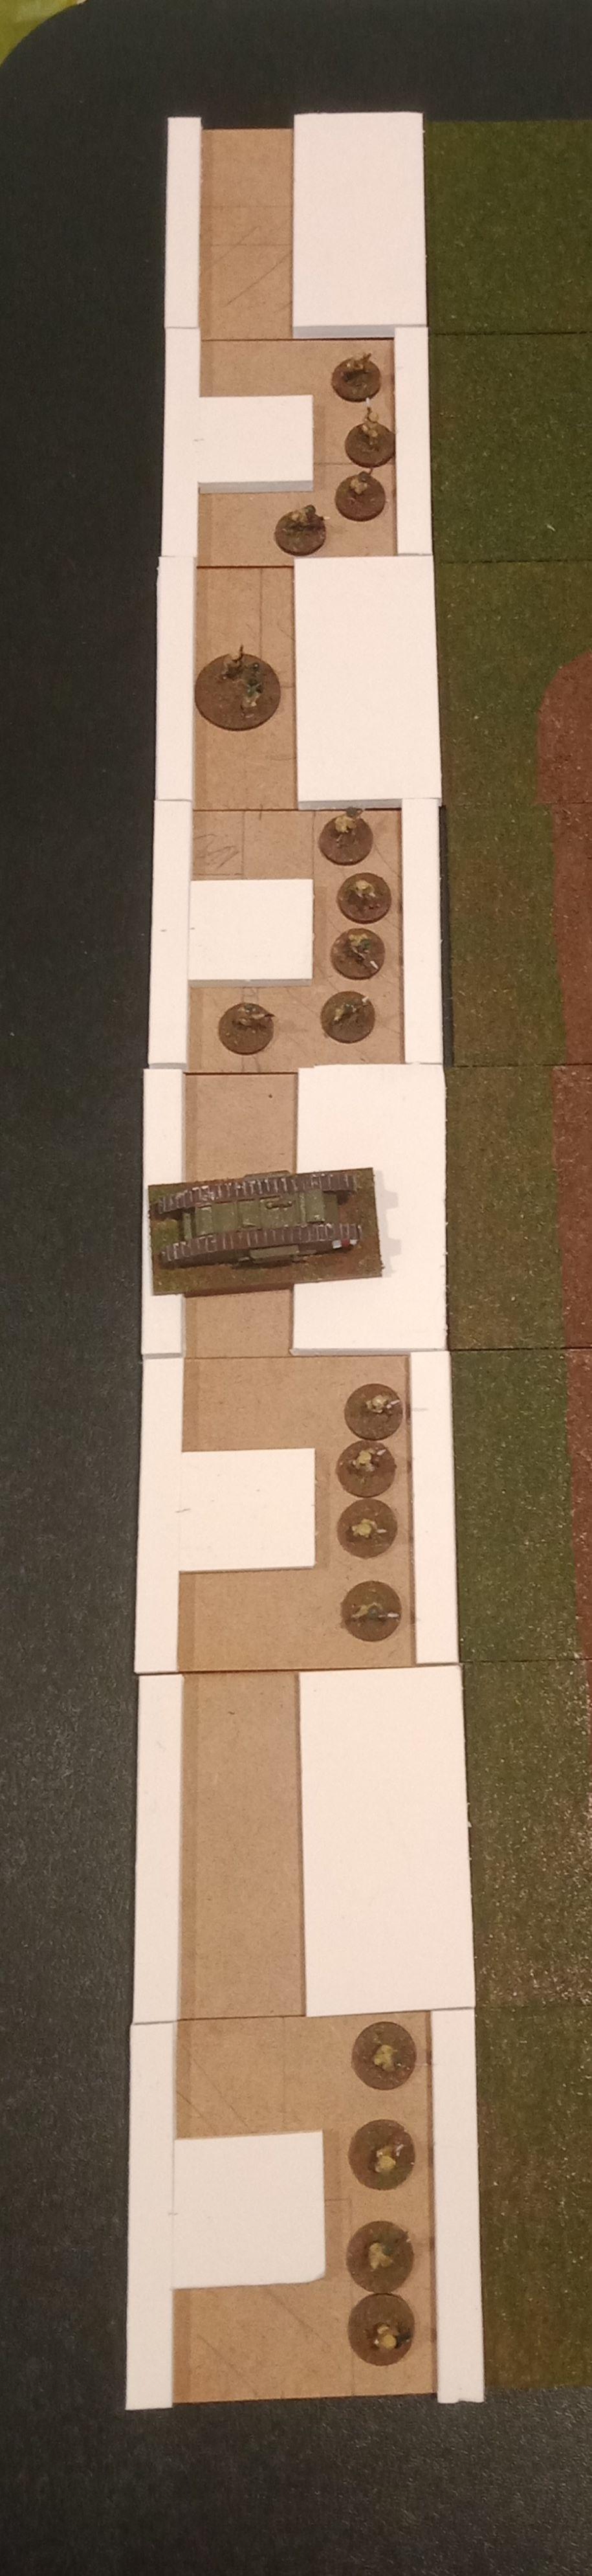
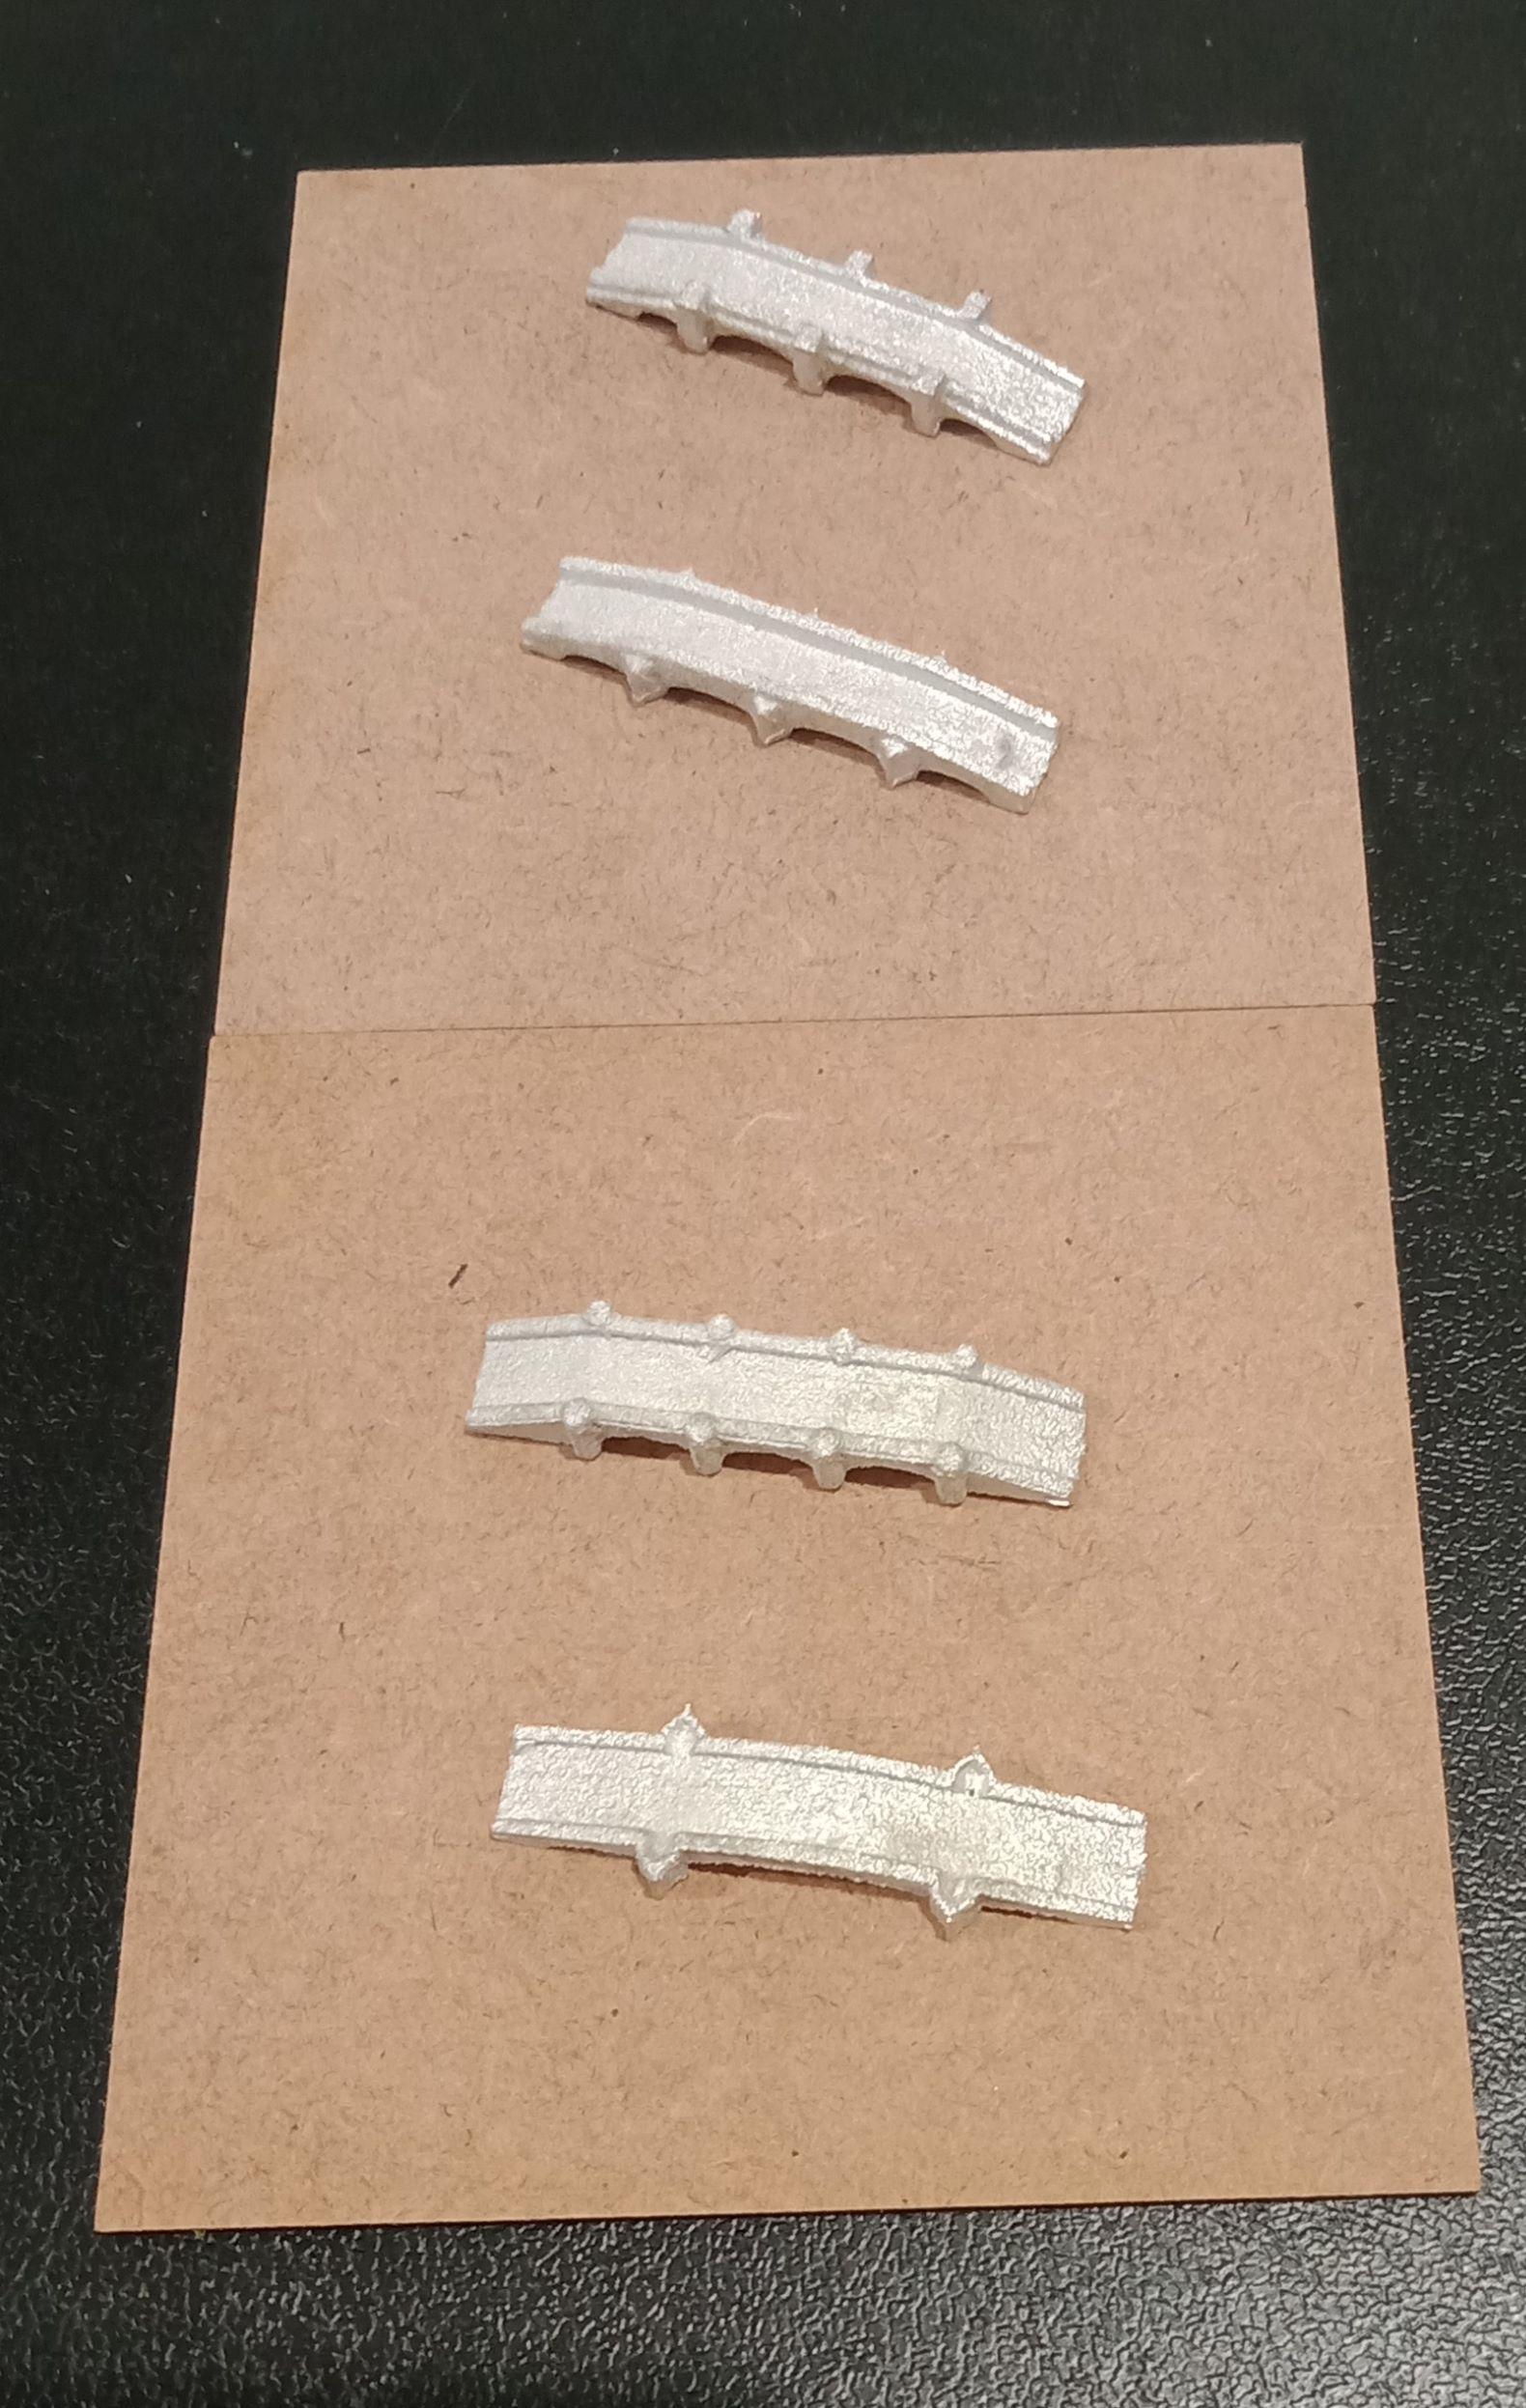
29/01/2024 at 09:11 #194723shelldrakeParticipantI finally cracked the design problems I was having with my trenches for the portable wargame, with the initial tiles shown in the image below.
I intend to make one tile with an opening at the back for the start of a communication trench, and the tiles in front of the trenches will have a small section which will slope downward and have barbed wire in front of that section… at least that is the plan.
 29/01/2024 at 09:42 #194724ian pillayParticipant
Those trenches look brilliant. WWI is definitely a period I would like to get into but not sure on the type of game just yet but I will certainly references back to your trench layout.
Tally-Ho! Check out my blog at…..
http://steelcitywargaming.wordpress.com/29/01/2024 at 10:49 #194725shelldrakeParticipantThose trenches look brilliant. WWI is definitely a period I would like to get into but not sure on the type of game just yet but I will certainly references back to your trench layout.
Thank you. I need to make sand bags along the front edge of each trench, and of course, paint them up.
Figuring out how to make these trenches is a big game changer for me.
I have a few WW1 wargame rules,and some other players have come up really amazing ways to make trenches for 28mm skirmish games.
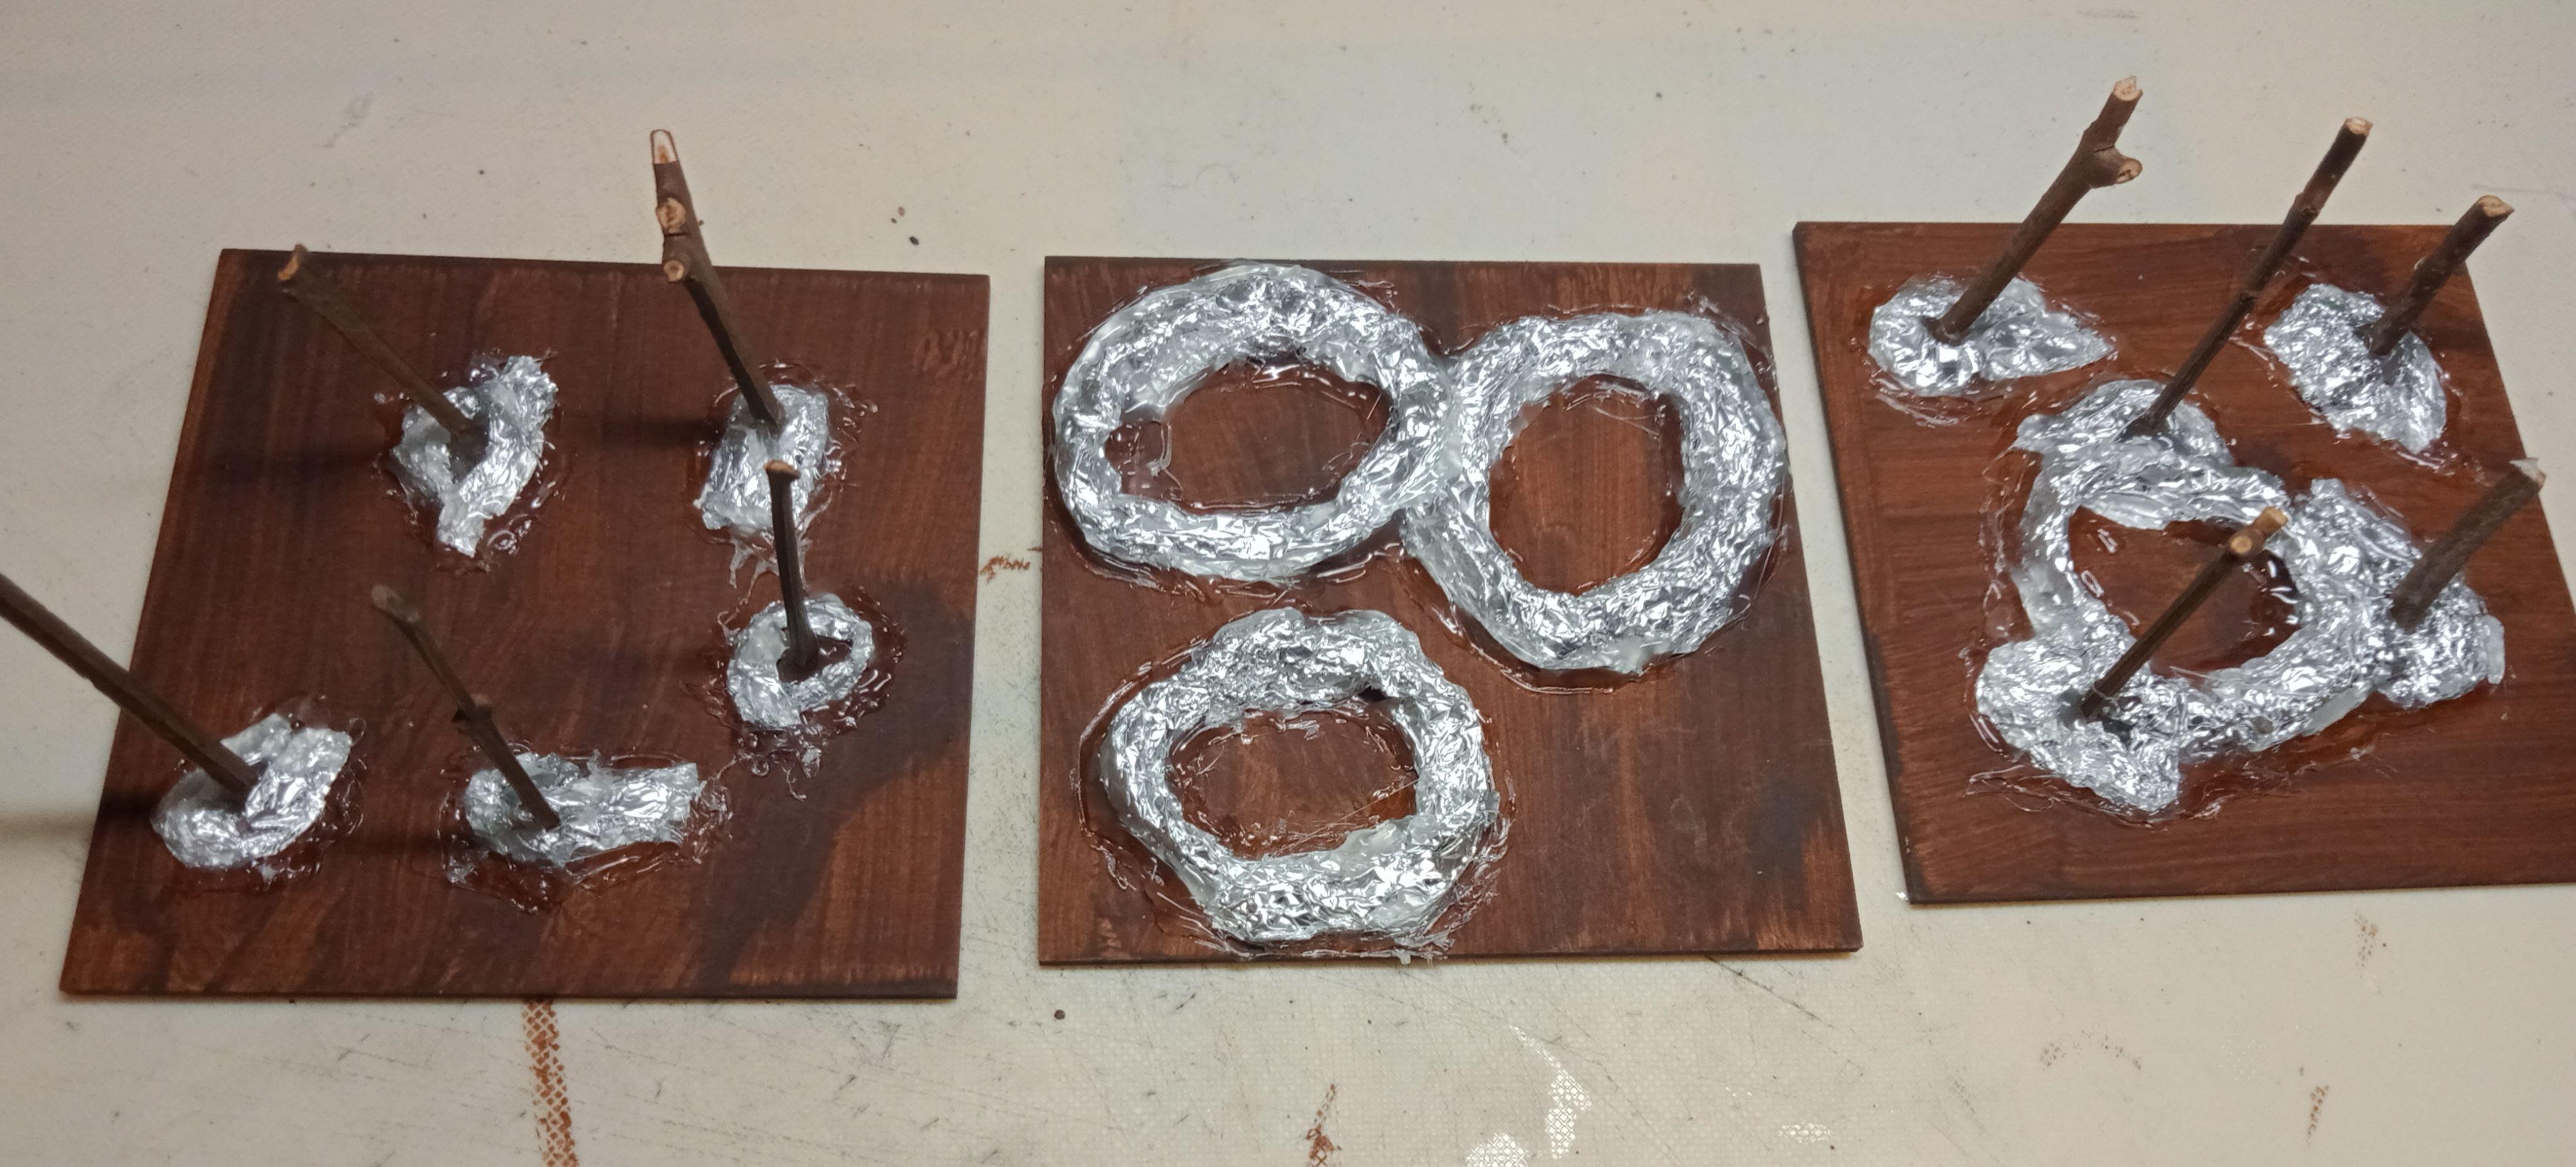
30/01/2024 at 04:43 #194747shelldrakeParticipantI spent the morning making some test pieces for the WW1 board, making some bombed out trees, some bombed out trees with a shell crater, and some shell craters:
My Brigade Models bridges and churches arrived today, and I am very happy with the bridges, as they are match the size of the roads, so making rivers will be easy.
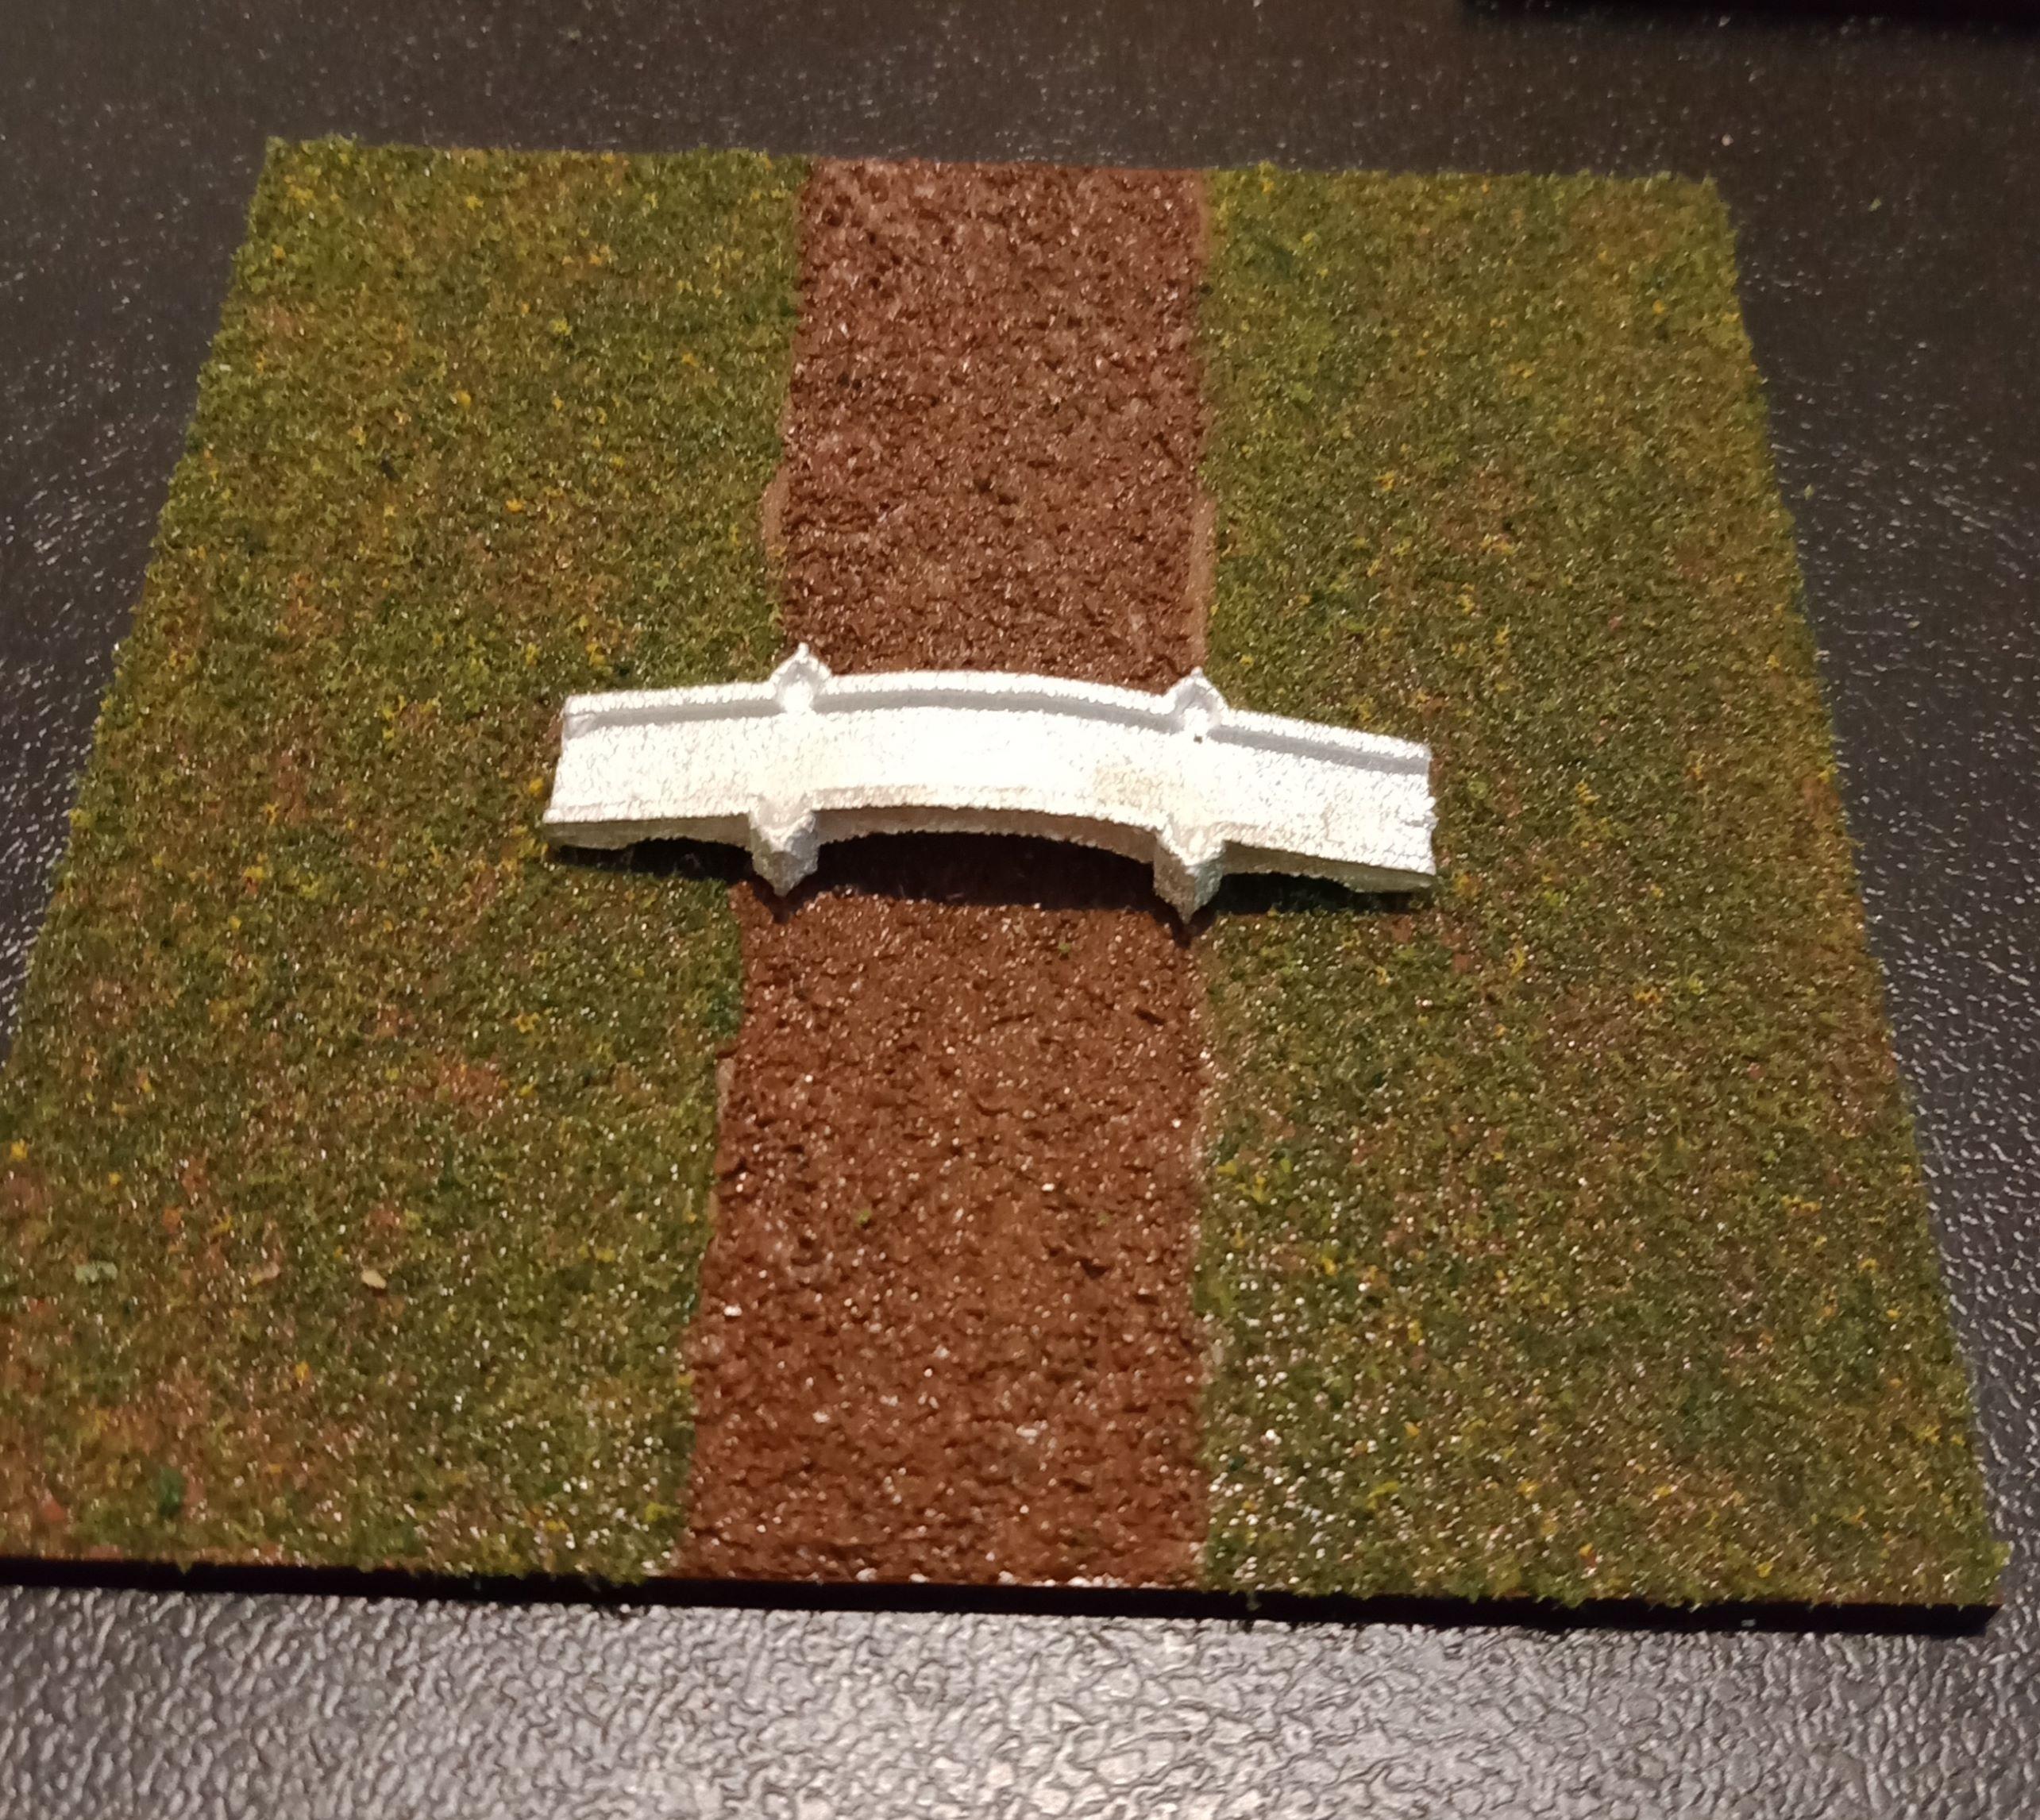
I kept some of the squares aside to make the rivers, and now the bridges have arrived, I will commence making river sections whilst waiting for the second order of squares to arrive.
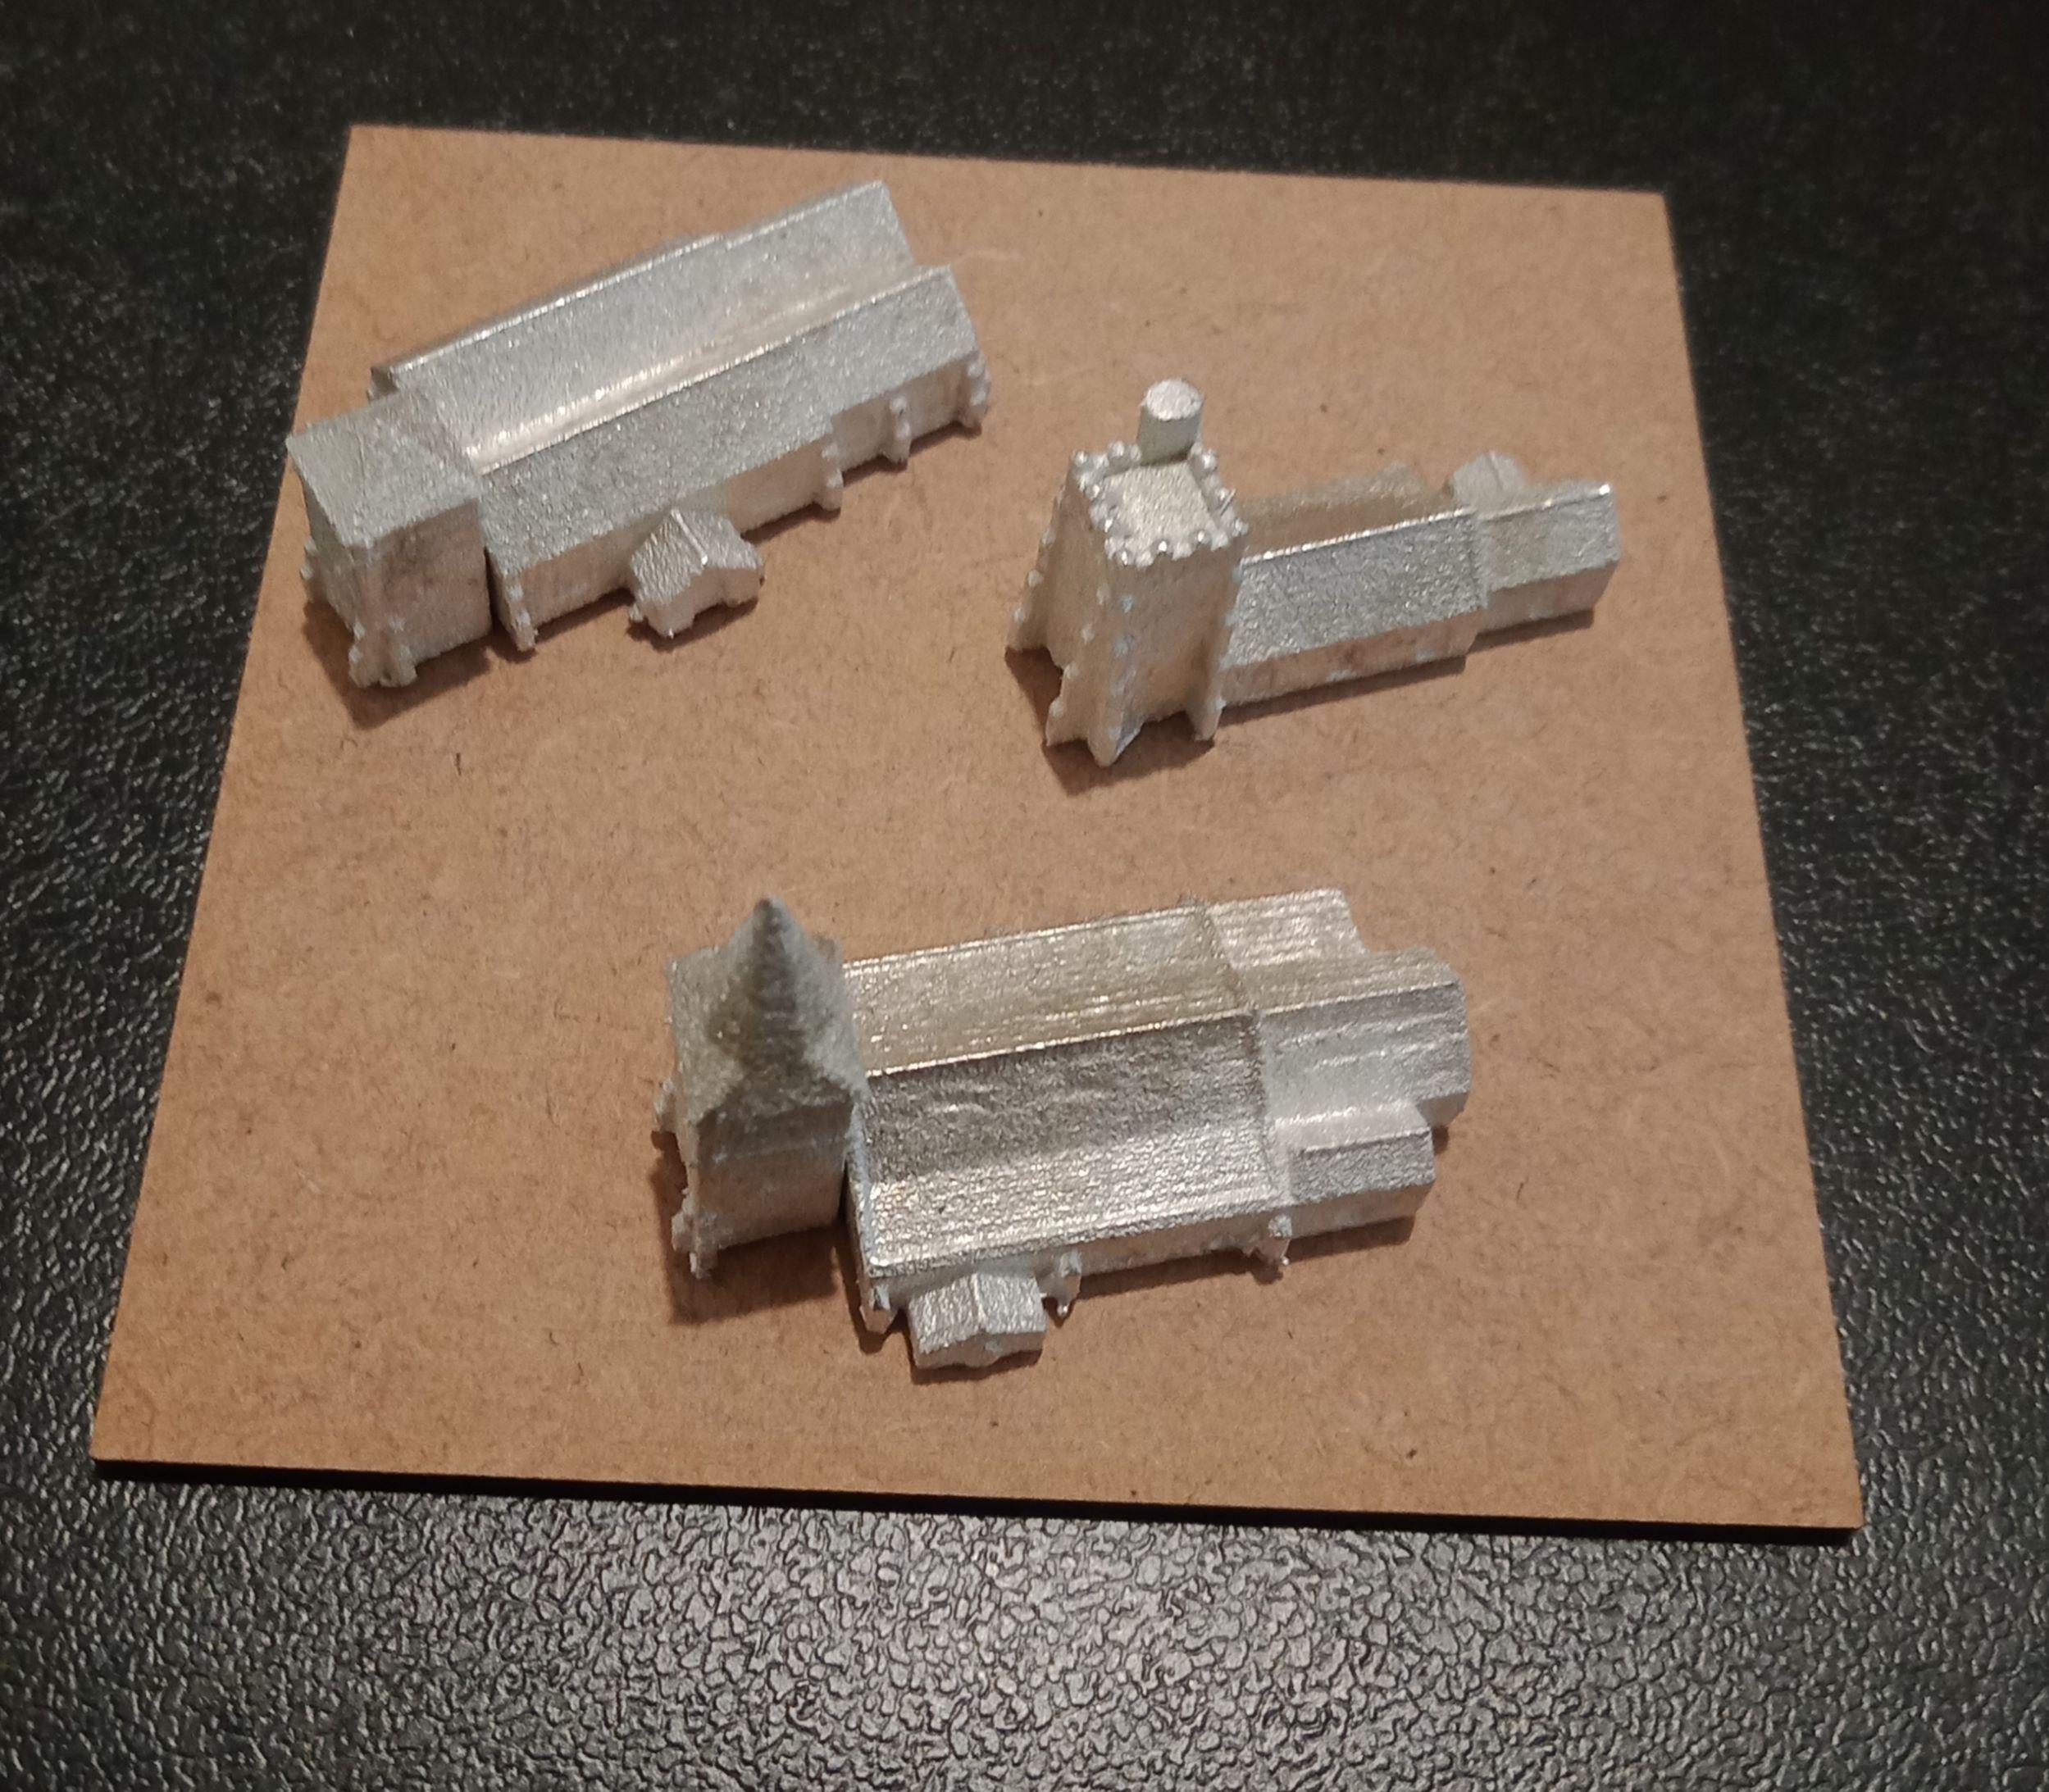
I will wait for the 3mm village buildings to arrive before using the churches on any of the tiles, but in the meantime, here is what they look like:
A book on the Boer war called “Wargaming in History: The second Boer war: that I ordered also arrived, so I hope to place an order for some 10mm Pendraken Boer War miniatures soon.
I will probably make completely new squares for the Boer War, as I will want a different colour grass for the tiles, and (if I can find or amazing myself and make) some trees like would be found in South Africa, as well as more hilly terrain to suit the setting.
31/01/2024 at 21:28 #194826Andrew BeasleyParticipantThe bombed out trees look good – busy enough to tell what they are but open enough for your troops.
AK Interactive make some lovely mud textures in pots though I do wonder if, in thick quantities, it cracks or may warp the boards? I’ve only ever tried an old pot that was drying out on a small base.
01/02/2024 at 20:08 #194854 The Red HobbitParticipant
This is a fun project, looking forward to seeing more progress photos
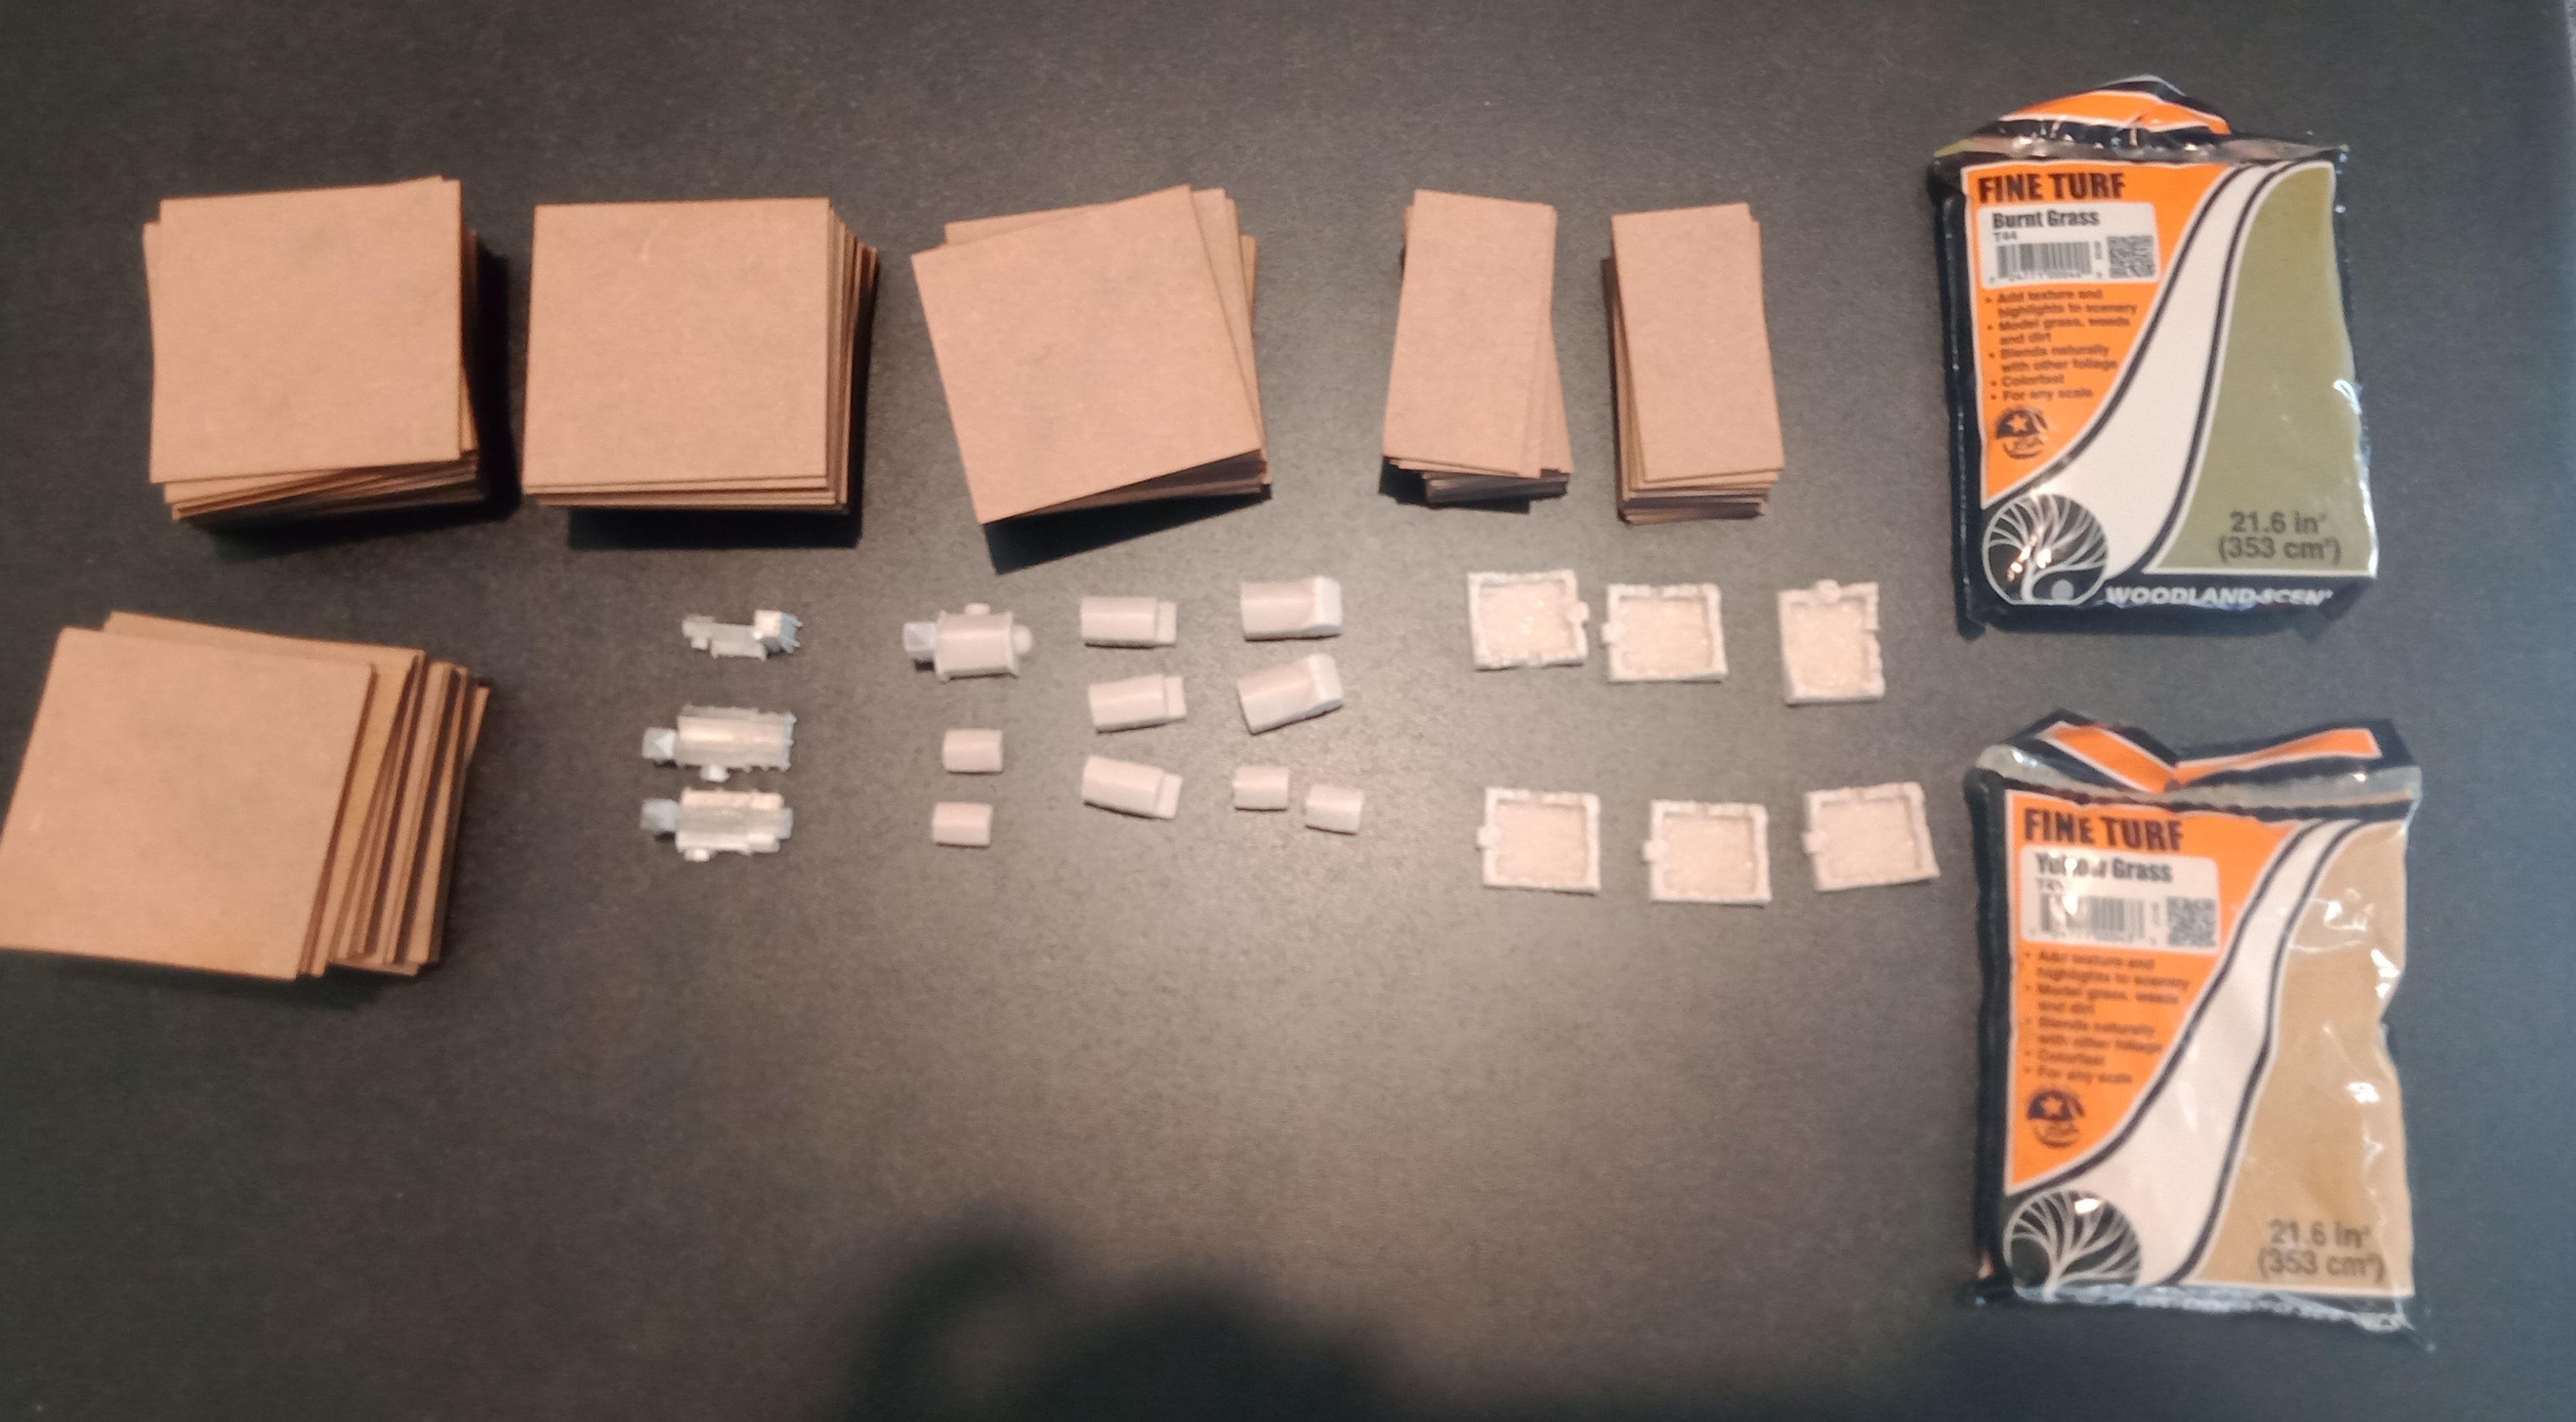
06/02/2024 at 01:03 #194990shelldrakeParticipantA few thing arrived in the mail these last two days:
Bases for the 6mm Napoleonics, and some contrast paints to help with painting them (it will take a while to paint the 6mm figures, as my eyes don’t last long trying to paint them), 3mm buildings to make a town base for the scenery, as well as some 6mm ruins to use with the WW1 game.
A heap more 8cm squares also arrived, including some rectangles so that I can offset the squares to change the grid pattern. The additional squares will allow me to make rivers, swamps and other terrain features for that layout.
I also purchased some different coloured flocks to allow for different types of scenery, such as Veldt and Sandy areas.
I also purchased “The Second Portable Wargame Compendium”, as I wanted the skirmish rules within, and was very pleasantly surprised to see a section of making tiles for the portable wargame that is exactly like I have been making my own. Great minds think alike!
-
AuthorPosts
- You must be logged in to reply to this topic.